CX61/CR61 (MS-16GB)Disassembly Guide
7、LOWER CASE ASSY
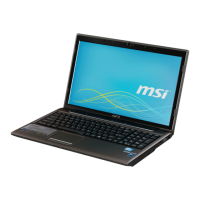
7.3:Remove 1 screw (M2.5*4mm); then remove
the IO board.
Attention: the screw driver torque is: 2.0-2.5Kgf-cm
Component P/N Qty
IO board 607-16GBA-A10 1
Screw E43-1254001-H29 1
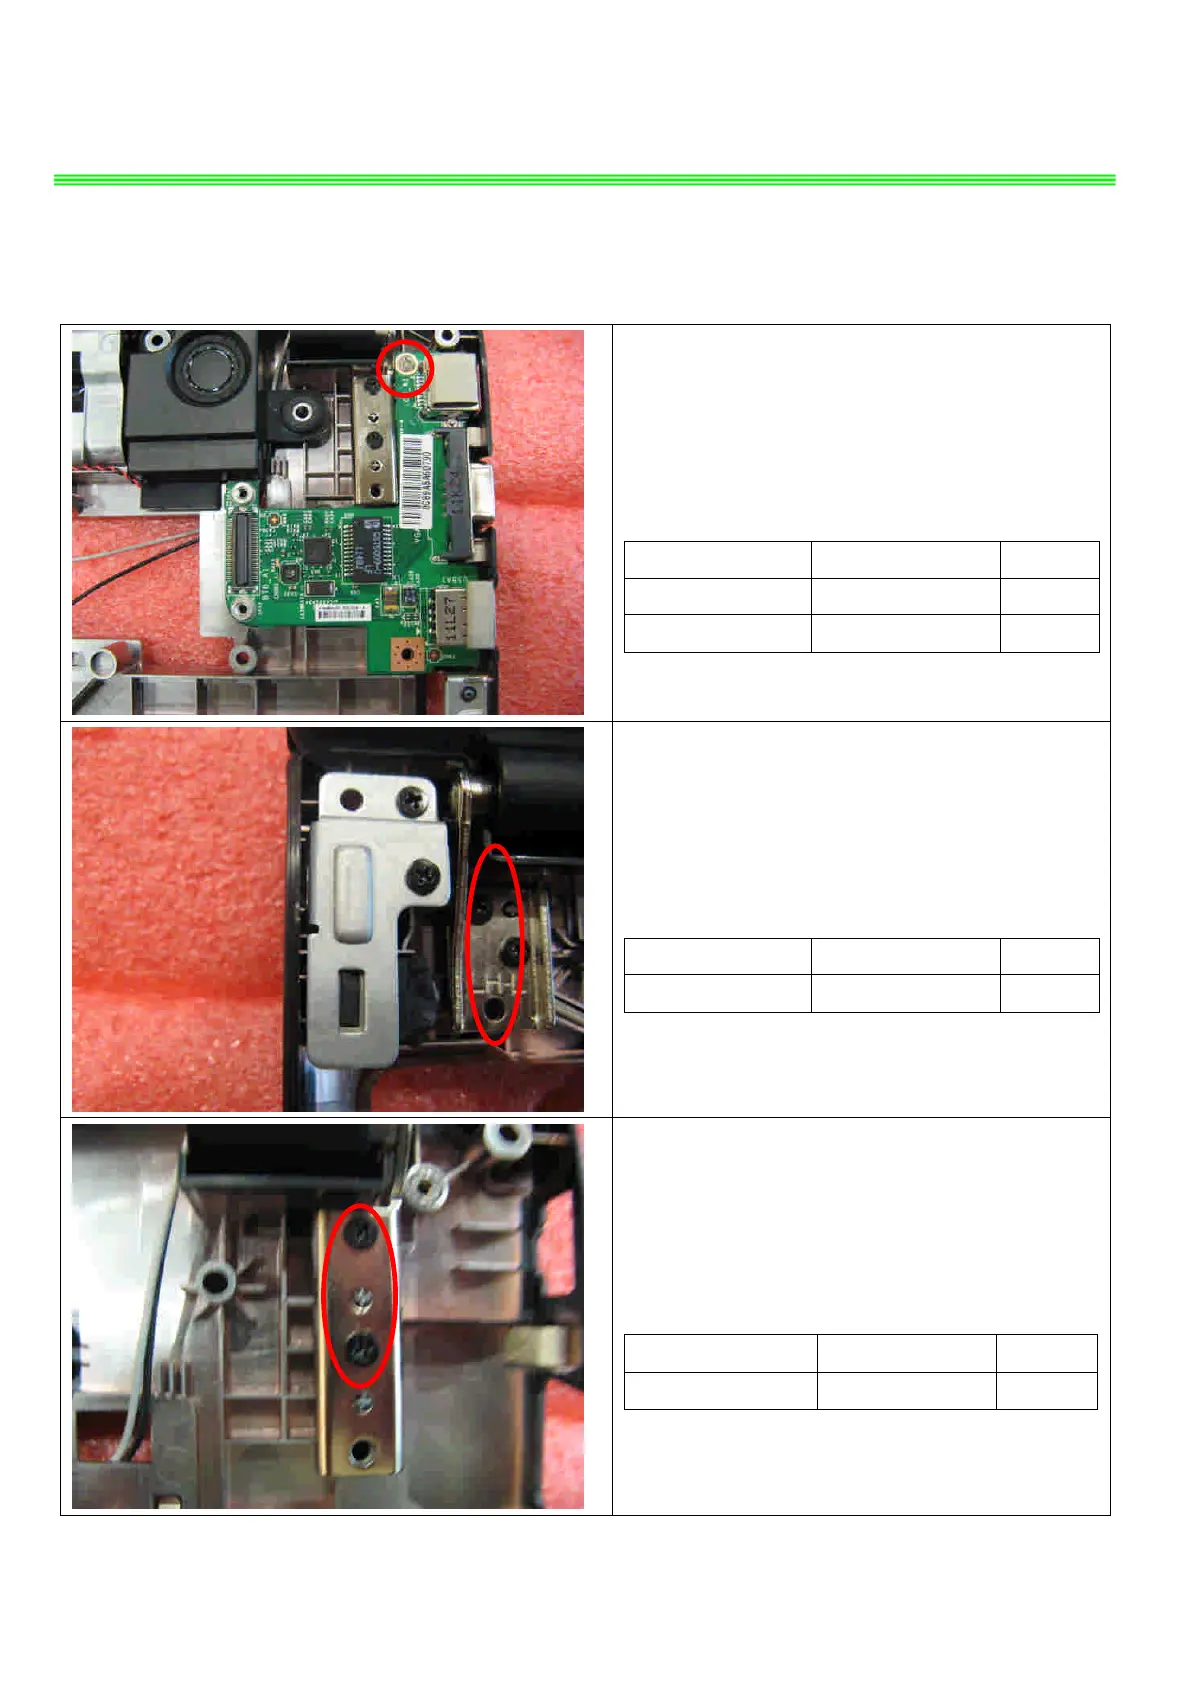
7.4 : Remove the 2 screws (M2.5*5mm) that
stabilize the left LCD hinge.
Attention: the screw driver torque is 2.5-3.0Kgf-cm
Component P/N Qty
Screw E43-1255001-G68 2
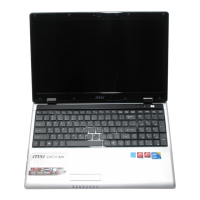
7.5 : Remove the 2screws (M2.5*5mm) that
stabilize the right LCD hinge.
Attention: the screw driver torque is 2.5-3.0Kgf-cm
Component P/N Qty
Screw E43-1255001-G68 2