EasyManua.ls Logo

MSI CX70 - User Manual

MSI CX70
28 pages
Print Icon
To Next Page IconTo Next Page
Loading...
CX70/CR70 (MS-1755) Disassembly Guide
1BATTERY PACK
2BOTTOM DOOR ASSY
3HDD MODULE
4THERMAL-KITCPUDRAM AND WIRELESS
5ODD MODULE
6SEPARATE UPPER CASE AND LOWER CASE
7LOWER CASE ASSY
8UPPER CASE ASSY
9LCD MODULE ASSY
Question and Answer IconNeed help?

Do you have a question about the MSI CX70 and is the answer not in the manual?

Summary

Battery Pack Removal

Unlock Battery Pack Latch

Move the battery unlock button to release the battery pack.

Release and Remove Battery Pack

Press the release button and slide the battery pack out.

Bottom Door Assembly Removal

Remove Bottom Door Screws

Remove five M2.5*5.5mm screws securing the bottom door.

HDD Module Replacement

Remove HDD Module Screws

Remove two M2.5*5.5mm screws and detach the HDD module.

Remove HDD Bracket

Remove two M3*4mm screws and detach the HDD bracket.

Thermal Kit, CPU, DRAM, and Wireless Card Removal

Remove Fan and Fan Cable

Remove two M2.5*5.5mm screws and fan cable to detach the fan.

Remove Heatsink Assembly

Remove six M2.5*4.5mm screws to detach the heatsink.

Remove CPU Module

Open the CPU slot and remove the CPU module.

Remove RAM Module

Release RAM retaining clips and remove the RAM module.

Remove Wireless Card Antenna

Remove one M2*3.5mm screw and detach the wireless card antenna.

Optical Drive (ODD) Module Replacement

Remove ODD Module

Detach the ODD module following the indicated direction.

Remove ODD Bezel

Remove the Optical Drive Bezel.

Remove ODD Bracket

Remove two M2*3mm screws and detach the ODD bracket.

Upper and Lower Case Separation

Remove Keyboard Assembly

Release keyboard retaining hooks and remove the keyboard.

Disconnect Keyboard Cable

Push the connector and detach the keyboard cable.

Remove Power Board and Touchpad Cable

Open connectors and detach power board and touchpad cable.

Remove 5 M2*3.5 mm Case Screws

Remove five M2*3.5mm screws.

Remove 10 M2.5*5.5 mm Case Screws

Remove ten M2.5*5.5mm screws.

Remove 11 M2.5*5.5 mm Case Screws

Remove eleven M2.5*5.5mm screws.

Disconnect Speaker and MIC Cables

Detach the speaker and microphone cables.

Disconnect LVDS and Power Cables

Detach the LVDS and power cables.

Remove Upper Case

Remove two M2.5*5.5mm screws to detach the upper case.

Lower Case Assembly Disassembly

Remove Left I;O Board

Remove three M2.5*4.5mm screws and detach the left I/O board.

Remove T;P Board

Detach FFC, remove two M2.5*4.5mm screws, then remove T/P board.

Remove Main Board

Remove three M2.5*4.5mm screws and detach the main board.

Remove Right I;O Board

Detach Bluetooth cable, remove one M2.5*4.5mm screw, then remove right I/O board.

Remove Left LCD Hinge Screws

Remove two M2.5*5.5mm screws securing the left LCD hinge.

Remove Right LCD Hinge Screws

Remove two M2.5*5.5mm screws securing the right LCD hinge.

Remove Power Connector

Remove one M2.5*5.5mm screw and detach the power connector.

Remove Top Speaker

Detach the top speaker.

Upper Case Assembly Disassembly

Remove Power Board

Remove two M2*3.5mm screws and detach the power board.

Remove USB Board

Remove one M2*3.5mm screw and detach the USB board.

Remove Touchpad Module

Release connector and detach the touchpad module.

LCD Module Assembly Replacement

Remove LCD Cover Rubber

Remove the four rubber covers from the LCD.

Remove LCD Bezel

Remove the LCD bezel, starting from the top and sides.

Remove Left Hinge Cap

Remove one M2.5*4.5mm screw and detach the left hinge cap.

Remove Right Hinge Cap

Remove one M2.5*4.5mm screw and detach the right hinge cap.

Secure Left LCD Hinge

Remove four M2.5*4.5mm screws securing the left LCD hinge.

Secure Right LCD Hinge

Remove four M2.5*4.5mm screws securing the right LCD hinge.

Remove Display Module

Remove four M2.5*4.5mm screws, camera cable, then display module.

Remove LVDS Cable

Detach the LVDS cable from the display module.

Remove Display Module Screws

Remove eight M2*3mm screws.

Remove MIC Module

Detach the MIC module as shown in the picture.

Remove CMOS Camera Module

Remove the CMOS camera module following the sequence shown.

Remove Wireless Antenna Board

Detach the wireless antenna board from the LCD cover.

Overview

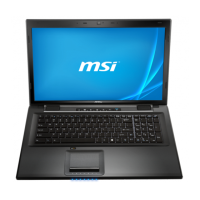
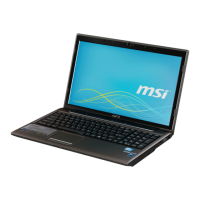
This document outlines the disassembly procedures for the CX70/CR70 (MS-1755) device, providing a step-by-step guide for technicians or users who need to access internal components for repair, replacement, or maintenance. The device appears to be a laptop or a similar portable computing unit, given the components described such as a battery pack, bottom door, HDD module, thermal kit, CPU, DRAM, wireless module, ODD module, upper and lower cases, and an LCD module.

The disassembly process is structured logically, starting with external components and progressing to internal ones. Each step is accompanied by visual aids (implied by the "pic shows" or "left picture shows" references) to ensure clarity and accuracy during the procedure. This systematic approach is crucial for preventing damage to the device and ensuring that all components are handled correctly.

Function Description:

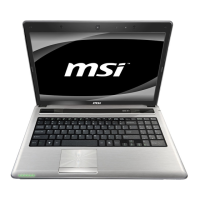
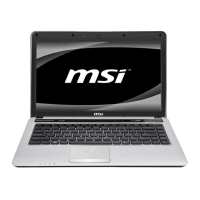
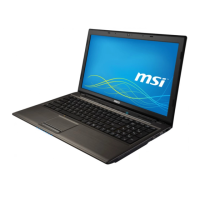
The CX70/CR70 (MS-1755) is a portable computing device, likely a laptop, designed for general-purpose use. Its modular construction allows for the replacement or upgrade of various internal components.

  • Battery Pack: Provides portable power to the device, enabling operation without a direct power source.
  • Bottom Door Assy: Serves as a protective cover for internal components, allowing easy access to user-serviceable parts like the HDD, RAM, and potentially the wireless module.
  • HDD Module: Stores the operating system, applications, and user data. It is a critical component for the device's functionality.
  • Thermal-Kit, CPU, DRAM, and Wireless:
    • Thermal-Kit: Manages heat generated by the CPU and other components, ensuring stable operation and preventing overheating.
    • CPU (Central Processing Unit): The "brain" of the device, responsible for executing instructions and performing calculations.
    • DRAM (Dynamic Random-Access Memory): Provides temporary storage for data that the CPU is actively using, influencing the device's multitasking capabilities and overall speed.
    • Wireless Module: Enables wireless connectivity (Wi-Fi, Bluetooth), allowing the device to connect to networks and other peripherals without cables.
  • ODD Module (Optical Disc Drive): Allows the device to read and write optical discs (CDs, DVDs), though this component is becoming less common in modern laptops.
  • Upper Case and Lower Case: Form the main chassis of the device, protecting internal components and providing structural integrity. The upper case typically includes the keyboard and touchpad.
  • LCD Module Assy: The display unit of the device, allowing users to interact visually with the operating system and applications.

Usage Features:

The disassembly guide primarily focuses on the internal structure and maintenance, rather than end-user operational features. However, the presence of certain modules implies specific usage features:

  • Portability: The design, with a battery pack and modular components, indicates a portable device.
  • Data Storage: The HDD module provides ample space for user data and system files.
  • Wireless Connectivity: The wireless module enables internet access and peripheral connections without physical cables.
  • Optical Media Support: The ODD module, if present, allows for the use of CDs/DVDs for software installation, data backup, or media playback.
  • User Interaction: The keyboard and touchpad (part of the upper case) are the primary input methods for the device.
  • Visual Output: The LCD module provides the visual interface for the user.

Maintenance Features:

The disassembly guide is essentially a manual for device maintenance, focusing on component removal and replacement. Key maintenance features include:

  • Modular Design: The device is designed with easily separable modules (battery, HDD, ODD, RAM, wireless card, CPU, thermal kit, LCD) which simplifies troubleshooting, repair, and upgrades.
  • Screw-Based Assembly: Most components are secured with screws of various sizes, making disassembly and reassembly straightforward with the appropriate tools. The guide specifies screw types (e.g., M2.55.5mm, M2.54.5mm, M23.5mm, M23mm) and their locations, which is critical for proper reassembly and preventing stripped threads.
  • Torque Specifications: The guide provides specific torque values (e.g., 1.5-2.0Kgf-cm, 2.0-2.5Kgf-cm, 2.5-3.0Kgf-cm, 2.8-3.2Kgf-cm) for tightening screws. This is a crucial maintenance feature, as it ensures that components are securely fastened without being overtightened, which could damage the screw or the component.
  • Clear Component Identification: Each step clearly identifies the component being removed and often provides its Part Number (P/N) and Quantity (Qty), which is invaluable for ordering replacement parts.
  • Step-by-Step Instructions: The detailed, sequential instructions for removing each component minimize the risk of damage during disassembly. For example, the battery pack removal involves specific "unlock" and "release" buttons, and the keyboard removal requires releasing hooks in a particular order.
  • Cable Management: The guide highlights the removal of various cables (FAN cable, FFC, LVDS cable, power cable, Bluetooth cable, camera cable, wireless card antenna), indicating that proper disconnection and reconnection are part of the maintenance process.
  • Thermal Paste Application (Implied): The removal of the thermal kit and CPU implies that during reassembly, new thermal paste would need to be applied to ensure efficient heat transfer, although this specific step is not explicitly detailed in the removal instructions.
  • Accessibility to Key Components: The design allows access to critical components like RAM, HDD, CPU, and wireless card, enabling users to perform upgrades (e.g., increasing RAM, replacing HDD with SSD) or repairs.
  • LCD Module Disassembly: The detailed steps for disassembling the LCD module, including removing cover rubber, bezel, hinge caps, hinges, camera cable, and LVDS cable, indicate that the display unit itself is serviceable, allowing for replacement of individual display components rather than the entire module.
  • Screw Specification Table: The inclusion of a "screws specification" section with photos, screw types, and corresponding labels (colors) is an excellent maintenance feature. It helps users identify the correct screws for each location during reassembly, preventing incorrect screw usage that could lead to damage or improper fastening. This table categorizes screws by their dimensions (e.g., M2.5L5.5MM, M2.5L4.5MM, M2L3MM, M2L3.5MM) and color (black, white), and associates them with specific assembly areas (Bottom Assy, Thermal-Kit, Wireless Card Assy, NB, LCD Hinge Assy, LCD Hinge Cap Assy, LCD Module Assy). This level of detail is critical for successful maintenance.

MSI CX70 Specifications

General IconGeneral
Bus typeDMI
SteppingL1
Tjunction105 °C
Processor cache3 MB
Processor cores2
Processor modeli5-3230M
System bus rate5 GT/s
Processor familyIntel® Core™ i5
Processor seriesIntel Core i5-3200 Mobile series
Processor socketBGA 1023
Processor threads4
Processor codenameIvy Bridge
Processor frequency2.6 GHz
Processor cache typeSmart Cache
Processor lithography22 nm
Processor manufacturerIntel
Processor front side bus- MHz
PCI Express slots version3.0
Processor boost frequency3.2 GHz
Processor operating modes64-bit
ECC supported by processorNo
PCI Express configurations1x16, 2x8, 1x8+2x4
Thermal Design Power (TDP)35 W
CPU multiplier (bus/core ratio)26
Maximum number of PCI Express lanes16
Motherboard chipsetIntel HM76 Express
Internal memory8 GB
Memory clock speed1600 MHz
Internal memory typeDDR3-SDRAM
Maximum internal memory- GB
HDD speed- RPM
HDD interfaceSATA
Storage mediaHDD
Optical drive typeDVD Super Multi
Card reader integratedYes
Total storage capacity500 GB
Compatible memory cardsMS PRO, MS PRO Duo, MS PRO Duo Mark 2, SD, SDHC, SDXC
Number of HDDs installed1
Touchscreen-
Display diagonal17.3 \
Display resolution1600 x 900 pixels
Native aspect ratio16:9
On-board graphics card ID0x166
Discrete graphics card modelNVIDIA® GeForce® GT 640M
On-board graphics card modelIntel® HD Graphics 4000
Discrete graphics card memory2 GB
Discrete graphics memory typeGDDR3
On-board graphics card familyIntel® HD Graphics
On-board graphics card base frequency650 MHz
On-board graphics card dynamic frequency (max)1100 MHz
Audio systemHD
Video capturing speed30 fps
Front camera resolution1280 x 720 pixels
4G standardWiMAX
Wi-Fi standards802.11a, 802.11b, 802.11g
Bluetooth version4.0
Cabling technology10/100/1000Base-T(X)
Ethernet LAN data rates10, 100, 1000 Mbit/s
Mobile network generation4G
Charging port typeDC-in jack
Headphone connectivity3.5 mm
USB 2.0 ports quantityUSB 2.0 ports have a data transmission speed of 480 Mbps, and are backwards compatible with USB 1.1 ports. You can connect all kinds of peripheral devices to them.
eSATA/USB 2.0 ports quantity0
Keyboard layoutQWERTY
Pointing devicePointing Stick
Keyboard number of keys102
Operating system installedWindows Vista Home Premium
Form factorClamshell
Product typeLaptop
Product colorBlack, Grey
Processor codeSR0WX
Processor ARK ID72056
Processor package size31 x 24 (BGA1023) mm
Supported instruction setsAVX
Intel Identity Protection Technology version1.00
Battery life (max)- h
Number of battery cells6
AC adapter power65 W
Weight and Dimensions IconWeight and Dimensions
Depth269.3 mm
Width418 mm
Height39 mm
Weight2700 g

Related product manuals