EasyManuals Logo

MSI Stealth 17 Studio Series User Manual

MSI Stealth 17 Studio Series
70 pages
To Next Page IconTo Next Page
To Previous Page IconTo Previous Page
Page #56 background imageLoading...
Page #56 background image
3-22 3-23
How to Get Started
Wired LAN
Use cables to connect to the Internet. Before setting up the connection of Dynamic IP/
PPPoE or Broadband (PPPoE) or Static IP, contact your Internet Service Provider (ISP) or
network administrator for assistance of setting up Internet connection.
Dynamic IP/PPPoE Connection
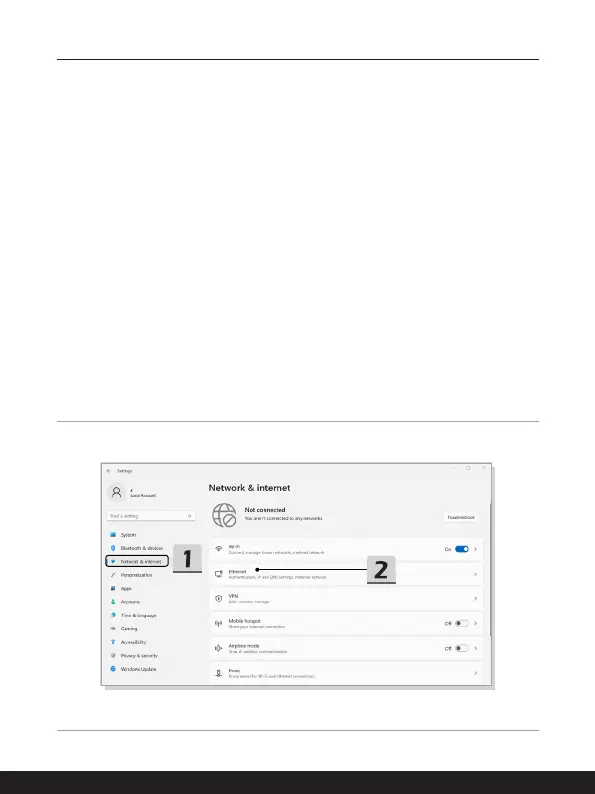
1. Open up [Settings], find and click [Network & internet].
2. Select [Ethernet] within the [Network & internet] selection menu.
3. The [IP assignment] and [DNS server assignment] are automatically set as
[Automatic (DHCP)].
Static IP Connection
4. Follow the previous steps 1 to 2 to continue.
5. Click [Edit] of [IP assignment].
6. Select [Manual].
7. Switch the [IPv4] or [IPv6] on. (Contact your Internet Service Provider or
network administrator for assistance of the configurations.)
8. Fill the IP address, Subnet mask, Gateway, Preferred DNS, and Alternate DNS.
Then click [Save].

Table of Contents

Questions and Answers:

Question and Answer IconNeed help?

Do you have a question about the MSI Stealth 17 Studio Series and is the answer not in the manual?

MSI Stealth 17 Studio Series Specifications

General IconGeneral
Operating SystemWindows 11 Pro
Weight2.8 kg
Processor13th Gen Intel Core i9-13900H
GraphicsNVIDIA GeForce RTX 4090
MemoryUp to 64GB DDR5
StorageUp to 2TB NVMe SSD
Battery99.9Whr
KeyboardPer-Key RGB Backlight Keyboard
Audio2x 2W speakers, Nahimic 3 audio enhancer
WebcamFHD Type (30fps@1080p)
LAN2.5G LAN
WirelessWi-Fi 6E, Bluetooth 5.3
Ports1x RJ45
Display17.3" UHD (3840x2160), 144 Hz Refresh Rate, MiniLED, IPS-Level Panel, 100% DCI-P3, HDR 1000 17.3" QHD (2560x1440), 240 Hz Refresh Rate, IPS-Level Panel, 100% DCI-P3

Related product manuals