25658 2/18 | 85-000868_INST_D
MINIAC GPS-333 CYCLING COMPUTER INSTRUCTIONS
6400 WEST 105TH STREET // BLOOMINGTON, MN 55438 // 1-855-883-6563 // WWW.MSWBIKE.COM
Thank you for purchasing an MSW Miniac GPS-333 Cycling Computer!
Thank you for your purchase! At MSW
©
we believe having essential
accessories makes a good bike ride great. The 33-function Miniac GPS-333
Cycling Computer is loaded with features that will add to any ride experience.
Take it along on every ride!
WARNING: Cycling can be dangerous. Bicycle products should be installed
and serviced by a professional mechanic. Never modify your bicycle
or accessories. Read and follow all product instructions and warnings including
information on the manufacturer’s website. Inspect your bicycle before every
ride. Always wear a helmet.
For additional product and safety information go to: www.mswbike.com/safety.
COMPATIBILITY AND INTENDED USE
The MSW MINIAC GPS-333 function list includes: GPS Technology, Auto
Wake-Up, Backlight On/Off, Actual Temperature, Riding Data File Storage,
PC Link Connection, Device Battery Life Indicator, Button Sound, Clock, Trip
Time, Trip Distance, Total ODO, Speed Comparison, Current / Average /
Maximum Speed, Actual Altitude, Trip Altitude Gain / Loss, Total Altitude,
Maximum Altitude, Current / Average / Maximum Gradient.
FUNCTIONS AVAILABLE WITH ADDITIONAL BLE SENSORS NOT INCLUDED:
Current /Average / Maximum Cadence, Current / Average / Maximum Power,
Current / Average /Maximum Heart Rate, Maximum Pulse %.
The MSW Miniac GPS-333 is intended for use on roads and
paved trails as well as ASTM Condition 2 use. This includes
smooth paved roads, unpaved and gravel roads, and trails with
moderate grades where loss of contact with ground may occur
but drops are less than 6" (15cm).
The Miniac GPS-333 head unit mounting bracket is compatible with most
handlebar diameters.
INSTALLATION
ITEM CHECKLIST
HOW TO MOUNT THE BRACKET
Use the rubber pad to tighten the bracket on the handlebar or stem with the
rubber ties.
Place the computer on the bracket and secure it by turning it clockwise.
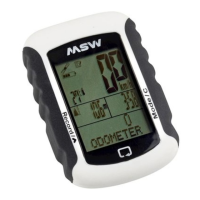
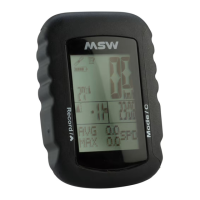
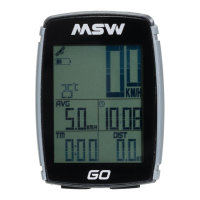
COMPUTER MAIN DISPLAY
& BUTTON FUNCTION
TURN ON / OFF
Press RECORD button and MODE button for three seconds to turn on / off
the device.
WAKE UP AND SLEEP
Auto Wake Up: When there is any speed or vibration, the computer will wake up.
Auto Sleep: After six minutes without any speed or vibration, computer will
go to sleep.
MODE CHANGE
Press MODE button to change mode.
BIKE MODE
In Bike Mode, press SELECT button to change functions.
Flash 3 Sec.
Flash 3 Seconds
Turn Off
Functions
Cadence / Altitude
Gradient / Temperature
Record Button
GPS Indicator
Battery
Set Button
(located on
back of device)
Mode Button
Touch Button / Select Button / Enter
Clock / Heart Rate / Power
ALT GAIN ALT LOSS Gradient Maximum ALT Total ALT
GPS - 333
These two tenons
have to be on the
left and right side
of the bracket.
Micro USB CableBracket
Rubber Pad
Rubber Ties x 4
Bracket
Bands stretch around
the stem or bar
Rubber Pad
Computer
Bracket
Rubber Pad
Rubber Ties
GPS - 333
These two tenons
have to be on the
left and right side
of the bracket.
Micro USB CableBracket
Bracket
Bands stretch around
the stem or bar
Rubber Pad
Rubber Pad
Set Button
Mode Button
Functions
Cadence / Altitude
Gradient / Temperature
Record Button
Touch Button / Select Button / Enter
Clock / Heart Rate / Power
GPS Indicator
Battery
Computer
Bracket
Rubber Pad
Rubber Ties x 4
Rubber Ties
GPS - 333
These two tenons
have to be on the
left and right side
of the bracket.
Micro USB CableBracket
Bracket
Bands stretch around
the stem or bar
Rubber Pad
Set Button
Mode Button
Functions
Cadence / Altitude
Gradient / Temperature
Record Button
Touch Button / Select Button / Enter
Clock / Heart Rate / Power
GPS Indicator
Battery
Computer
Bracket
Rubber Pad
Rubber Ties x 4
Rubber Ties
Flash 3 Sec.
Flash 3 Seconds
Turn Off
Functions
Cadence / Altitude
Gradient / Temperature
Record Button
GPS Indicator
Battery
Set Button
(located on
back of device)
Mode Button
Touch Button / Select Button / Enter
Clock / Heart Rate / Power
ALT GAIN ALT LOSS Gradient Maximum ALT Total ALT
GPS - 333
These two tenons
have to be on the
left and right side
of the bracket.
Micro USB CableBracket
Rubber Pad
Rubber Ties x 4
Bracket
Bands stretch around
the stem or bar
Rubber Pad
Computer
Bracket
Rubber Pad
Rubber Ties
For off-road
riding and
jumps less than
6" (15cm)
GPS - 333
These two tenons
have to be on the
left and right side
of the bracket.
Micro USB CableBracket
Bracket
Bands stretch around
the stem or bar
Rubber Pad
Rubber Pad
Set Button
Mode Button
Functions
Cadence / Altitude
Gradient / Temperature
Record Button
Touch Button / Select Button / Enter
Clock / Heart Rate / Power
GPS Indicator
Battery
Computer
Bracket
Rubber Pad
Rubber Ties x 4
Rubber Ties