Do you have a question about the MTD OEM-190-679 and is the answer not in the manual?
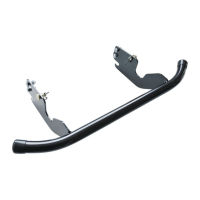
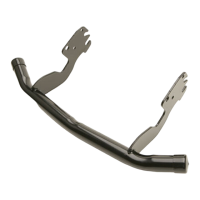
Hook bumper slots onto tractor frame shoulder bolts and secure with clevis pins.
Slide bumper over front brackets, align holes, insert hex bolts from outside, secure with nuts.
Slide bumper over front brackets, align holes, insert hex bolts from outside, secure with nuts.
This document describes the installation and assembly of a Front Bumper Kit designed for FastAttach™ Compatible 600- and 800-Series Tractors, as well as Compatible 600- and 800-Series Box-Frame Tractors. The specific models covered are OEM-190-679 and 190-679-101. The manual, Form No. 769-00041C, was printed in the U.S.A. on January 25, 2006.
The Front Bumper Kit serves as an accessory to provide protection to the front end of compatible tractors. Its primary function is to absorb impacts and prevent damage to the tractor's grille, engine components, and other front-facing parts during operation, especially when navigating obstacles or in the event of minor collisions. The bumper enhances the durability and longevity of the tractor by safeguarding critical areas. It is designed to be easily mounted, allowing users to add this protective feature without extensive modifications. The kit is compatible with both FastAttach™ systems, which implies a quick and tool-less or minimal-tool attachment process for certain tractor types, and traditional box-frame tractors, which may require a more standard bolted installation.
The kit includes several components necessary for installation:
The compatibility extends to:
The installation process is detailed for different tractor types, highlighting the versatility of the kit:
While the manual primarily focuses on installation, some aspects imply maintenance considerations:
The manual provides clear instructions for seeking assistance:
Overall, the Front Bumper Kit is presented as a straightforward, protective accessory with clear installation guidelines tailored to different tractor designs, emphasizing safety and ease of use.
| Brand | MTD |
|---|---|
| Model | OEM-190-679 |
| Category | Lawn Mower Accessories |
| Language | English |