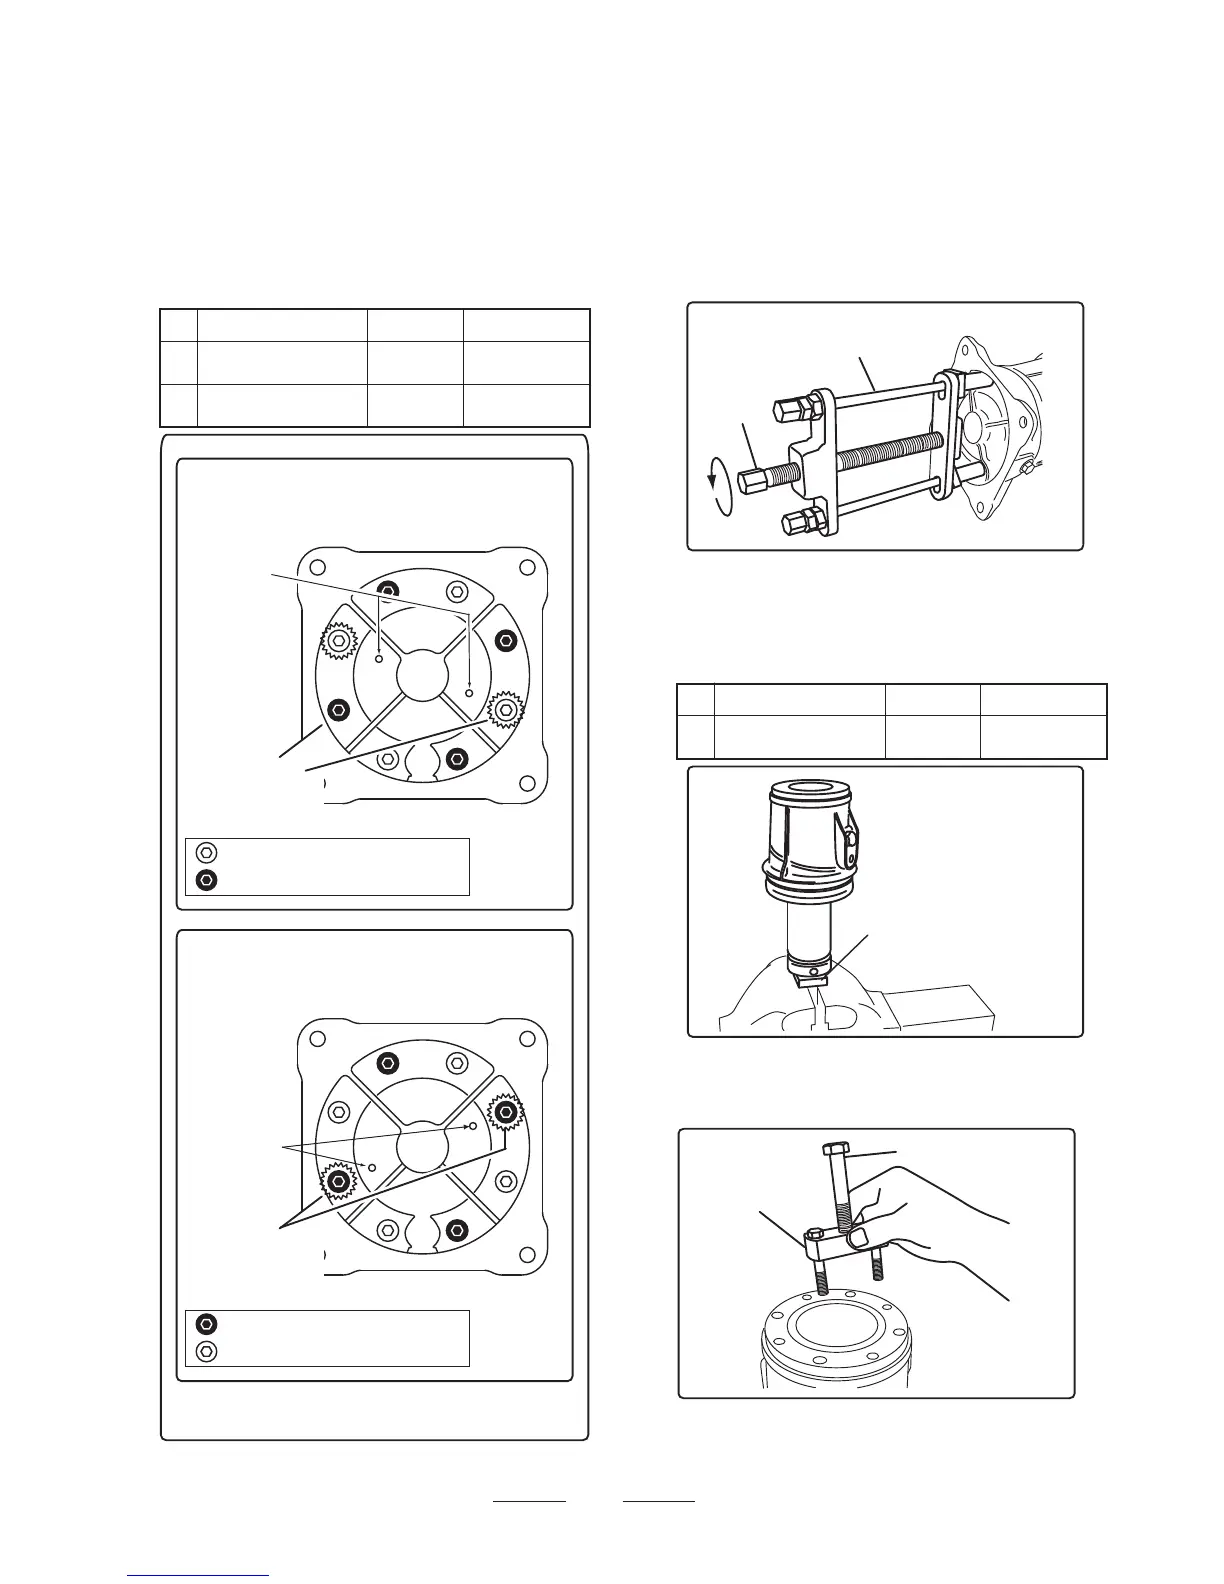
2) Loosening the center bolt of the spring cyl
inder remover slowly will remove the foot
plate (13). (fig.13)
Remove the spring cylinder remover when
decreasing pressure of main springs (9).
Then, remove the lower main springs (9)
and lower stopper (8).
Load the piston rod holder (P/N:9839-10030)
to the vice, and put the spring cylinder as-
sembly which removed the foot plate upside
down to it. Then, remove the bolt (5), SW and
PW, which fixing the piston end (4). (fig.14)
Assemble the piston end remover (P/N:9839-
10010) to the piston end(4), and tightening
the center bolt of it. (fig.15)
H.
I.
i) In case of MTX-70 / 80 / 90
1) Unscrew 2 pcs bolts which marked foot
plate. (fig.12)
Assemble the spring cylinder remover(P/N:
9830-10040) there.Then, unscrew 6 pcs
remaining bolts after tightening the center
bolt of the spring cylinder remover.
fig.15
(Piston end
remover)
Special tool
Center bolt
5
117.6N・m
(83.7ft・lbf)
No.
Size
Bolt M12X30
(Fine Pitch Thread)
Tightening
torque
Remarks
Apply Loctite
#221
fig.13
(Spring cylinder remover)
Special tool
Center
bolt
fig.14
(Piston rod holder)
Special tool
11
Rear (Engine side)
Front (Front cover side)
Mark
Backside of "Foot plate"
MTX-60
Socket head bolt M10 x 20(15)
Socket head bolt M 8 x 40(16)
Special tool
wearing point
Rear (Engine side)
Front (Front cover side)
Mark
Backside of "Foot plate"
MTX-70 / 80 / 90
Socket head bolt M10 x 20(15)
Socket head bolt M10 x 40(16)
Special tool
wearing point
fig.12
15
68.6N・m
(50.6ft・lbf)
53.9N・m
(39.8ft・lbf)
No.
Size
Socket Head Bolt
M10X20
Socket Head Bolt
M10X40
16
Tightening
torque
Remarks
Apply Loctite
#221
Apply Loctite
#221


 To Next Page