Maintenance(Continued}
Removing the Drive Belt
(Self-Propelled Units Only)
WARNING:Before you remove the belt,
disconnect the wire from the sparkplug.
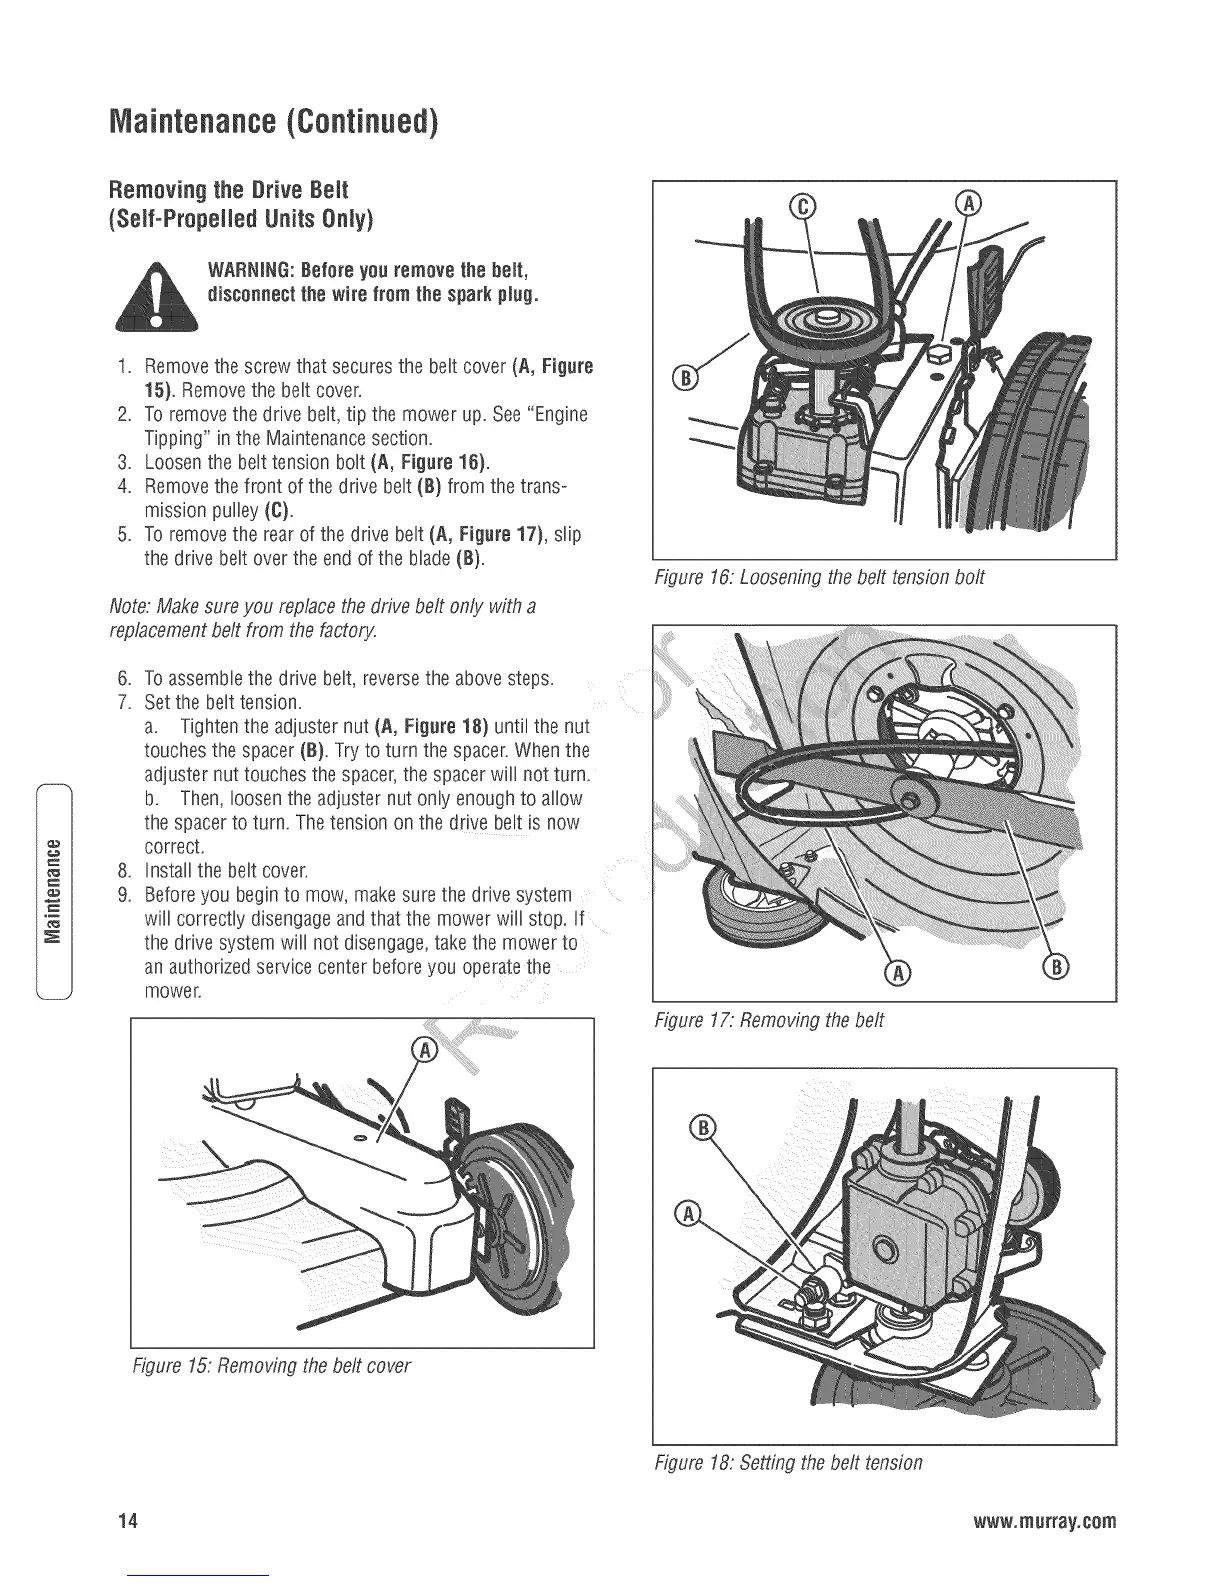
1. Removethe screw that securesthe belt cover (A, Figure
15). Removethe belt cover.
2. Toremove the drive bdt, tip the mower up. See"Engine
Tipping" in the Maintenancesection.
3. Loosenthe bdt tension bait (A, Figure 16).
4. Removethe front of the drive belt(B) from the trans-
mission puiby (O).
5. Toremove the rear of the drive belt (A, Figure 17), slip
the drive belt over the end ofthe blade (B).
Note: Make sureyou replacethe drive belt only with a
replacementbelt from the factory.
.
7.
.
9.
Toassemblethe drive belt, reversethe abovesteps.
Setthe belttension.
a. Tightenthe adjuster nut (A, Figure 18) until the nut
touchesthe spacer (B}. Try to turn the spacer.When the
adjuster nuttouches the spacer,the spacer will not turn.
b. Then, loosen the adjuster nut only enoughto allow
the spacerto turn. Thetension on the drive belt is now
correct.
Install the belt cover.
Beforeyou beginto mow, make surethe drive system
will correctly disengageand that the mower will stop. If
the drive system will not disengage,take the mower to
an authorized service center beforeyou operatethe
mower.
Figure 15:Removing the belt cover
Figure 16:Loosening the belt tension bolt
Figure 17:Removing the belt
Figure 18:Setting the belt tension
14 www.murray.eam