Cutting
2.0 Cutting Overview
To be a successful owner of a vinyl cutter, you need to keep in mind a few factors:
2
You’re going to make mistakes. This is normal and part of the process of mastering a cutter.
Read this chapter. It contains valuable information to help you understand how to load the blade,
set the exposure, understand the effects of various cut settings, create presets, and set a new origin.
Perform test cuts before cutting large projects. It prevents wasted material and preserves your
valuable time.
2.1 Proper Blade Installation
Before using the ARTisan advanced control panel to set the cutting speed and force, it is important to
make sure the blade is installed properly in the blade holder. Remove the protective cap on the blade
and follow these instructions:
The blade tip only needs to protrude far enough to cut through the face film and adhesive of
adhesive-backed vinyl. This is a combined thickness of approximately 0.005" or less. The blade should
not extend farther than ~ half the thickness of a credit card.
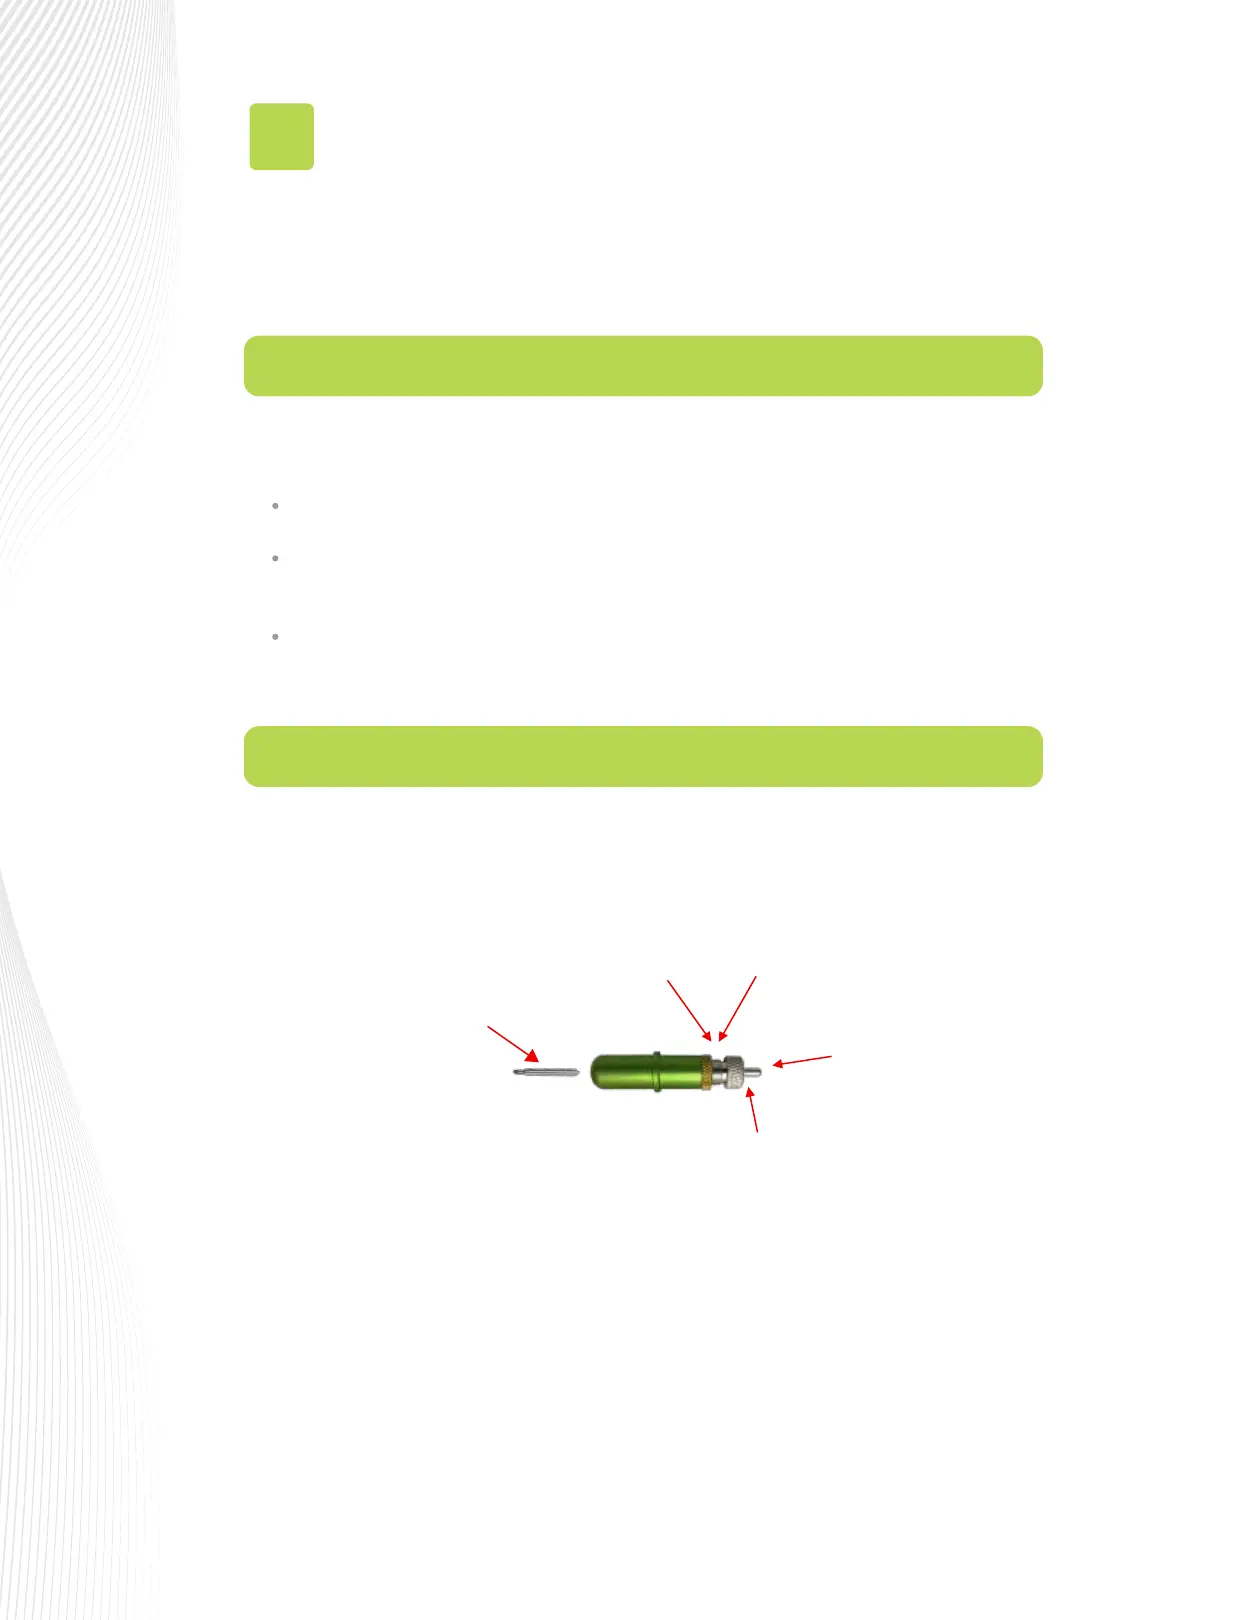
When properly installed, the tip of the blade is barely visible (as shown in the following diagram). Adjust
the blade inside the holder by turning the knob clockwise to extend more of the blade and
counterclockwise to retract it.
2. Gently insert non-sharp end of
the blade into the holder. An
internal magent will pull the
blade inwards.
Then release button on top of
holder
3. Turn the brass ring
counterclockwise until
loosened.
5. Turn the brass ring clockwise
until locked back in place.
1. Push in this button and
hold so that a blade
can be instered or
removed.
4. Turn the large ring clockwise or counter
clockwise to set blade length to match the
thickness of the material being cut.