USB Connection in LXi
1.10.1
Turn on the Muse before connecting to your computer. Using the USB cable that came with the cutter, plug
the wider end into your computer’s USB port and the squarish end into the cutter’s USB port which is on the
right end cap (see FIG. 1.5.4).
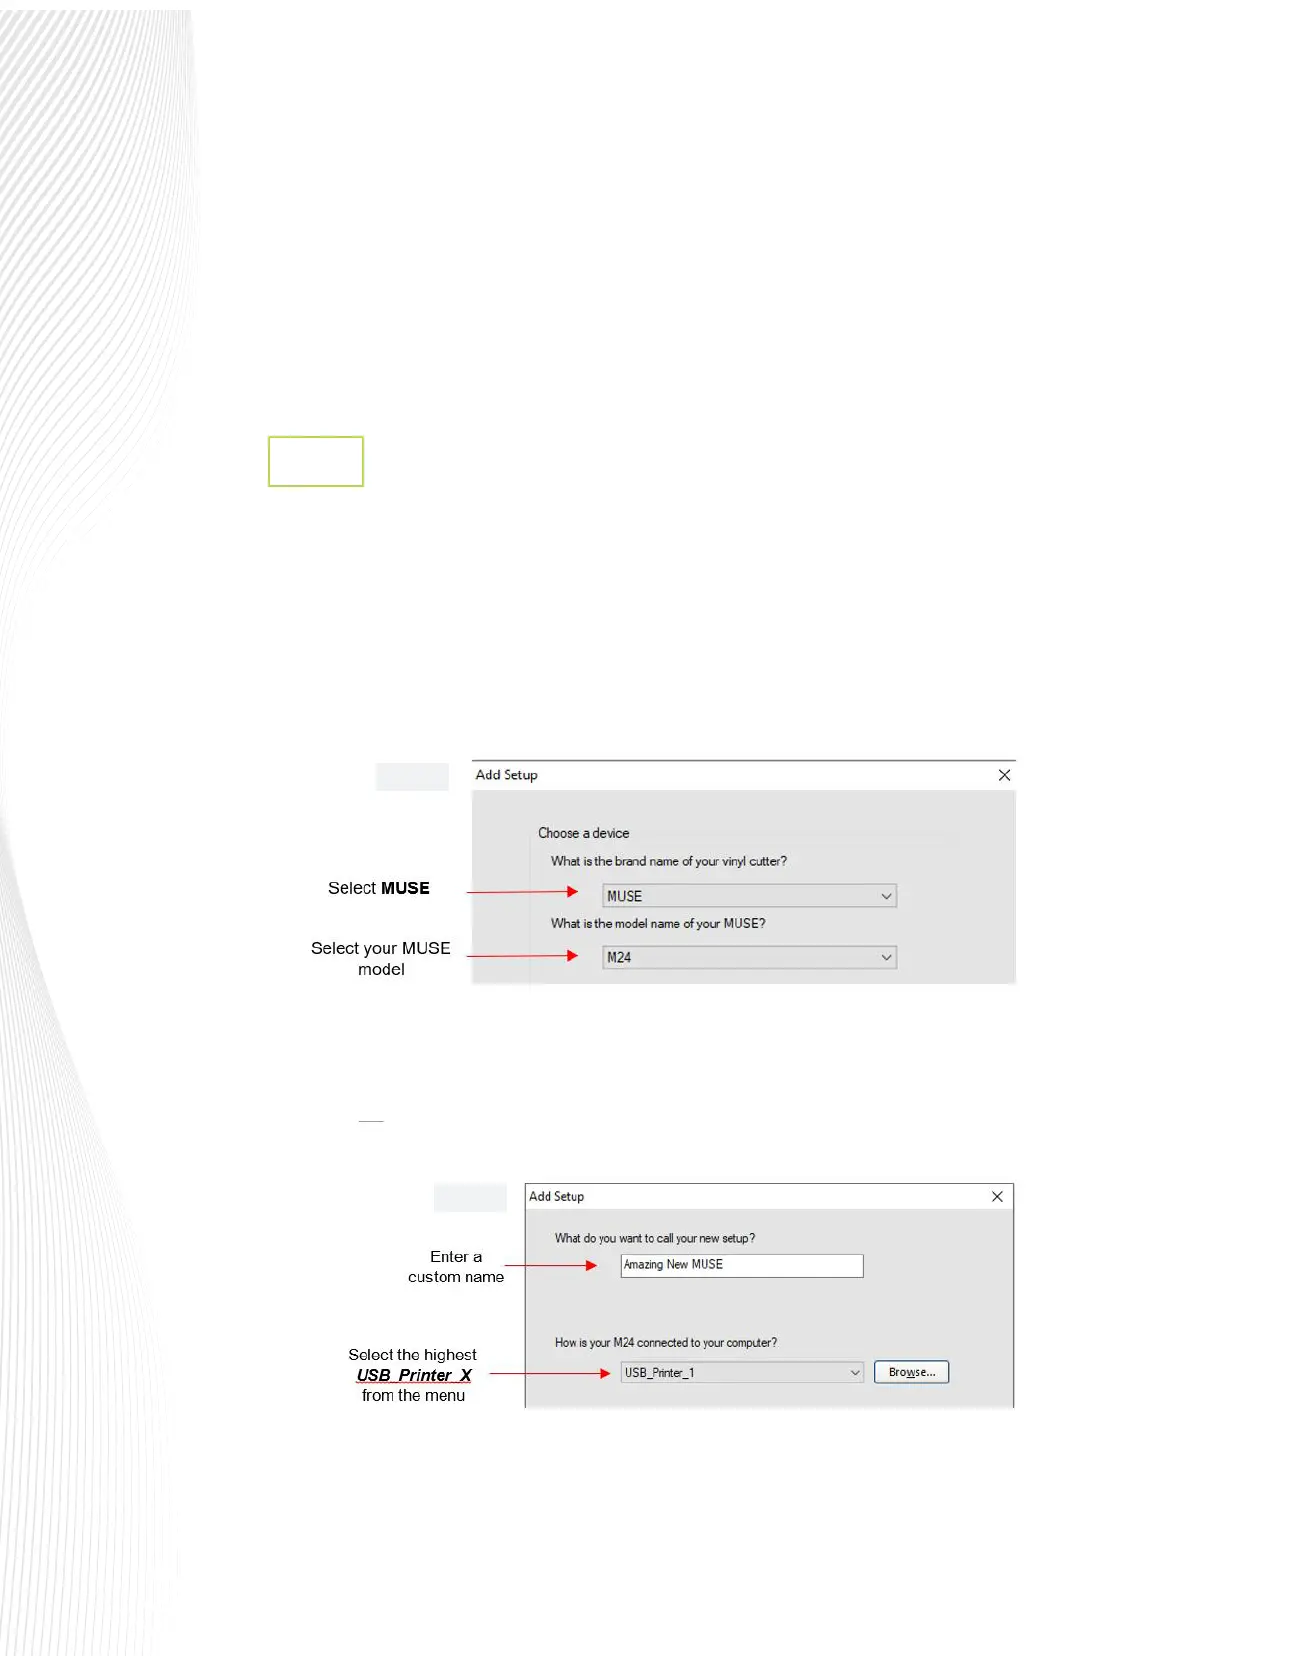
Open LXi Production Manager. If this is your rst time opening LXi, a popup screen will request a Brand and
Model selection. Otherwise, select Setup and from the drop-down menu, click Add Setup.
From the pop-up window, choose MUSE as the Brand. Find and select M15, M24 or M60 in the Model
window:
Click Next. The setup window will ask how your Muse is connected to the computer. Open the drop-down
menu and select the largest available option for USB_Printer_X where X will be 0, 1, 2, etc. For example, if you
see both USB_Printer_0 and USB_Printer_1 then you would select USB_Printer_1 because it is the higher of
the two. It is not recommended that you select USB001 or USB002 (or other) from that menu. They may work
for basic functions but may not adequately support contour cutting.
Click on Finish at the bottom of the Add Setup window.
2.
3.
Wi-Fi takes a little more time and care to set up but oers a wireless environment in which the cutter
can be used without being connected to the computer on which the software is installed. See Section
1.10.3 and Section 1.10.4 or 1.10.5 for detailed instructions.
The USB ash drive option allows you to use the cutter without being connected to the PC. Files can be
saved from the design station computer in .PLT format and transferred to the cutter using a USB thumb
drive. See Sections 1.10.6 - 1.10.8.
Fig. 1.10.1
Fig. 1.10.2
 Loading...