6.
7.
8.
9.
10.
11.
Press APPLY to set the changes and add the Muse to your wireless network. This can take up to a minute or
longer.
Note the complete IP address at the top of the window (FIG. 1.10.7). You will be entering this same IP
address in the software you use for cutting.
If you need to reset or change networks, press and hold the DEFAULT button for 3 seconds. This will reset
the settings and enable you to change the network.
Before connecting the Muse to your computer using a Wi-Fi connection, you must verify that your
computer is also connected to the same network. To do this, locate and launch the network icon for your
computer:
A menu of available networks will appear. Select the network used for the Muse setup and, if needed,
enter the network password. Wait a bit for the connection to be made and the menu should indicate
you are now connected to that network.
Proceed to either the next section (if using LXi Production Manager) or Section 1.10.5 (if using Create
Space).
On a PC: On a Mac:
If the APPLY button on the Muse WiFi screen changes to CONNECTED OK, you have successfully
connected!
If the APPLY button changes to PASSWORD ERR, check your settings, and enter the correct values.
Click on the Network icon.
(usually in lower right corner)
Click on the Network icon.
(usually in upper right corner)
If you are connected via
Ethernet, your network icon
may look like this.
Wi-Fi Connection in LXi
1.10.4
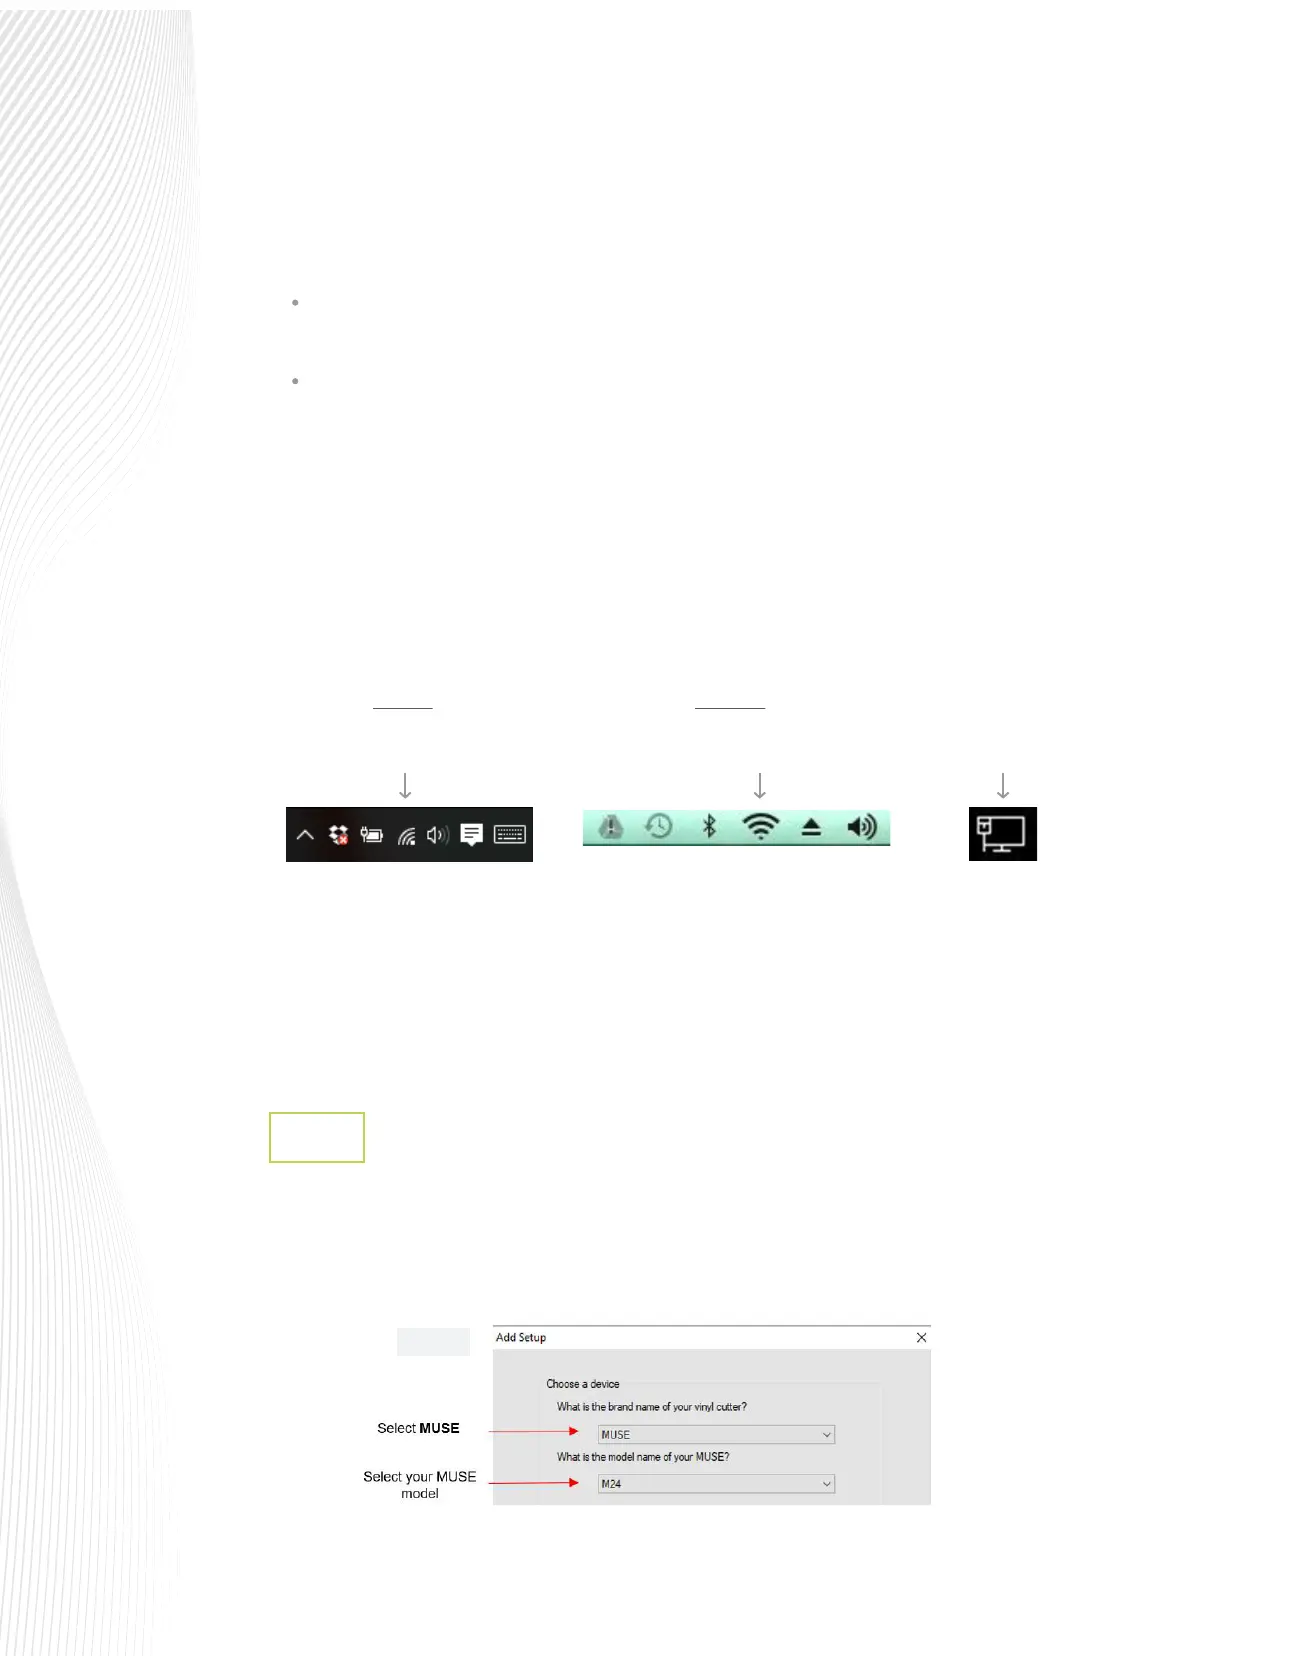
Open LXi Production Manager. If this is your rst time opening LXi, a pop-up screen will request a Brand and
Model selection. Otherwise, select Setup and from the drop-down menu, click Add Setup.
From the pop-up window, choose MUSE as the Brand. Find and select M15, M24 or M60 in the Model
window:
Fig. 1.10.8
 Loading...