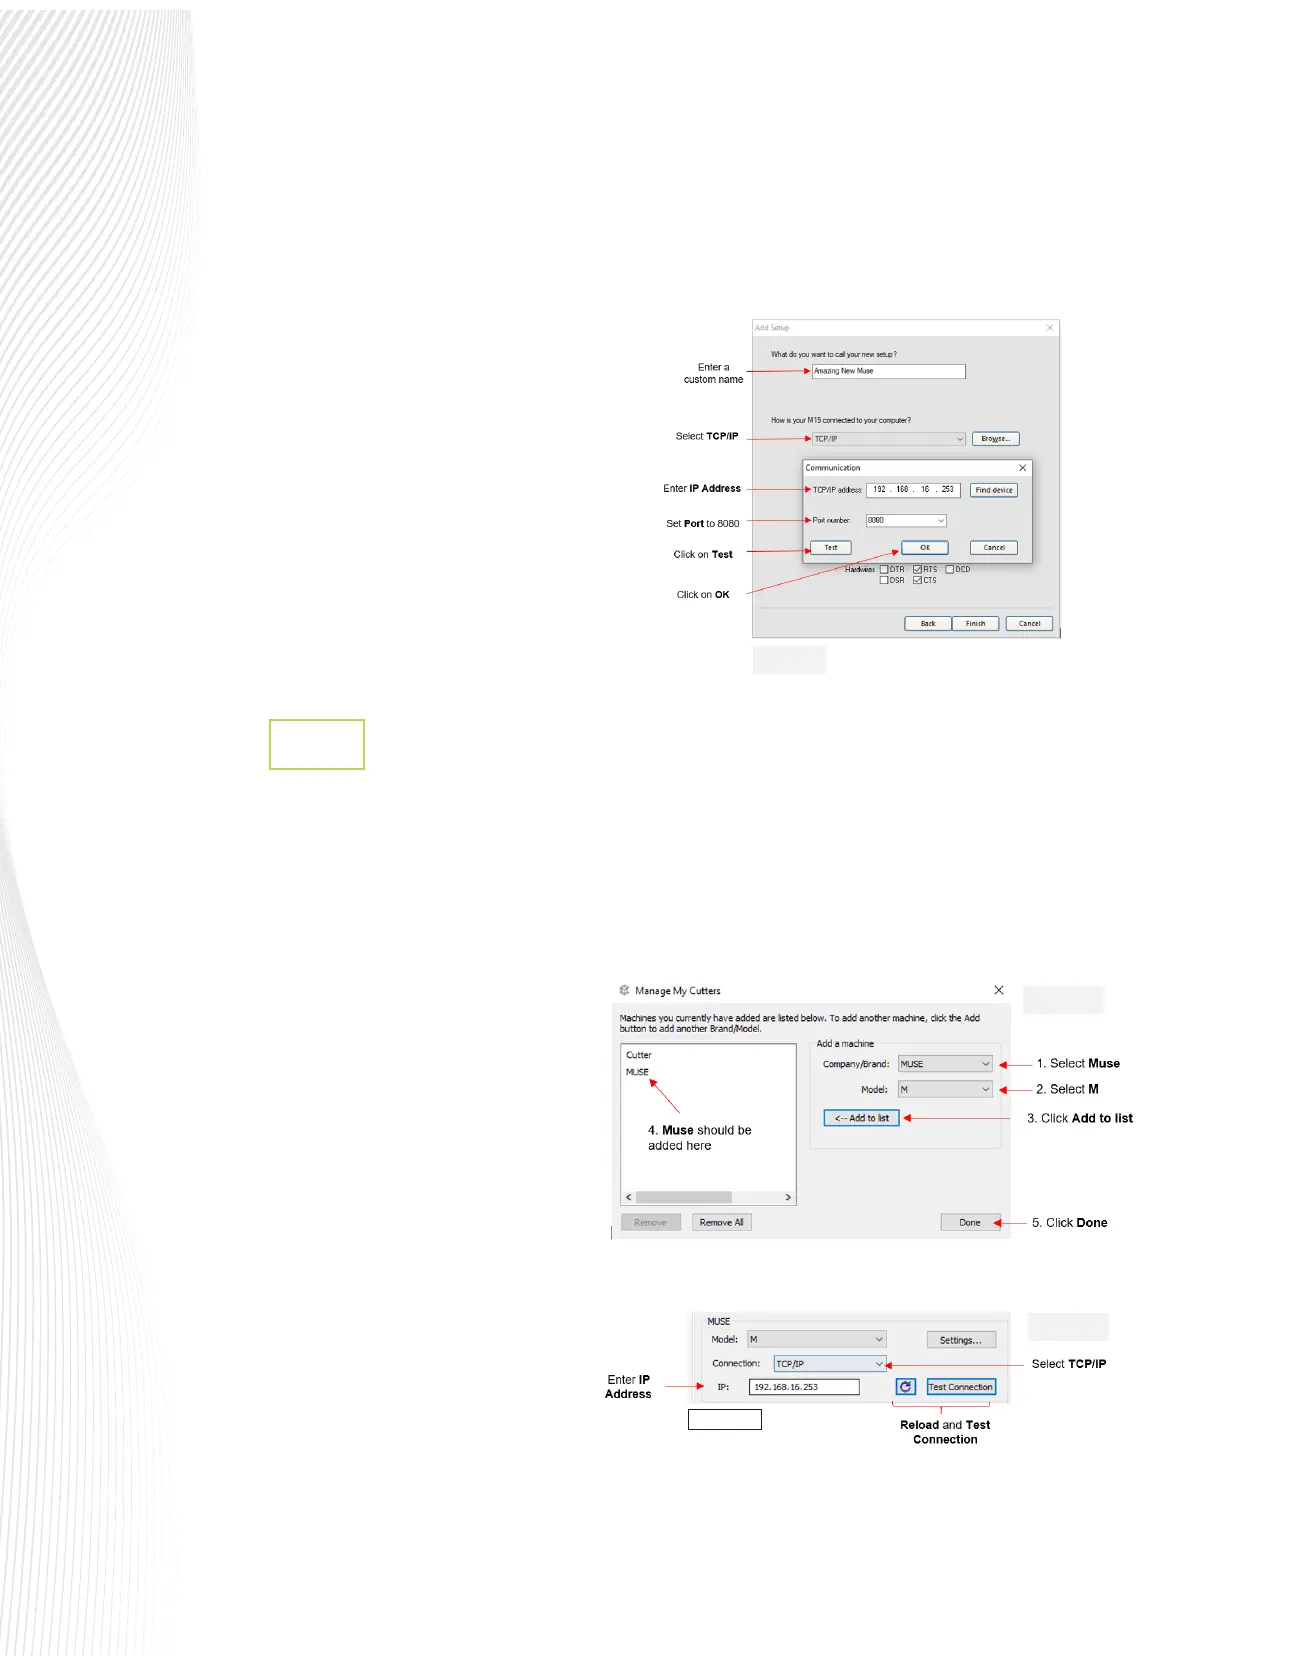
Click Next. The setup window shown in FIG. 1.10.9 will ask how your Muse is connected to the computer.
Select TCP/IP. A small window will appear in which you can type in the cutter’s IP Address from Step 7 in
Section 1.10.3 (FIG. 1.10.7)
Below TCP/ IP address, you will need to enter the
correct Port number which is 8080. Enter this
value and click Test. If you have a successful
connection, LXi will indicate success. Click on OK
to close the Communication window. Click on
Finish at the bottom of the Add Setup window.
If Test fails, check the Muse again to verify the
network name and the IP address. If you change
settings, it may be necessary to wait a minute
and start from the beginning of the process in
order to allow the computer time to reset and
recognize the Wi-Fi connection.
Wi-Fi Connection in Create Space
1.10.5
Open Create Space and select New Project.
Go to Cutter>My Cutter>Manage Cutters.
A new window will open. On the right side, under Company/Brand select MUSE and under Model select
M. Click Add to list. Click Done to apply and close the window:
Once you are ready to cut, click the Cutter
icon on the Toolbar at the top of the
screen. The Cut Settings window will open
and, in the Connection drop-down menu,
select TCP/IP (FIG. 1.10.11)
In the IP eld, type in the IP Address from
Step 7 in Section 1.10.3.
Once you type in the IP address, click on
Test Connection, it will move the blade
carriage back and forth. This does not
send a cut, just a signal to the cutter. If not
connected, you may need to change the
IP address to a free number on your
system.
Fig. 1.10.11
Fig. 1.10.9
Fig. 1.10.10
Fig. 1.10.11
 Loading...