If you are new to Create Space, follow the rst few steps in Section 1.10.2 to add the Muse to Create
Space.
Using the UDISK (USB thumb drive) option involves saving a .PLT le containing the cut design and
some or all of the cut settings. This le can then be opened directly onto the Muse and cut. Remember
that with this option, once the le is saved to the thumb drive, the design is locked in and cannot be
edited, other than setting up an array of repeats.
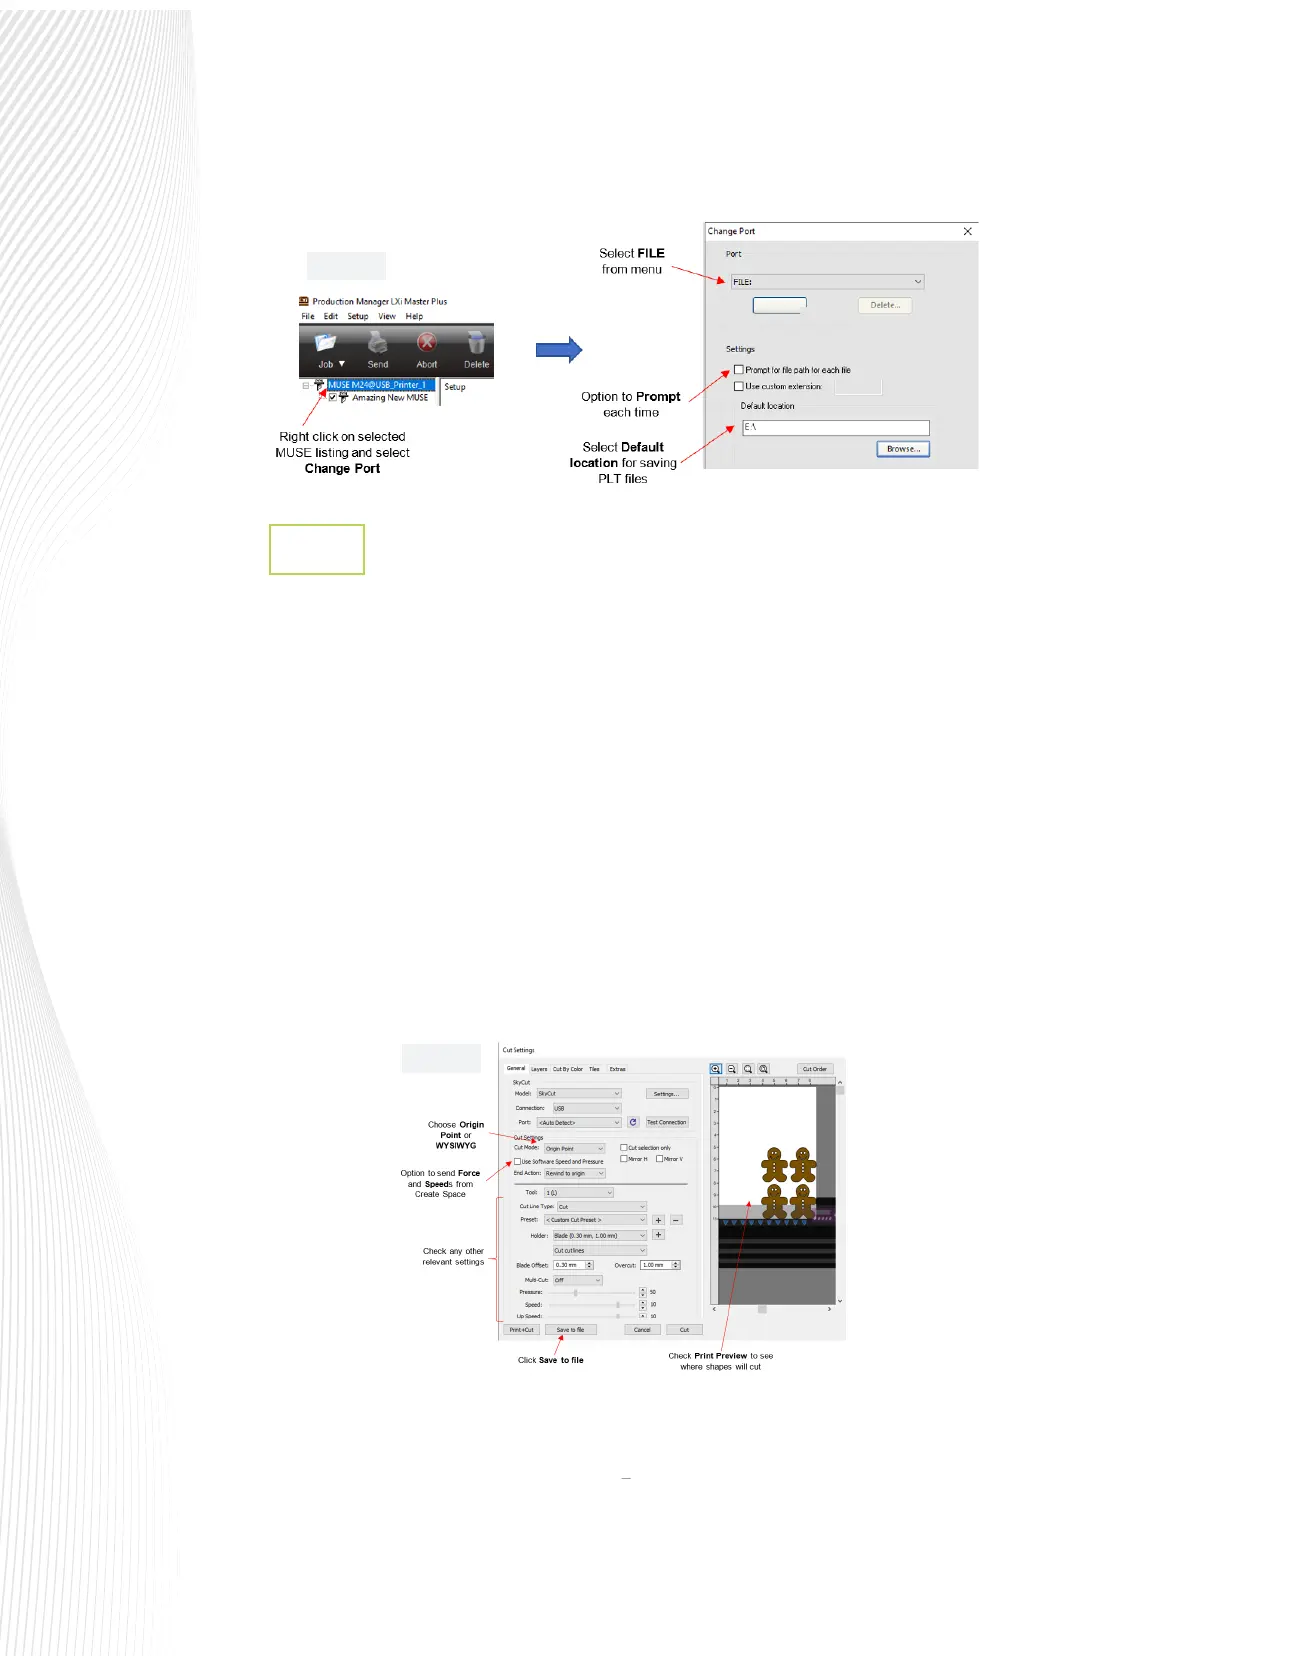
In the Cut Settings window, verify you see the design in the Preview as shown in FIG. 1.10.15, and choose
either Origin Point (move shapes to cut at the origin) or WYSIWYG mode (leave shapes in location on
virtual mat in main window) depending on which you prefer.
Mark the box for Use Software Speed and Pressure, if you want those included in the le. Otherwise, leave
the box unchecked and you can set those values on the Muse’s control panel. The other cut settings
including Blade Oset, Overcut, and Multi-cut
(Passes) will always be included in the .PLT le:
Once your le is ready to cut, insert a USB ash drive into the computer. Click on Save to File at the bottom of
the Cut Settings window. A new window opens where you can browse to nd the USB ash drive, name the
le, and mark the box for Add registration marks, if this is a contour cutting application.
USB Flash Drive Setup in Create Space
1.10.7
Fig. 1.10.14
Fig. 1.10.15
 Loading...