Adjust the Oset based on how large a border you want to create between the edge of the printed image and
the cut path.
To place the cut path inside the printed area for a ‘full bleed’ decal, select a negative value in the Oset instead
(e.g. -0.0125). Once you have the setting you want and the preview looks acceptable, press the enter key on
your keyboard or click the green check mark icon in the Design Central window to apply the settings.
Adding Registration Marks and Printing
3.2.2
1.
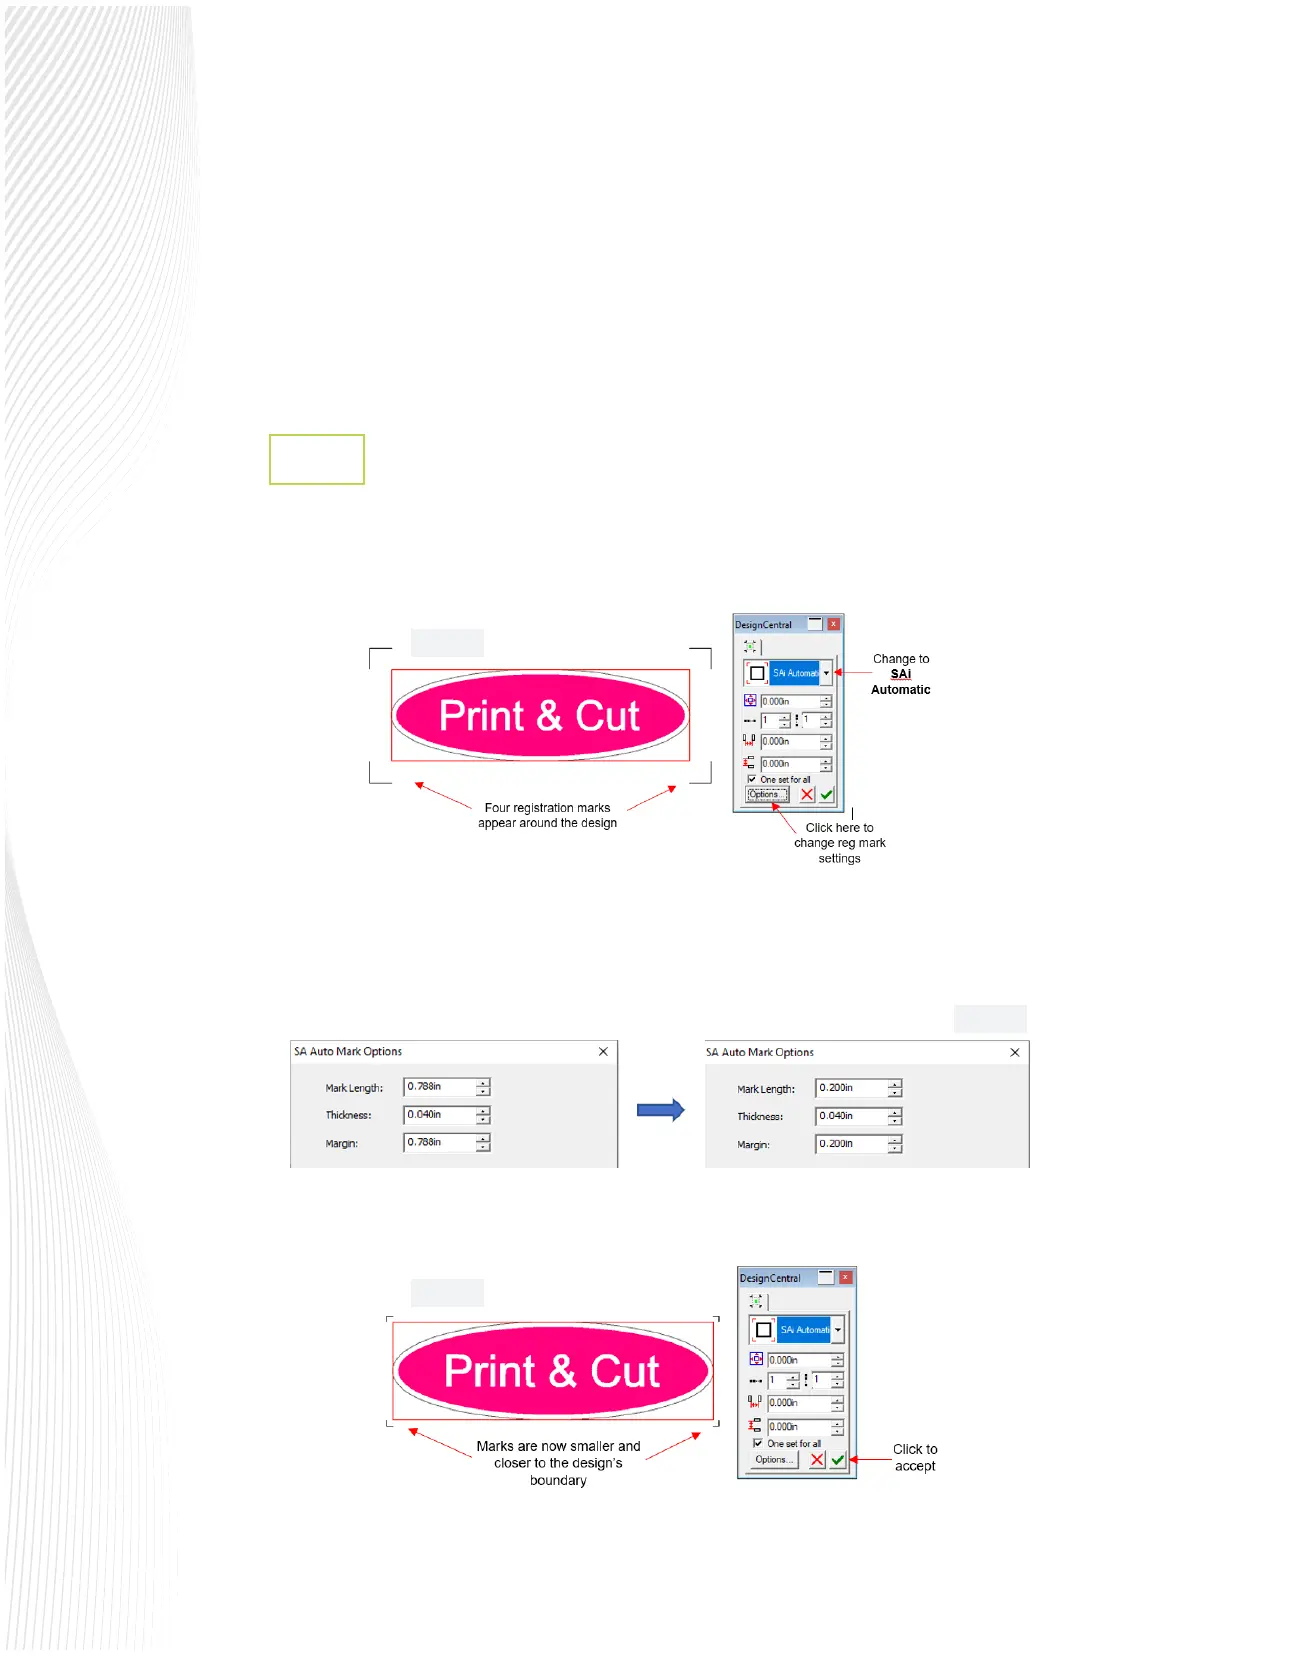
With the design and its contour selected, go to Eects>Contour Cut Marks. In this Design Central window,
the type and sizing of registration marks can be modied. First, select SAi Automatic from the drop-down
menu and the marks will appear like this:
2.
By default, the registration mark settings are far more conservative than needed when using the Muse’s
camera. In order to make them smaller and move them closer to the design, select Options (as shown in
the prior screenshot). In this next window, you can change to these smaller settings for the Mark Length
and the Margin:
3.
Click on OK to update the registration marks and then click the green check mark icon to accept:
Fig. 3.2.4
Fig. 3.2.3
Fig. 3.2.2
 Loading...