Contour Cutting to the Muse
3.2.3
1.
2.
Load the printout into the Muse using the same orientation as on the screen in LXi. In the example being
used, FIG. 3.2.5 shows a Landscape orientation and the printout should also appear the same. This is then
how the printout would also be loaded. Note that if the material is not backed (e.g. paper or cardstock), the
Muse’s cutting mat should be used as the carrier.
Try to load the material straight so that the front registration marks are parallel to each other on your Muse ’s
platen. Move the tool carriage so that the blade is over the lower right registration mark. The blade needs to
be close to the bottom corner as shown in FIG. 3.2.7
3.
4.
5.
4.
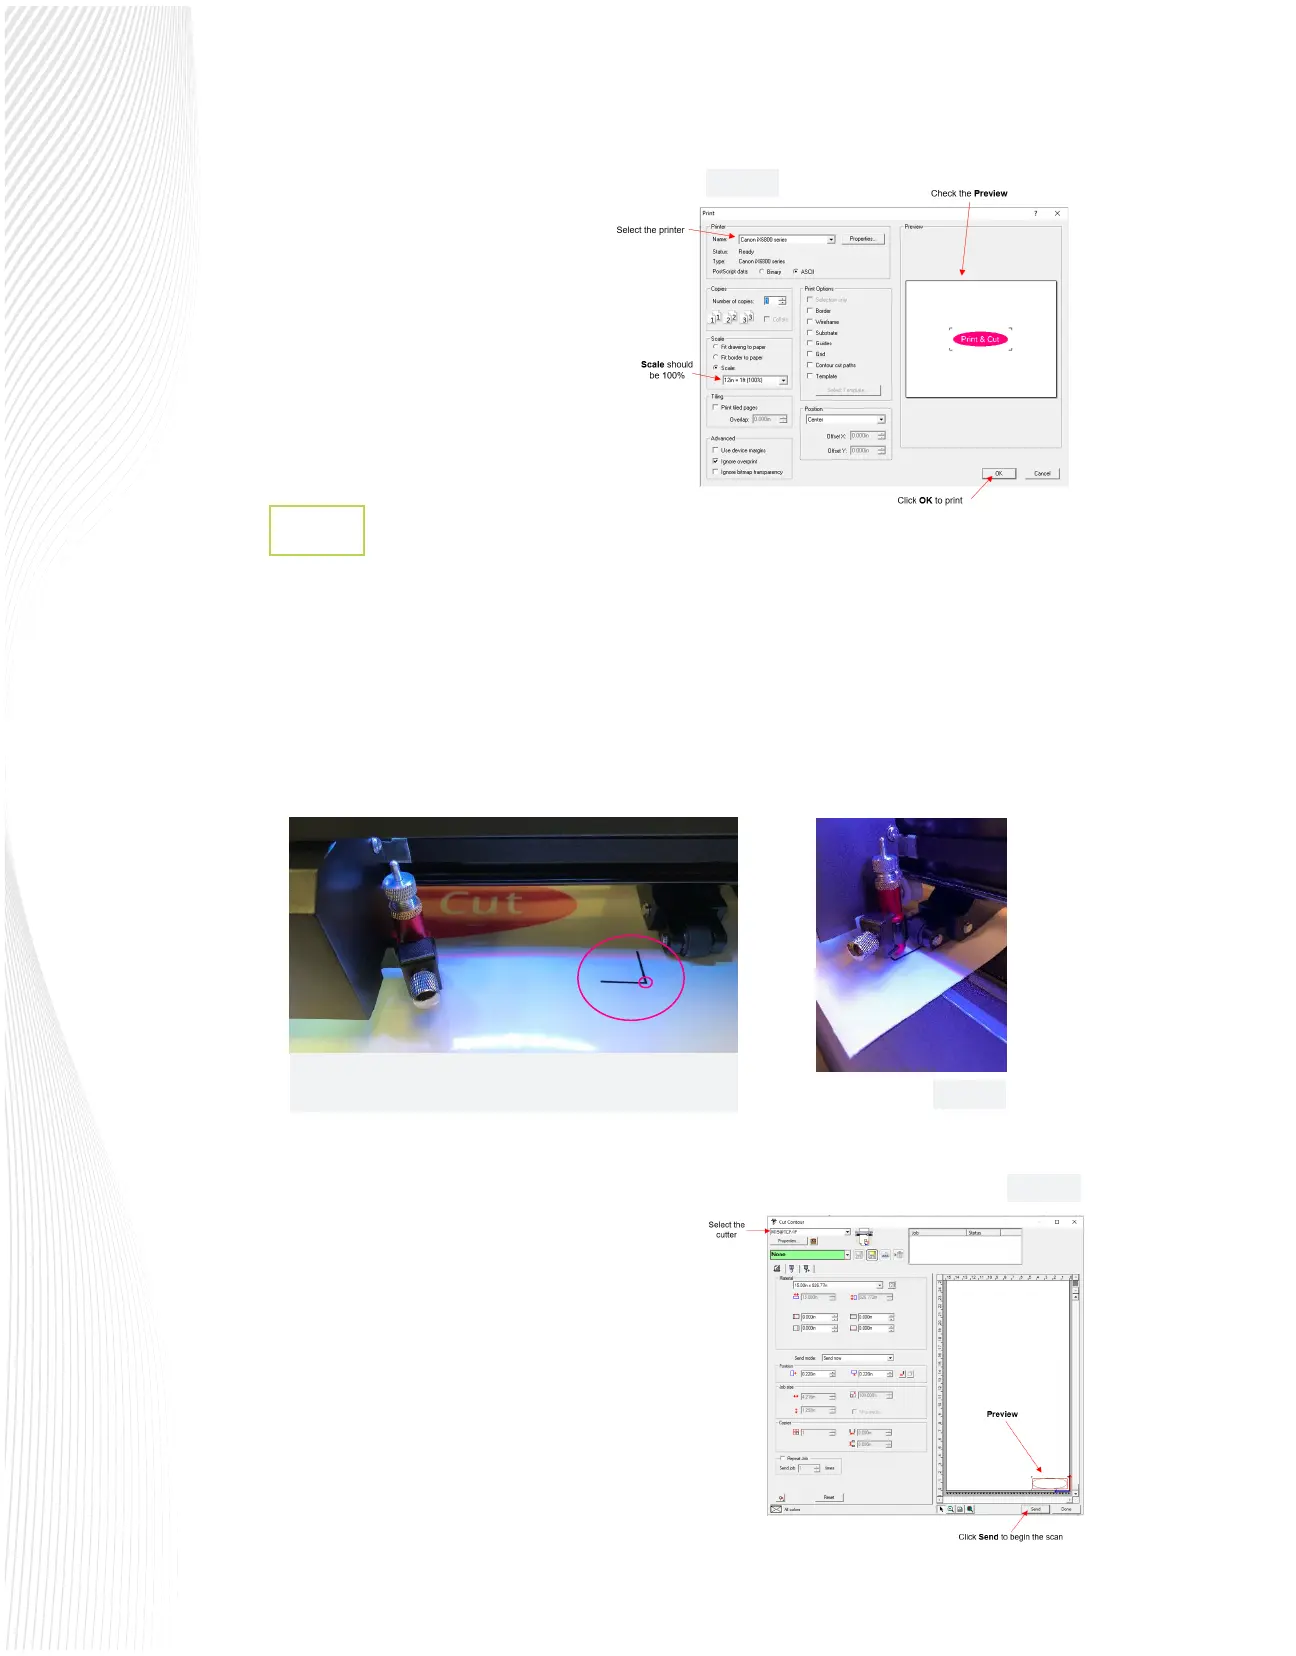
Go to File>Print and verify that all
settings and the Preview appear correct.
You may need to go to File>Document
Setup and/or File>Print Setup to make
changes. Otherwise, the Print window
should show your project with the
registration marks. Also, verify that the
Scale is set to 100% before clicking OK to
print:
In LXi 12, go to File>Cut Contour. LXi Production Manager
will open, as well as the following Cut Contour window,
where you can verify the correct cutter is selected (in case
you have more than one set up):
Click on Send and the Muse will start to scan the marks and
automatically perform contour cut.
As the camera scans each registration mark, the LCD
display will show the mark being scanned. If, for any
reason, the cutter fails to scan a particular mark, the
camera display will show how far o-center the alignment
is. At that point, you can use the arrow keys to adjust the
camera to align over the corner of the mark and complete
the scan (FIG. 3.2.9).
Fig. 3.2.8
Position the blade over the lower right corner of
the lower right registration mark.
Fig. 3.2.7
Fig. 3.2.6
Fig. 3.2.5
 Loading...