8.
9.
10.
When removing the printout from the larger format printer, be sure to allow several extra inches above the
printed registration marks for clearance of the pinch rollers.
1.
2.
3.
Import or design your project in Create Space.
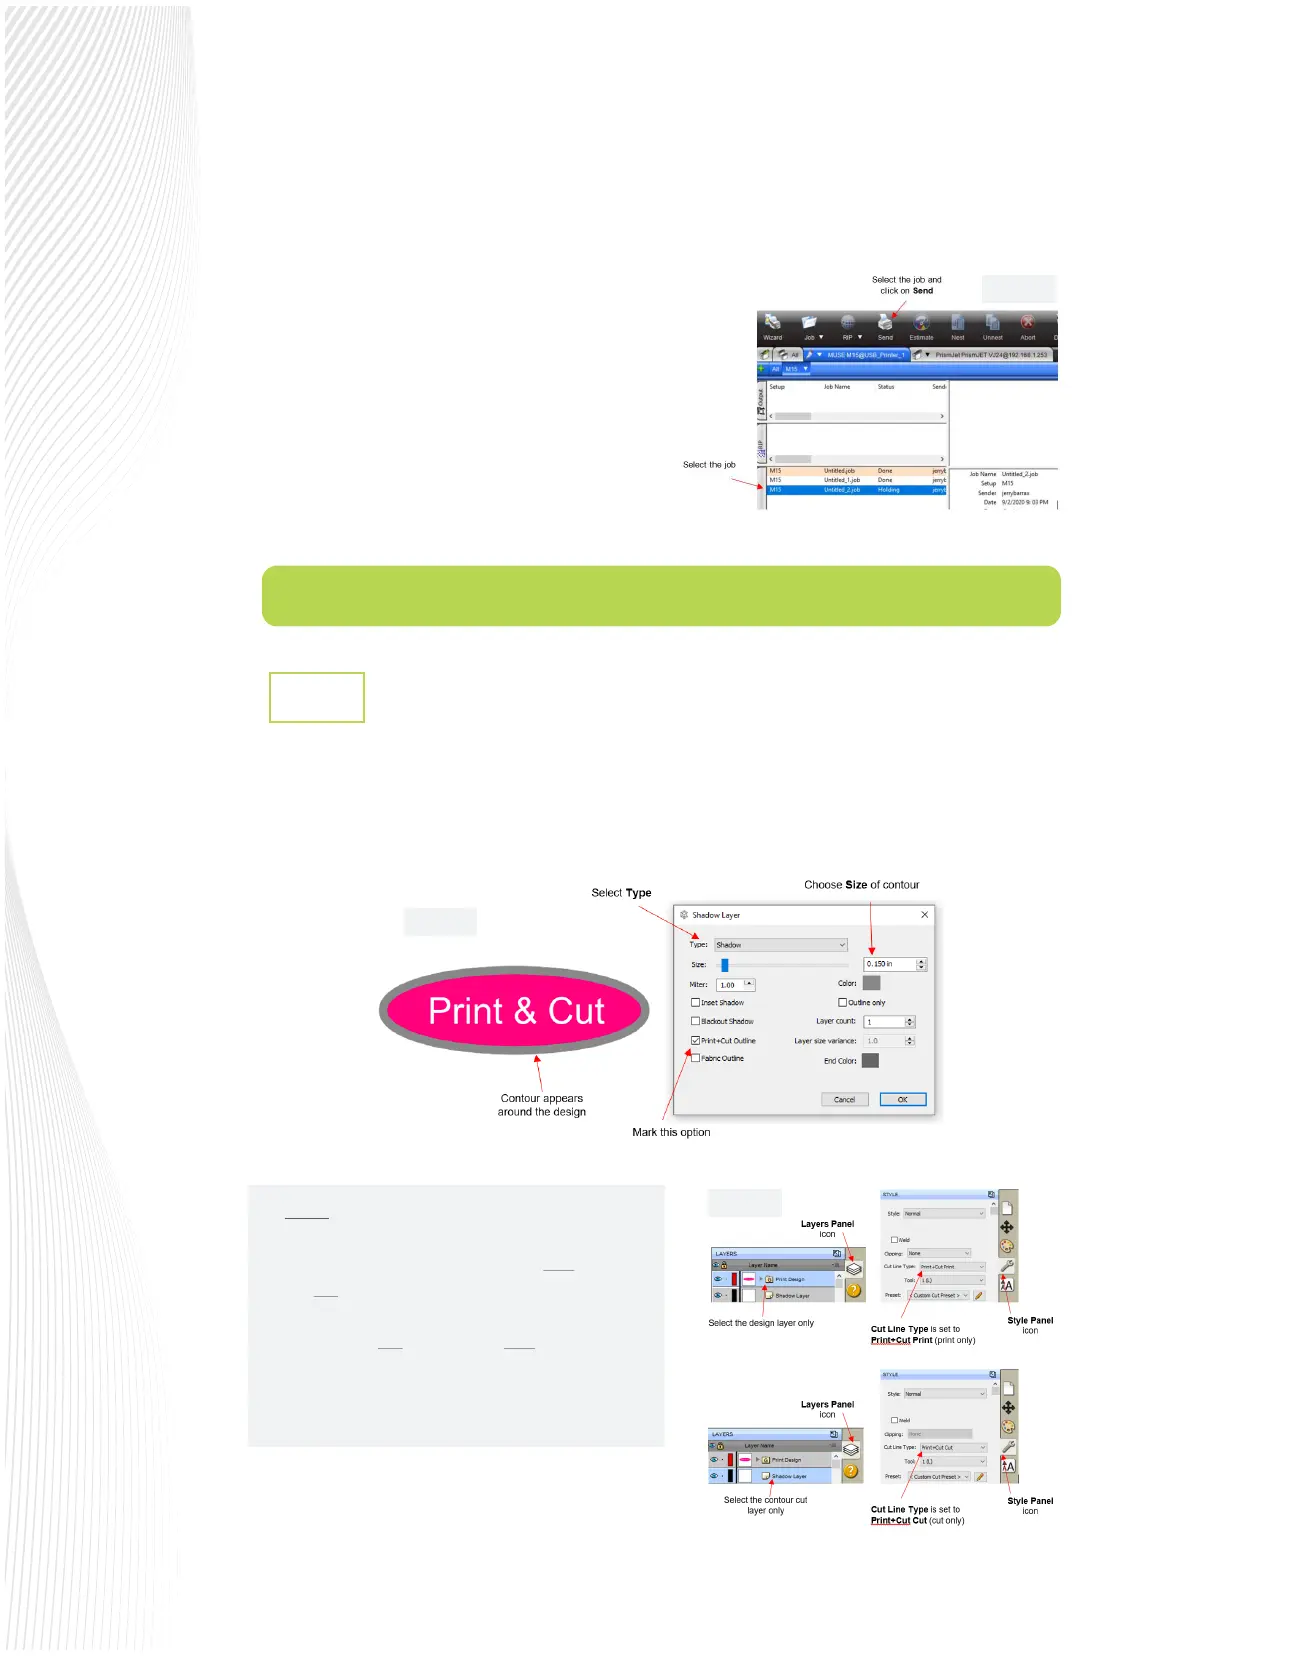
To add a contour cut, select the design and go to Eects>Shadow Layer (Contour Cut). In the window which
opens, you will set the shape and size of your contour cut. Mark the box for Print+Cut Outline. Click OK.
NOTE: The Print & Cut Outline option
automatically sets the Cut Line Type for the design
to Print+Cut Print. This means it will only print and
will not cut. It also automatically sets the Cut Line
Type for the contour to Print+Cut Cut which
means it will not print and will only cut. Note that
these assignments can be veried or changed by
selecting a layer and going to the Style Panel:
Load the printout into the MUSE in the same
orientation as printed and set the blade tip over
the lower right registration mark as was shown in
FIG. 3.2.6 and 3.2.7 in Section 3.2.3.
In the Job Production window, select the MUSE tab
and the job status should indicate Holding. Select
the job and click on Send at the top:
3.4 Contour Cutting with Create Space
Adding a Contour Cut to a Design and Printing
3.4.1
Fig. 3.3.8
Fig. 3.4.1
Fig. 3.4.2
 Loading...