4.
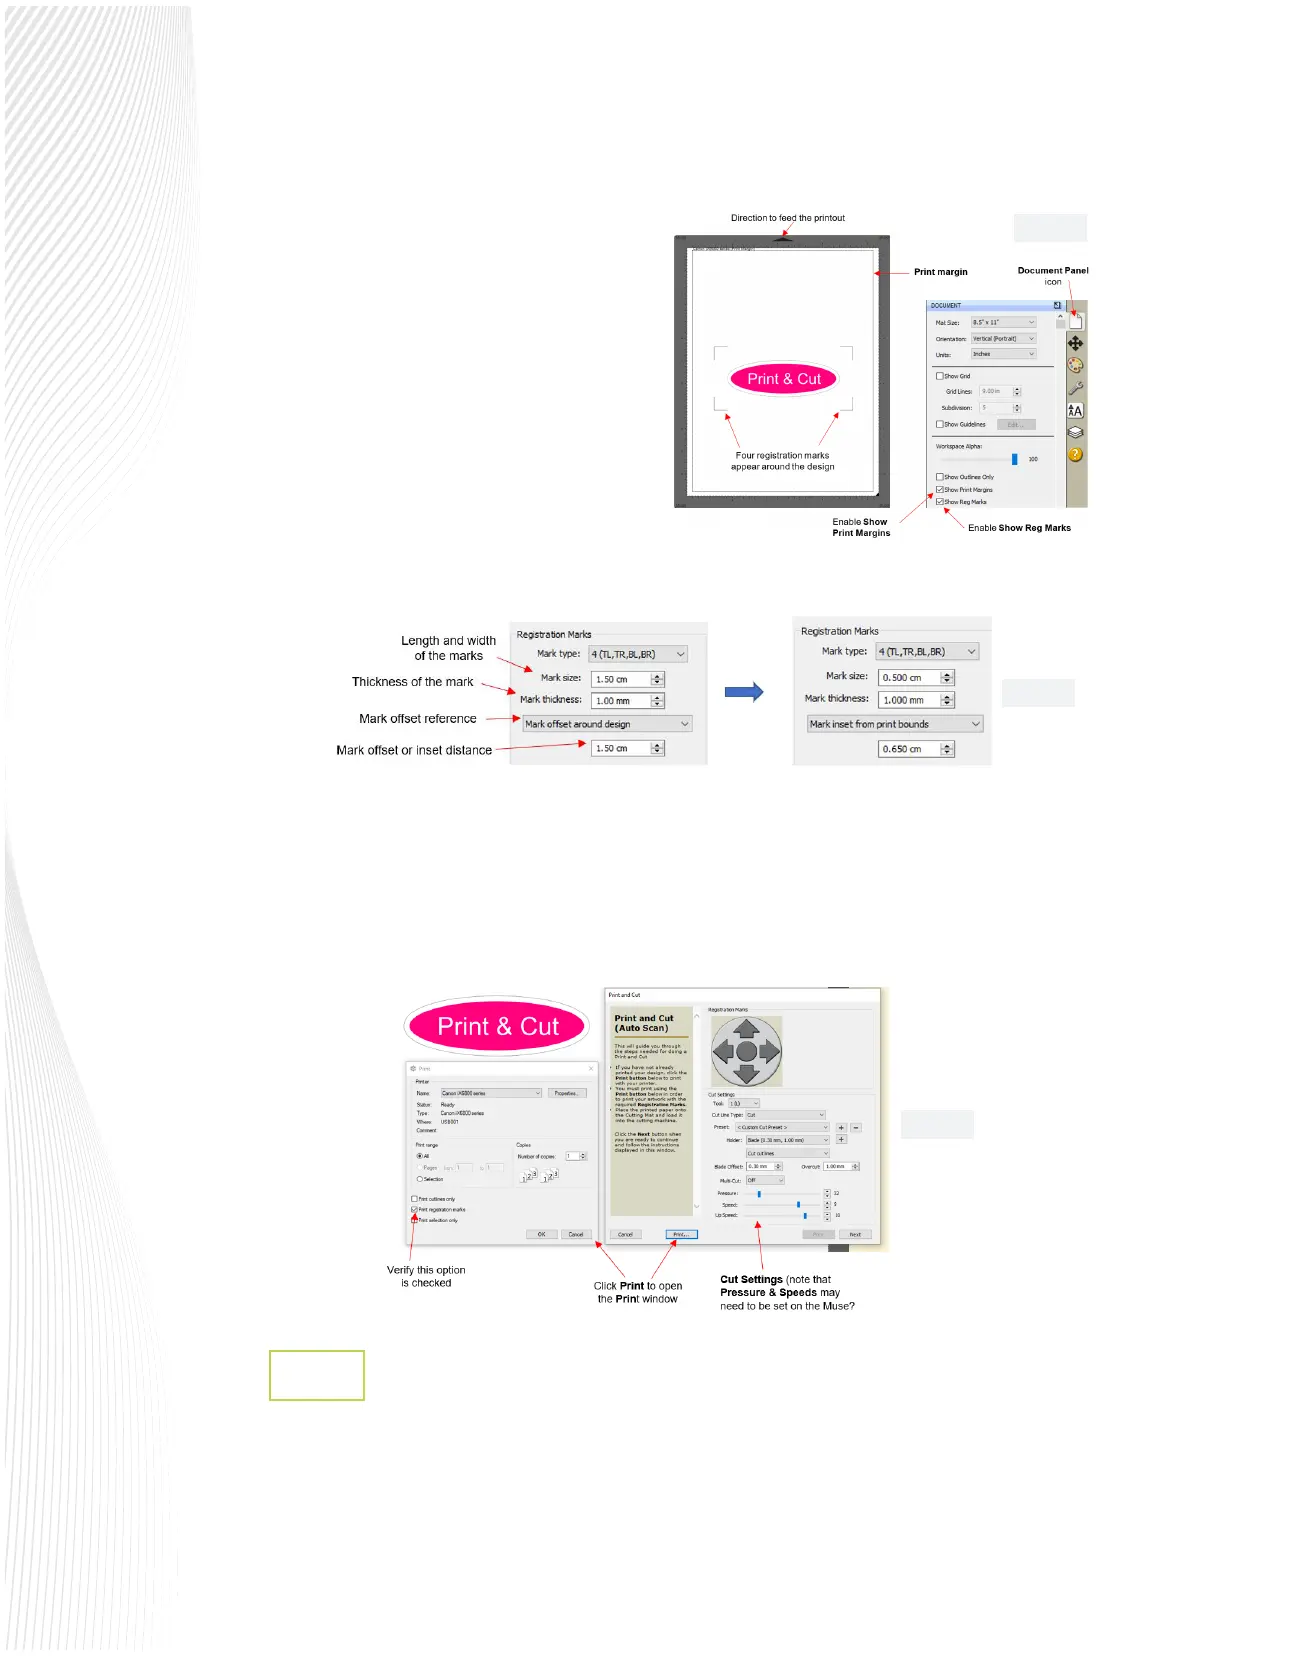
If you wish to see the print border for the
currently-selected printer and the registration
marks, enable Show Print Margins and Show
Registration Marks, respectively on the
Document Panel:
5.
6.
7.
8.
By default, the registration mark settings are far
more conservative than needed when using the
Muse’s camera. In order to make them smaller
and move them closer to the design (or to the
borders of the printout), go to Cutter>Cutter
Settings. In the upper right corner of this
window, you can make changes, as appropriate
for your needs. For example:
Click the Cutter icon at the top to open the Cut Settings window. Click the Print+Cut button.
The Print and Cut window will open. Adjust the cut settings, as needed.
Click Print to open the Print window. By default, the Print Registration Marks should be marked. Click OK to
print the project.
1.
Load the printout into the Muse based on the arrow direction (triangle) shown in the main window of Create
Space. In the example being used, FIG. 3.4.3 shows a Portrait orientation (also indicated on the Document
Panel) and the printout should be loaded the same way. Note that if the material is not backed (e.g. paper or
cardstock), the Muse cutting mat should be used as the carrier.
Contour Cutting from Create Space to the Muse
3.4.2
Fig. 3.4.3
Fig. 3.4.4
Fig. 3.4.5
 Loading...