2.
3.
4.
5.
6.
7.
8.
9.
Insert a sheet of paper into the M60, either on the cutting mat or directly inserted. Load a test pen into
both the left and right-side blade holder seats, making sure the pen nib is slightly above the paper.
Select the SPD/FOR function and make sure both sides are set to a suitable FORCE for drawing: ~ 30 – 40.
Make sure both pens are over the paper. On the Main Screen, select SET>CAMERA to open the camera
menu.
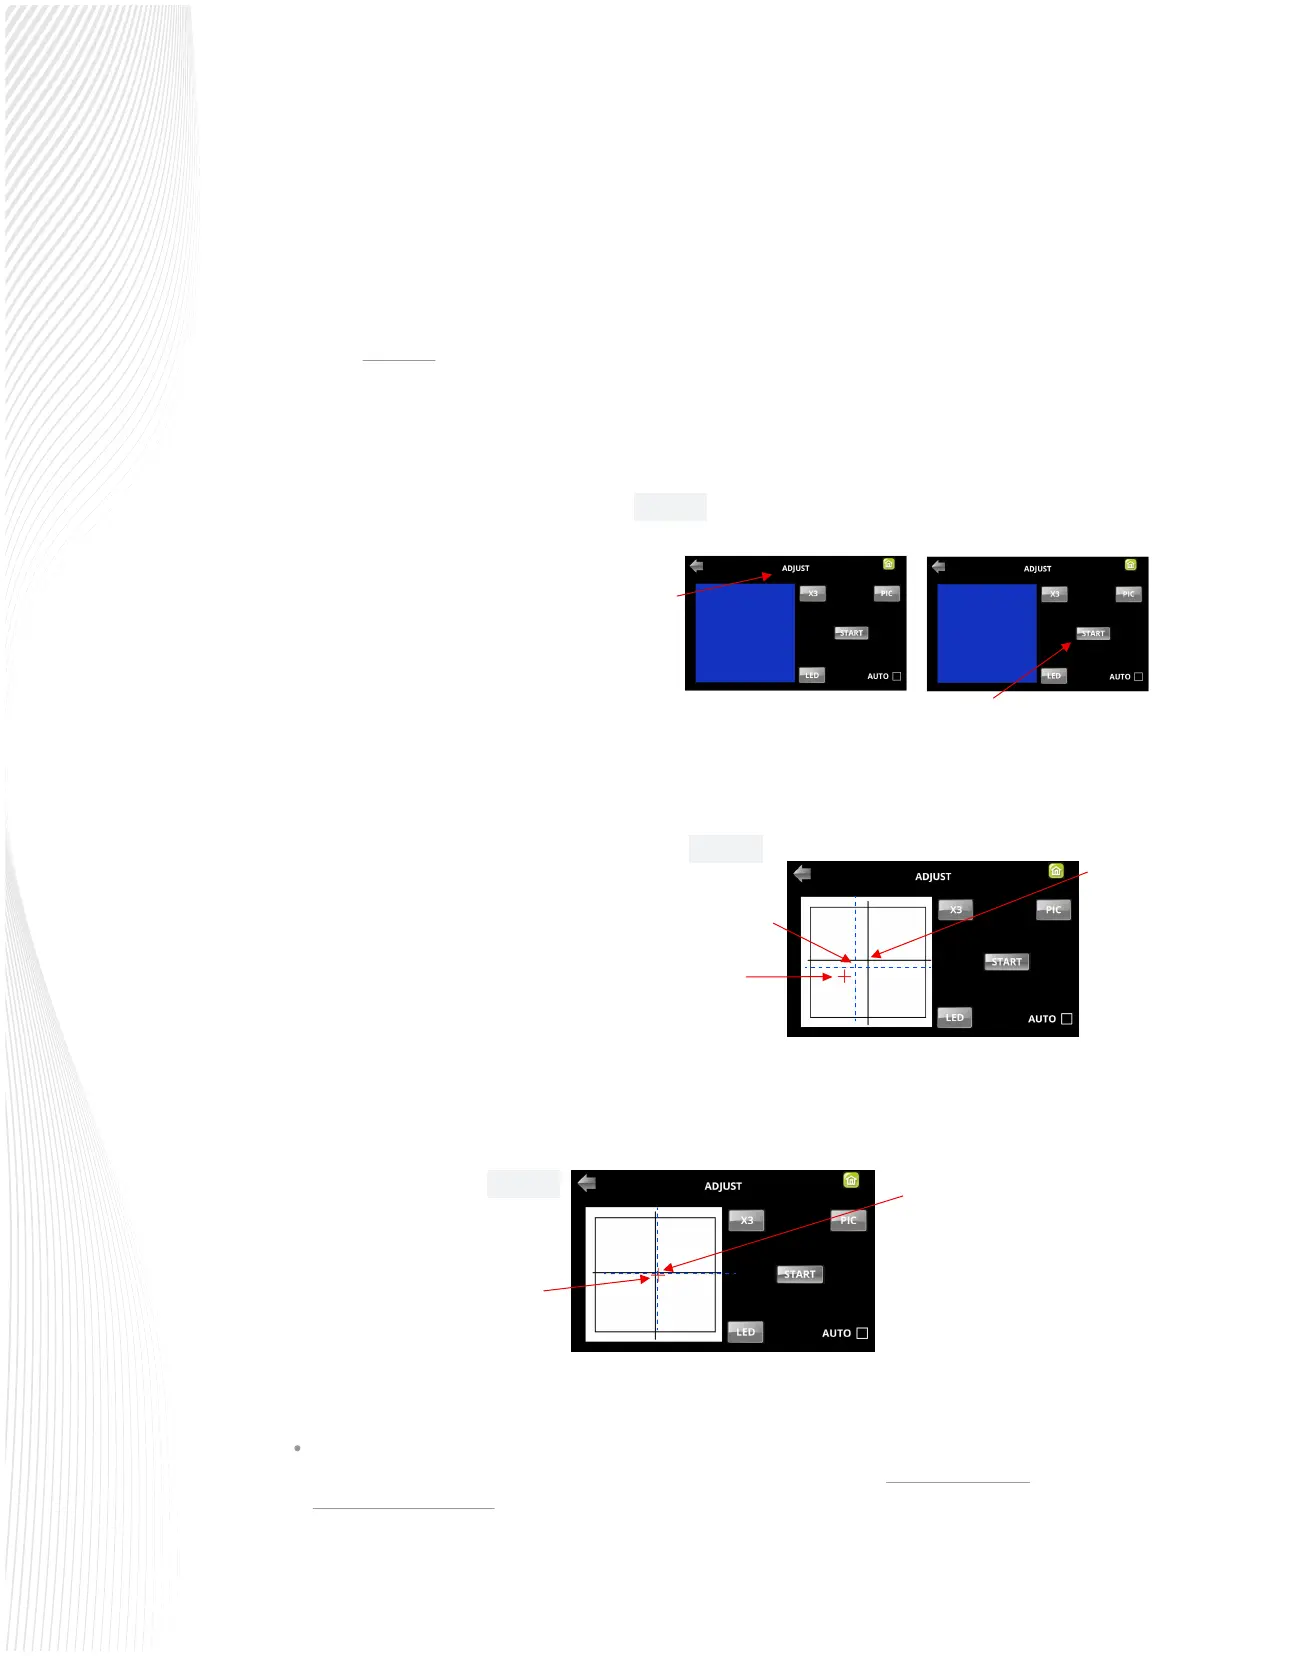
The camera will move over the right-side test
shape, take a photo, and display the photo on
the control panel. If you cannot see the test
shape clearly, press the LED button once so that
it reads LED 50%. You can also use the X3 button
to zoom in, if needed. Press the PIC button. You
should see three items in the photo: the test
shape that was drawn with the right-side pen, a
red +, and the blue dashed +:
Press ADJUST to open the screen for
calibrating. Press START.
Press and hold the OK button for several
seconds:
Press START. The test shape, which is a grid
of 6 lines, will be drawn rst on the right
side of the paper by the right-side pen.
Then the same test shape will be drawn by
the left-side pen about 4 inches to the left
of the rst test shape.
Tap your nger near the middle of the drawn test shape on the screen. This will move the red + close to that
location:
Press OK. A new photo will be taken and one of two things will happen:
10.
The red + is so close to the center that the Muse will now take over and nd the true center on its own.
You will see the red + and the blue dashed + aligned in the center. Additionally, the camera will now
move over to the left side test shape and take a photo.
Fig. 4.1.4
Fig. 4.1.3
Fig. 4.1.2
Tap your
nger here
Blue dashed +
Red +
Blue dashed + is also much
closer to the middle of the
test shape
Red + is now much
closer to the middle
of the test shape
Select
Adjust
Press Start
Press and hold OK
 Loading...