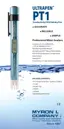
ULTRAPEN™ PT1 Quick Start Guide
Conductivity / TDS / Salinity and Temperature Pen
PT1QSI 06-18
For a complete set of operating instructions, maintenance procedures, calibration procedures, and the FACTORY CAL reset procedure, download the
full PT1 Operation Manual from www.myronl.com.
QUICK REFERENCE INSTRUCTIONS
1. Press and release Push Button to turn the PT1 ON.
2. LED flashes rapidly: Dip pen in sample solution so cell is totally submerged.
3. LED flashes slowly: Swirl pen in sample, keeping sensor submerged. Avoid contact with sides/bottom of container.
4. LED turns Solid ON when Measurement is complete then pen turns OFF.
NOTE: After turning the PT1 ON, press and hold the push button to enter either the calibration or configuration mode.
FEATURES
1. PUSH BUTTON – Press to turn ON and select mode settings.
2. BATTERY CAP – Unscrew to access battery for replacement.
3. BATTERY INDICATOR – Indicates life remaining in battery.
4. DISPLAY – Displays measurements and menu options.
5. LED INDICATOR LIGHT – Tells the user when to dip & swirl PT1 during
measurements and calibration.
6. CONDUCTIVITY CELL – Contains flux field in defined area for accurate
measurements.
7. ELECTRODES – Measures electric current through test sample
8. SCOOP – Contains sample solution for measurement when sampling from
a vertical stream. To use the scoop:
• Slide the open end of the scoop over cell until the neck of the scoop is
flush with the top of the cell.
• Hold pen with scoop end under stream.
• Rinse and fill with sample solution 3 times.
• Fill with solution again, then take measurement.
9. CAP STOP – DO NOT push the Protective Cap beyond the Cap Stop as
cell damage will occur.
10. PROTECTIVE CAP – Protects cell when not in use.
PT1 DEFAULT SETTINGS
Temperature Units: °C (Temp. value alternates on Display with Conductivity/TDS/Salinity value) Solution Mode: Conductivity – KCl
NOTE: For detailed instructions on altering settings, download the full PT1 Operation Manual from the Myron L
®
Company website.
NOTE: Selecting “ESC” from any menu immediately turns the PT1 OFF without saving changes.
OPERATING INSTRUCTIONS
MEASUREMENT SETUP: Before you take a reading, make sure the pen is clean, calibrated, and in the desired measurement mode. The sample
solution must also be within the specified measurement range.
I. SOLUTION MODE SELECTION: The following measurement modes are available on the PT1.
To change solution mode:
1. Push and release the Push Button to turn the PT1 ON.
2. Push and hold the Push Button to enter menu mode.
3. Release the Push Button while “SOL SEL” is displayed.
4. Push and hold the Push Button.
5. Release the Push Button when desired solution mode is displayed
6. “SAVEd” will display, then the PT1 will power OFF.
II. NORMAL OPERATION:
To measure solution at the extremes of the specified temperature range,
allow the pen to equilibrate by submerging the cell in the sample solution
for 1 minute prior to taking a measurement.
NOTE: When testing a vertical stream of sample, use the scoop.
Recalibrate the pen using the scoop to retain accuracy of ±1%.
1. Rinse the cell by swirling it in clean water (preferably DI, RO, or
purified water).
2. Remove the PT1 from rinse and pat it dry with a clean cloth or tissue.
3. Press and release the push button to turn the PT1 ON.
4. Grasp the pen near the battery cap to avoid sample contamination.
4. While the LED flashes rapidly, dip the pen in fresh sample solution so
that the cell is completely submerged.
• If you do not submerge the cell in solution before the flashing
slows, allow the pen to power OFF and retake the reading.
5. While the LED flashes slowly, swirl the pen around to remove
bubbles, keeping the cell submerged.
• If possible, keep the pen at least 1 inch (2½ cm) away from
sides/bottom of container, if applicable.
6. When the LED turns ON solid, remove the pen from solution.
• The display will alternate between the measurement and
temperature values.