ULTRAPEN™ PT1 Quick Start Guide
Conductivity / TDS / Salinity and Temperature Pen
PT1QSI 06-18
III. CALIBRATION
NOTE: Small bubbles trapped in the cell may give a false calibration.
NOTE: When selecting a CAL mode, choosing “ESC” exits the calibration routine without changing the stored calibration constants.
1. Rinse the PT1 cell in Myron L
®
Company calibration solution (see the Solution Mode Selection table in Section I for the appropriate type).
• If possible do not use the same container of solution to perform the calibration that was used as a pre-calibration rinse.
2. Press and release the push button to turn the PT1 ON.
3. Push and Hold the button down.
4. Release the button when “CAL” is displayed.
5. Grasp the pen near the battery cap to avoid sample contamination.
6. While the LED flashes rapidly, dip the pen in fresh sample solution so that the cell is completely submerged.
• If you do not submerge the cell in solution before the flashing slows, allow the pen to power OFF and retake the reading.
7. While the LED flashes slowly, swirl the pen around to remove bubbles, keeping the cell submerged.
• If possible, keep the pen at least 1 inch (2½ cm) away from sides/bottom of container.
8. When the LED turns ON solid, remove the pen from solution.
• The display will read “CAL SAVED” and the PT1 will turn OFF.
FACTORY CALIBRATION: Factory Calibration (FAC CAL) resets the PT1 to its factory settings. For instructions on how to perform a FAC CAL
download the full PT1 Operation Manual from the Myron L
®
Company website.
MAINTENANCE
I. BATTERY REPLACEMENT
The PT1 display has an indicator that depicts the pen battery's charge level. When the charge level indicator only shows one bar, IMMEDIATELY
replace the battery with a new N type battery.
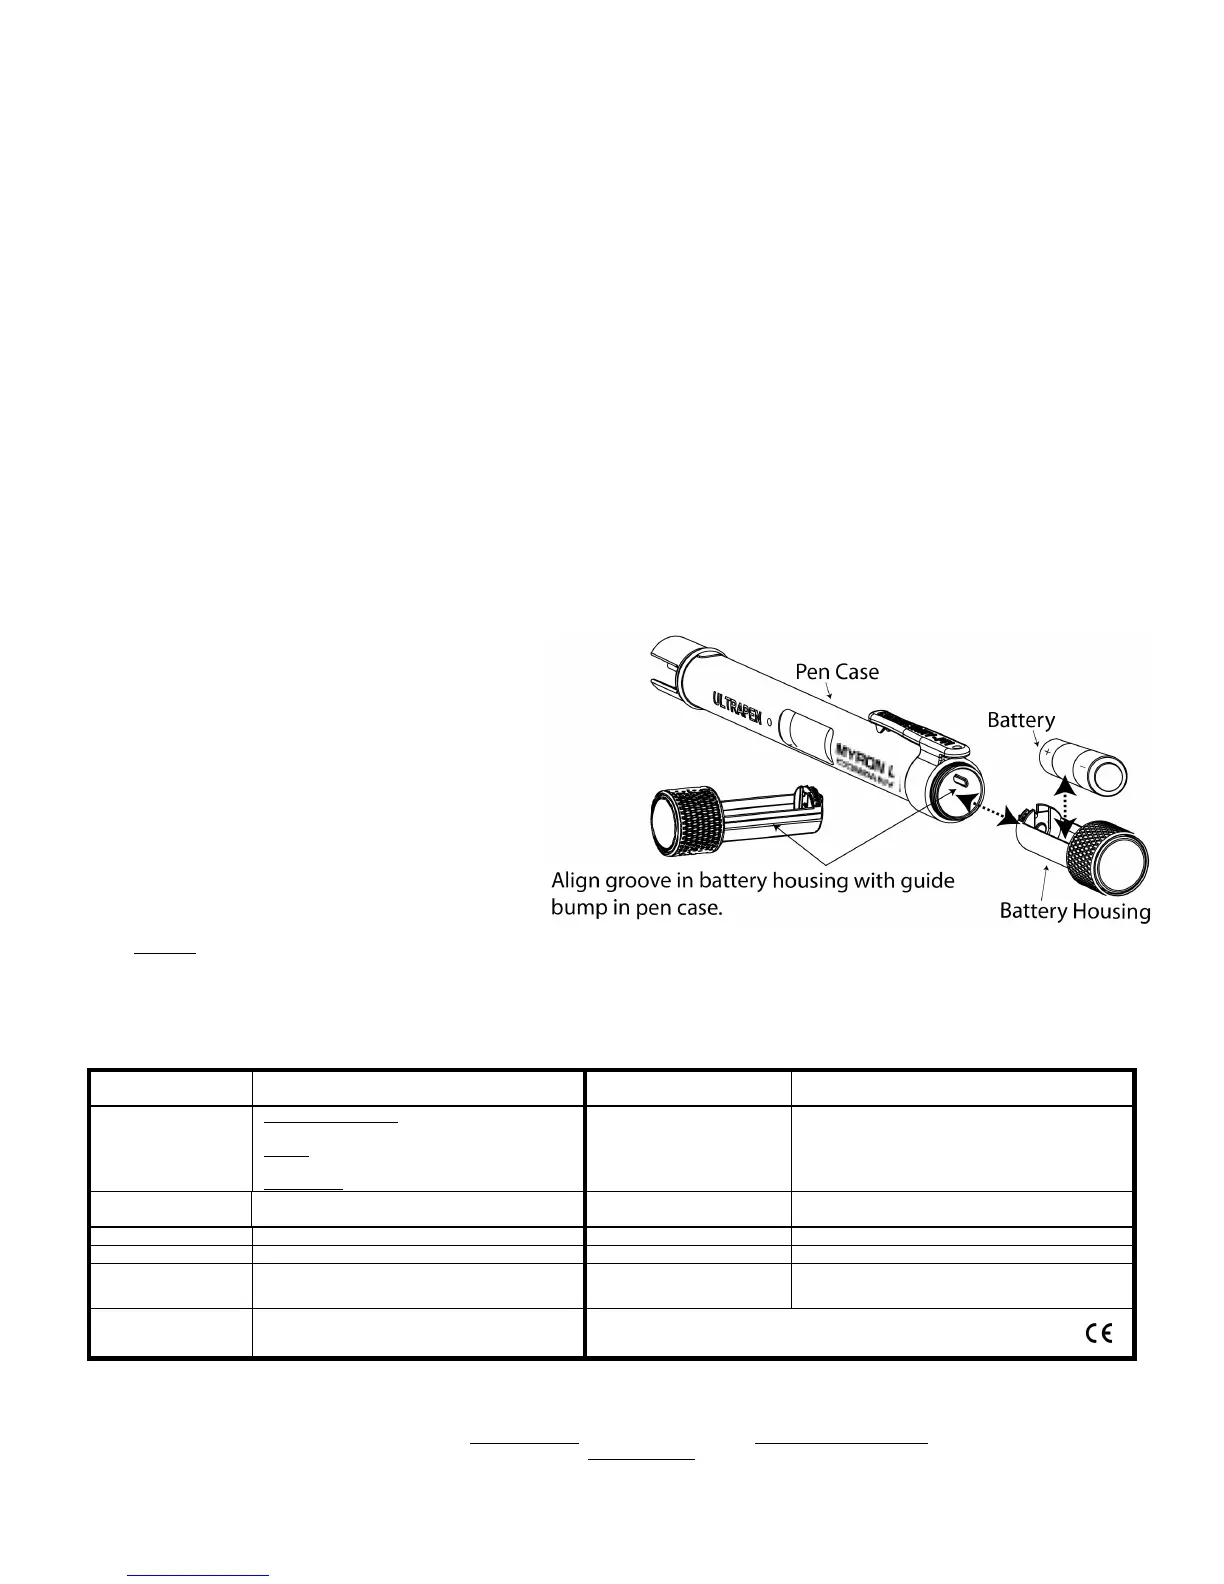
1. In a CLEAN and DRY environment, unscrew the battery cap
in a counter-clockwise motion.
2. Slide the cap and battery housing out of the pen.
3 Remove the depleted battery from its housing.
4 Insert a new battery into the battery housing oriented with
the negative end touching the spring.
5. Align the groove along the battery housing with the guide
bump inside the pen case and slide the battery housing
back in.
6. Screw the pen cap back on in a clockwise direction. Do not
over tighten.
II. ROUTINE MAINTENANCE
1. After each use, ALWAYS rinse the cell with clean water
(preferably DI, RO, or purified water), then carefully blot the
cell with a soft, clean cloth to remove any water drops.
2. ALWAYS replace the Protective Cap on the cell after each
use. DO NOT push the cap past the Cap Stop.
3. Do not drop, throw or otherwise strike the PT1. This voids the warranty.
4. Do not store the PT1 in a location where the ambient temperatures exceed its specified Operating/Storage Temperature limits.
SPECIFICATIONS
 Loading...