05
Sealed Electric Wall & Floor Mounted Towel Warmers
4.0 Fixing (cont)
4.0
Mounting for ES40:
G Place the product in the desired location and mark the
position of the fixing brackets.
G Drill holes and fix wall bracket securely.
G Slide the towel warmer onto the wall brackets. DO NOT
FORCE - adjust wall bracket position to ensure smooth fitting.
G Tighten the locking screw.
5.0 Electrical Connection
Electrical connection of this product must
be carried out by a licensed electrician, in
accordance with LOCAL OR NATIONAL
ELECTRICAL CODES.
If tube is to be rotated, the grub screws must
be completely loosened before turning.
This product may be hot to touch. It is the
responsibility of the installer to ensure this caution
is brought to the attention of all users.
Provision for disconnection from the electrical supply must be
incorporated in the fixed wiring in accordance with the wiring
rules.
To provide continued protection against risk of electric shock,
connect to properly grounded outlets only.
It is recommended this towel warmer is fitted to a GFI breaker.
A dedicated circuit is required.
G Prior to fixing and electrical connection the 120V AC wiring
must be ‘roughed in’ to a standard size outlet box in the wall.
The wire box should be positioned at the lower right corner
of the product. Check the product specifications for the exact
location of the box in the wall.
G At this point, the mounting hardware should be located and
fixed to the wall.
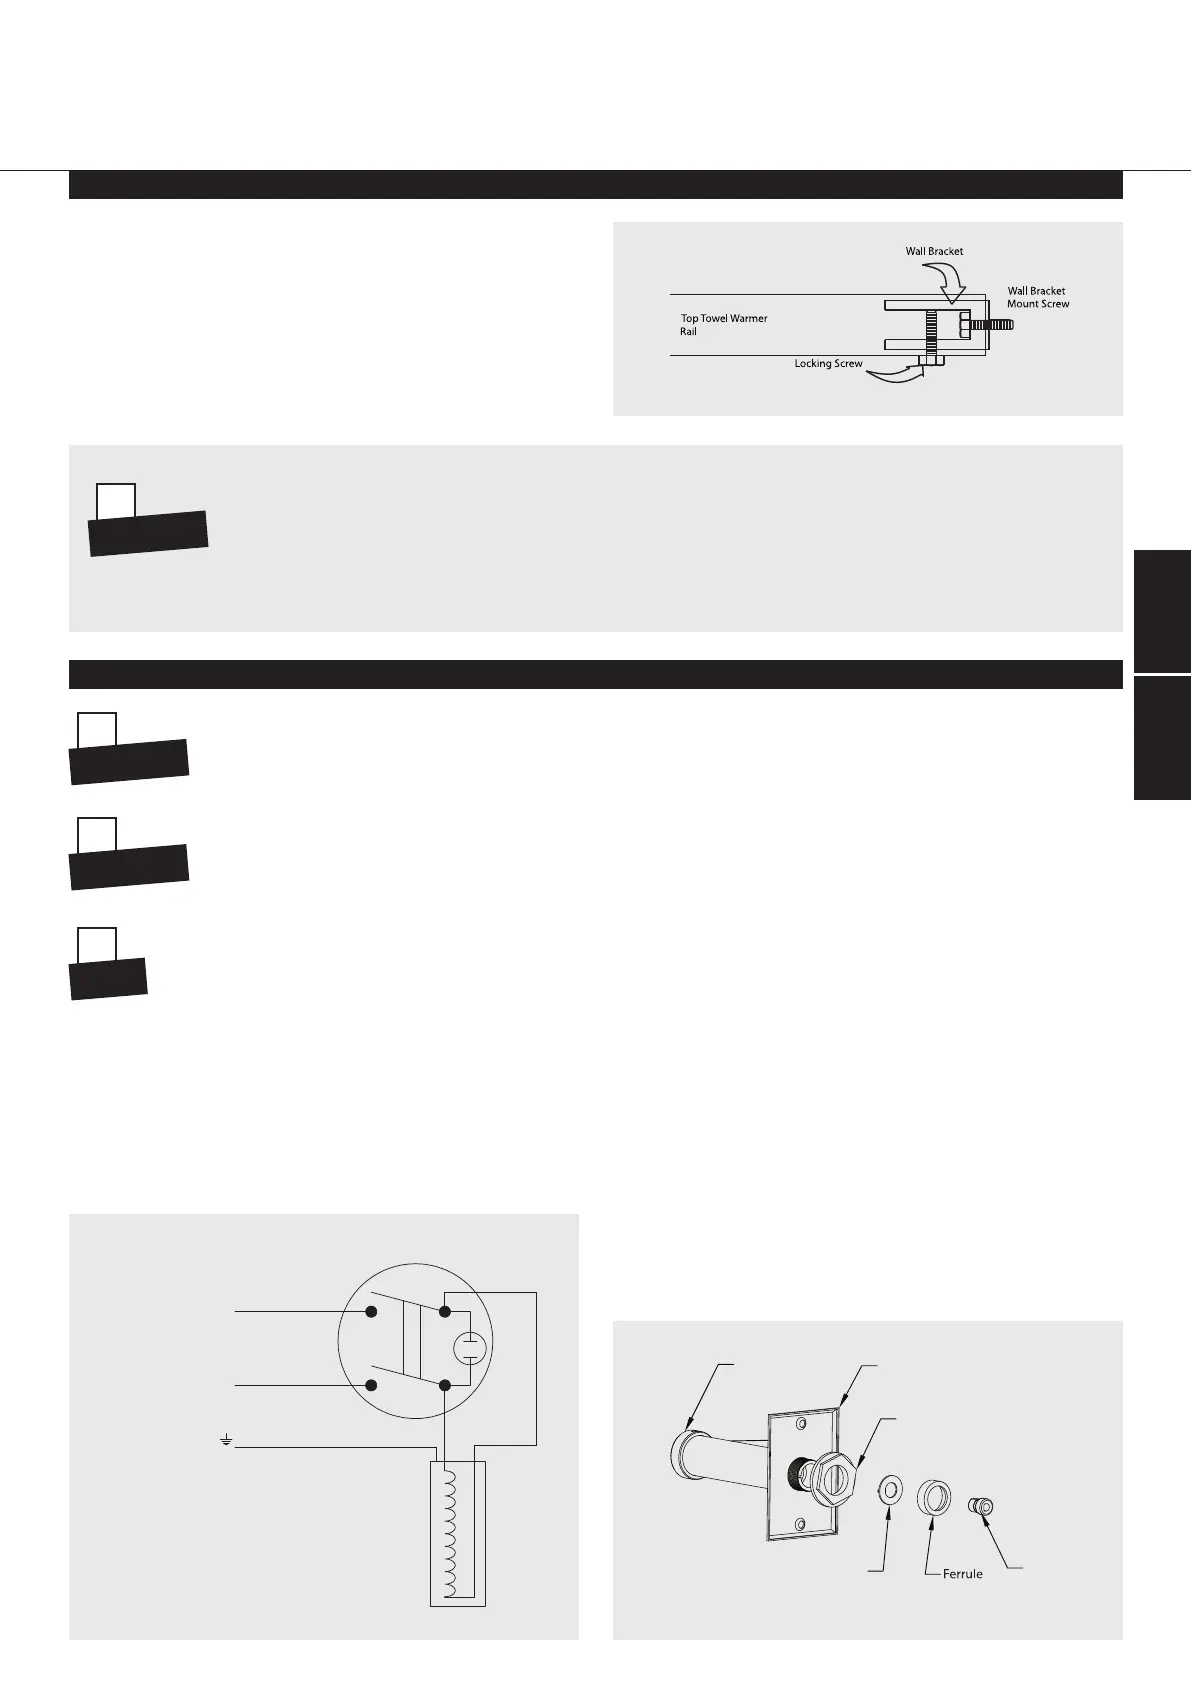
G Remove the ferrule at the end of the tube. Put the wires
through the wall plate and fix the wall plate to the tube by
tightening the large nut supplied with the kit. Replace the
ferrule on the end of the tube and tighten ensuring that the
strain relief plate is firmly located with the dimples aligned.
G Connect the wires from the product to the wires in the wall
box using appropriate wire nut connectors. Connectors
should be tight so as to prevent arcing or heat build up from
poor connection.
G Slip the product onto its mounting hardware on the wall and
tighten. Align the wall plate with the box and mount with
screws.
G The switch tube on EB30 can be mounted vertically if desired.
Loosen the two set screws and rotate the tube to the vertical
position. Re-tighten set screws.
G Switch on the electrical supply. Turn on the product and allow
30+ minutes to warm up.
!
CAUTION
!
HOT
Neutral (Supply)
Ground
bk
w
w
bk
g
Electric
Element
Switch
Line (Supply)
Strain
Relief
Bush
Strain
Relief
Washer
Locking
Nut
Wall
Plate
Switch
Holder
w = White
bk = Black
g = Green
5.0
For the correct installation of radiators it is essential that the fixing of the towel warmer is carried out
in such a way that it is suitable for intended use AND predictable misuse. A number of elements need
to be taken into consideration including the fixing method used to secure the towel warmer to the wall,
the type and condition of the wall itself, and any additional potential forces or weights that may
happen to be applied to the towel warmer, prior to finalising installation.
!
IMPORTANT
!
WARNING
23416 Towel Warmer US:Layout 1 25/11/10 15:18 Page 6
 Loading...