14
Fig. 32
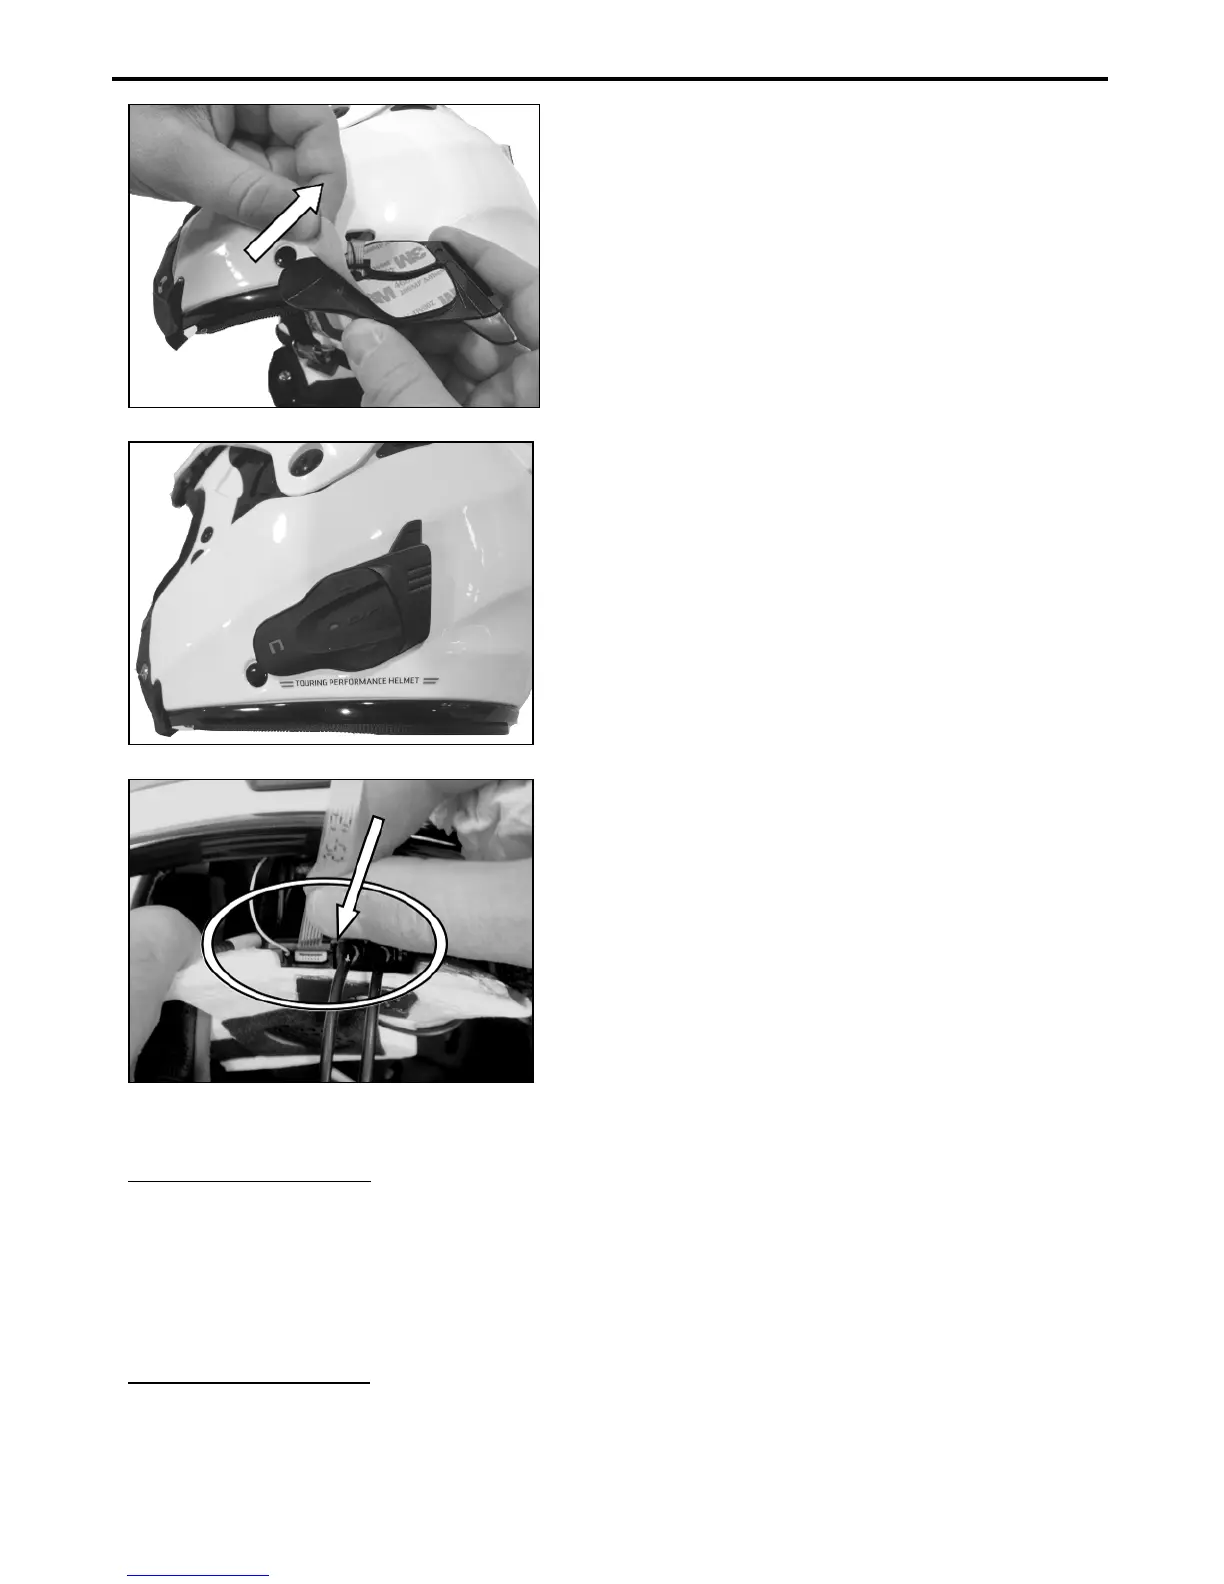
Remove the protective film from the back of
the adhesive keyboard using the special tab.
Pass the antenna and keypad cable completely
through, inside the helmet.
Apply the keyboard to the shell and press down
on its entire surface to make sure that
properly. (Fig. 33)
Note: Ma
ke sure you do not glue the antenna and
keypad cable underneath the keypad support.
Note: In the event that the keyboard is not
positioned correctly, peel it off right away
with extreme care and repeat the
positioning.
Note: It takes up to 24 hours for the keyboard to
stick completely. During this time, do not
expose the helmet to atmospheric agents.
Hook up the “flex” cable of the adhesive
keyboard to the e-box. (Fig. 34)
Reposition the left polystyrene cheek pad in its
housing.
Fig. 33
Fig. 34
Only for full-face helmets
: Insert the chin strap into the polystyrene cheek pad loop.
Reposition the left and right-hand side cheek pad by following the specific instructions provided in
the helmet user manual.
Hook the rear part of the comfort padding to the helmet.
Only for full-face helmets
: Insert the chin guard (microphone side), gently placing the microphone in
its housing. Then press down on the red tab until the chin guard is locked in place on the
helmet.