BX5
13
N.B.: BEFORE replacing the left polystyrene cheek pad, follow the instructions provided in the following
chapter.
3.7. Installing the adhesive keyboard
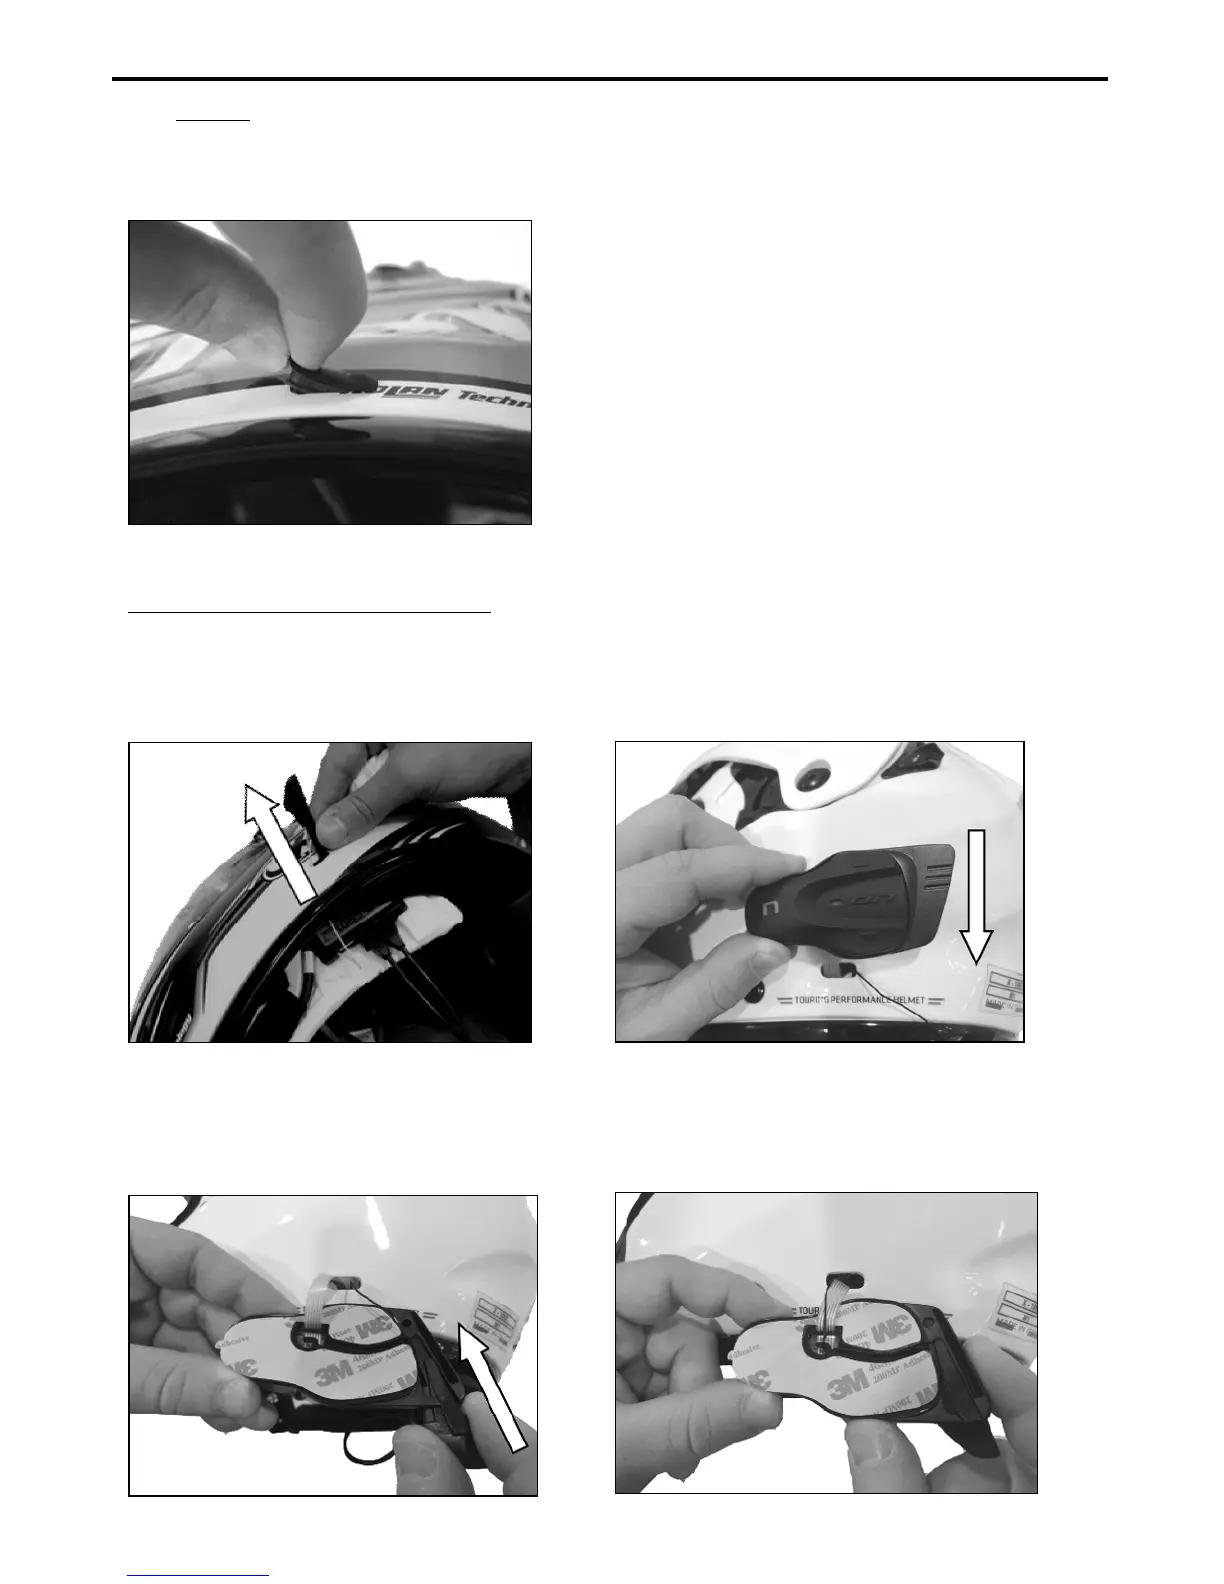
Fig. 27
Remove the N-
Com plug from the left side of
the helmet; to make this easier, it is
push the plug from the inside
of the helmet. (Fig. 27)
Thoroughly clean the outside surface of the
shell to make sure that the adhesive keyboard
sticks properly. Before you apply the keyboard,
make sure that the shell area is completely
clean and grease or dirt free.
Only for Jet helmets or flip-up helmets
: Carry out the operation with the chin guard open.
Bring the antenna outside the helmet, passing it through the hole in the shell (Fig.28)
Pass the Flex cable of the keyboard through the hole in the outer shell. (Fig. 29)
Fig. 28
Fig. 29
Insert the antenna into the groove on the plastic support of the keypad (Fig. 30).
Push the antenna until you hear a click (Fig. 31).
Fig. 30
Fig. 31