8
Unscrew the screw completely and remove it from the system.
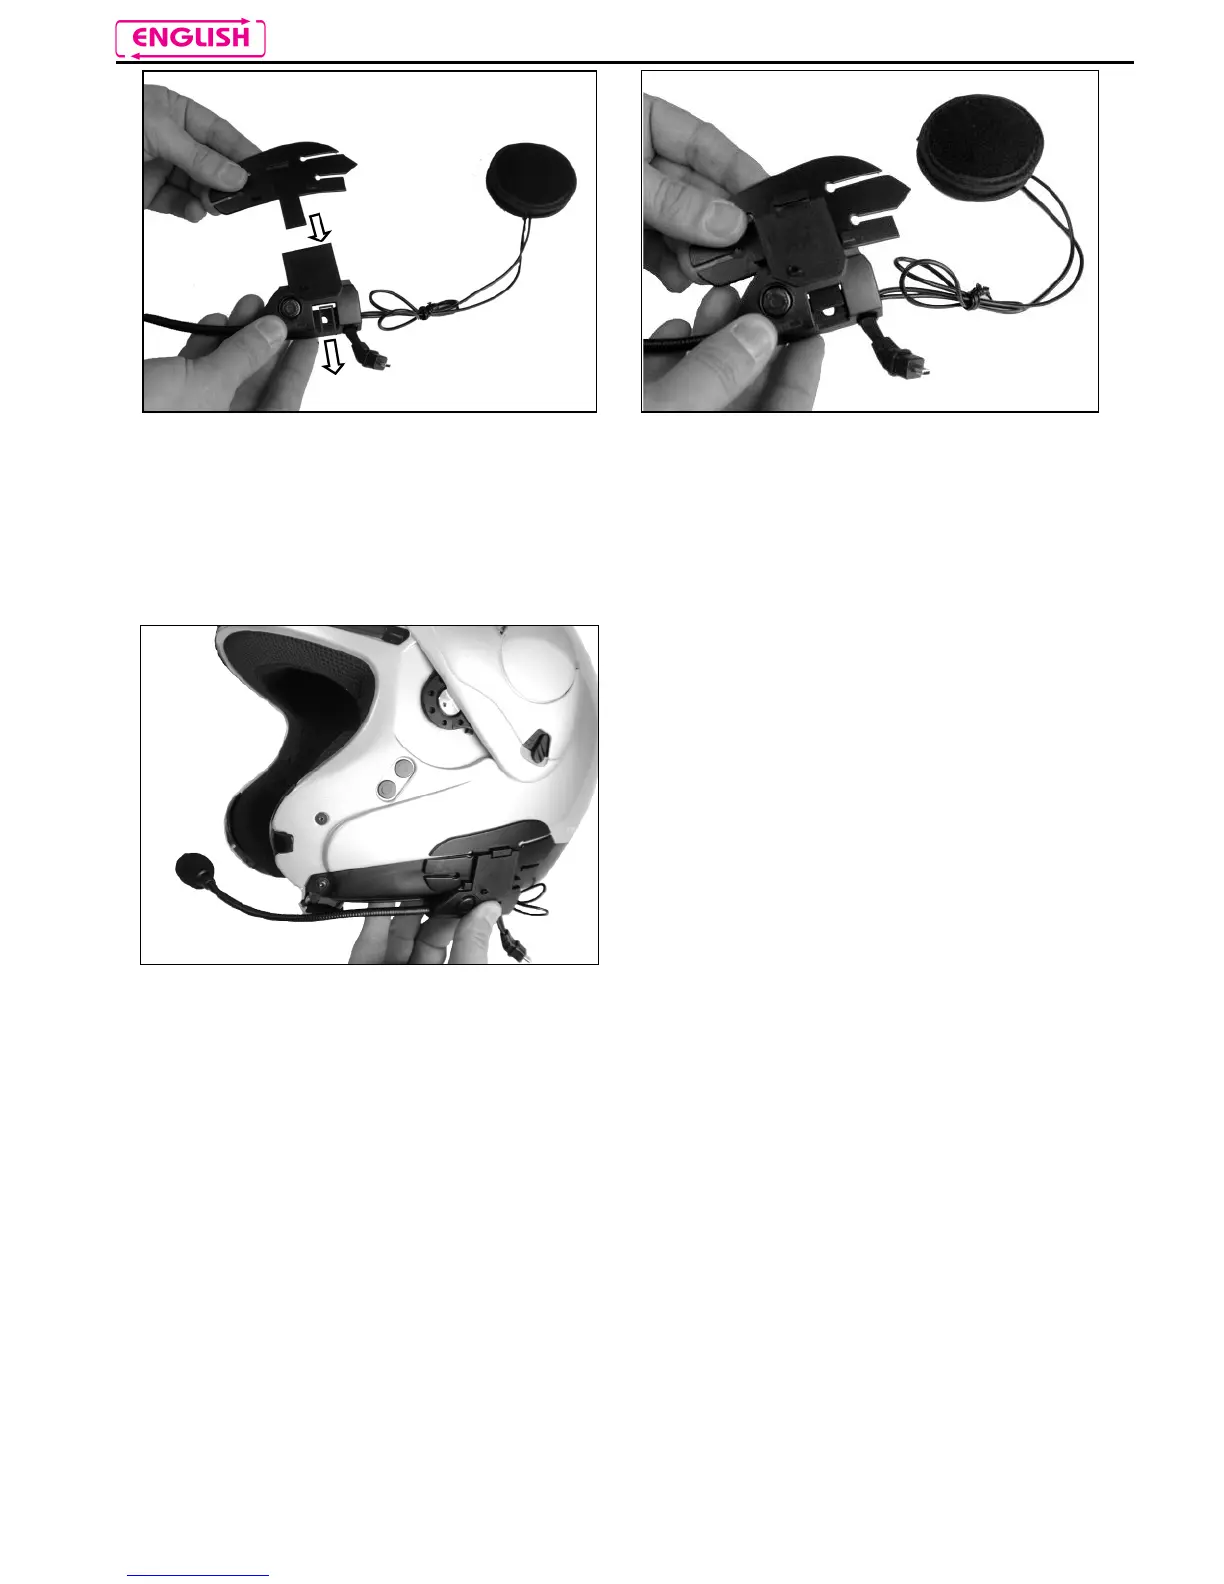
Remove the adhesive rubber (if already in place) and insert the adhesive plate in the wired support
until you hear it click (fig. 4a-4b).
Remove the protective film from the Adhesive Plate and apply the Plate to the helmet, making sure
the entire surface of the adhesive sticks perfectly to the shell.
N.B.: In case the adhesive plate is not in the right position, peel it off immediately from the helmet and
repeat the positioning.
N.B.: It will take up to 24 hours for the adhesive to stick completely. During this time, do not expose the
helmet to atmospheric agents. During the first 12 hours, do not apply the e-box MULTI 3.
Fig. 4a
Fig. 4b
Fig. 5
Thoroughly clean the outer surface of the shell
to ensure that the Adhesive Plate sticks
properly. Before gluing, make sure the shell is
dry and free from oil or dirt.
Before you glue the Adhesive Plate to the helmet,
determine the right spot where the e-box MULTI
will be positioned, making sure that the
microphone ends up precisely in front of the rider’s
mouth (fig 5).