MULTI 3
7
3. INSTALLATION
The MULTI 3 can be installed on the helmet in two different ways, depending on the type of helmet
used: using pliers with screw closing or by gluing the support to the helmet.
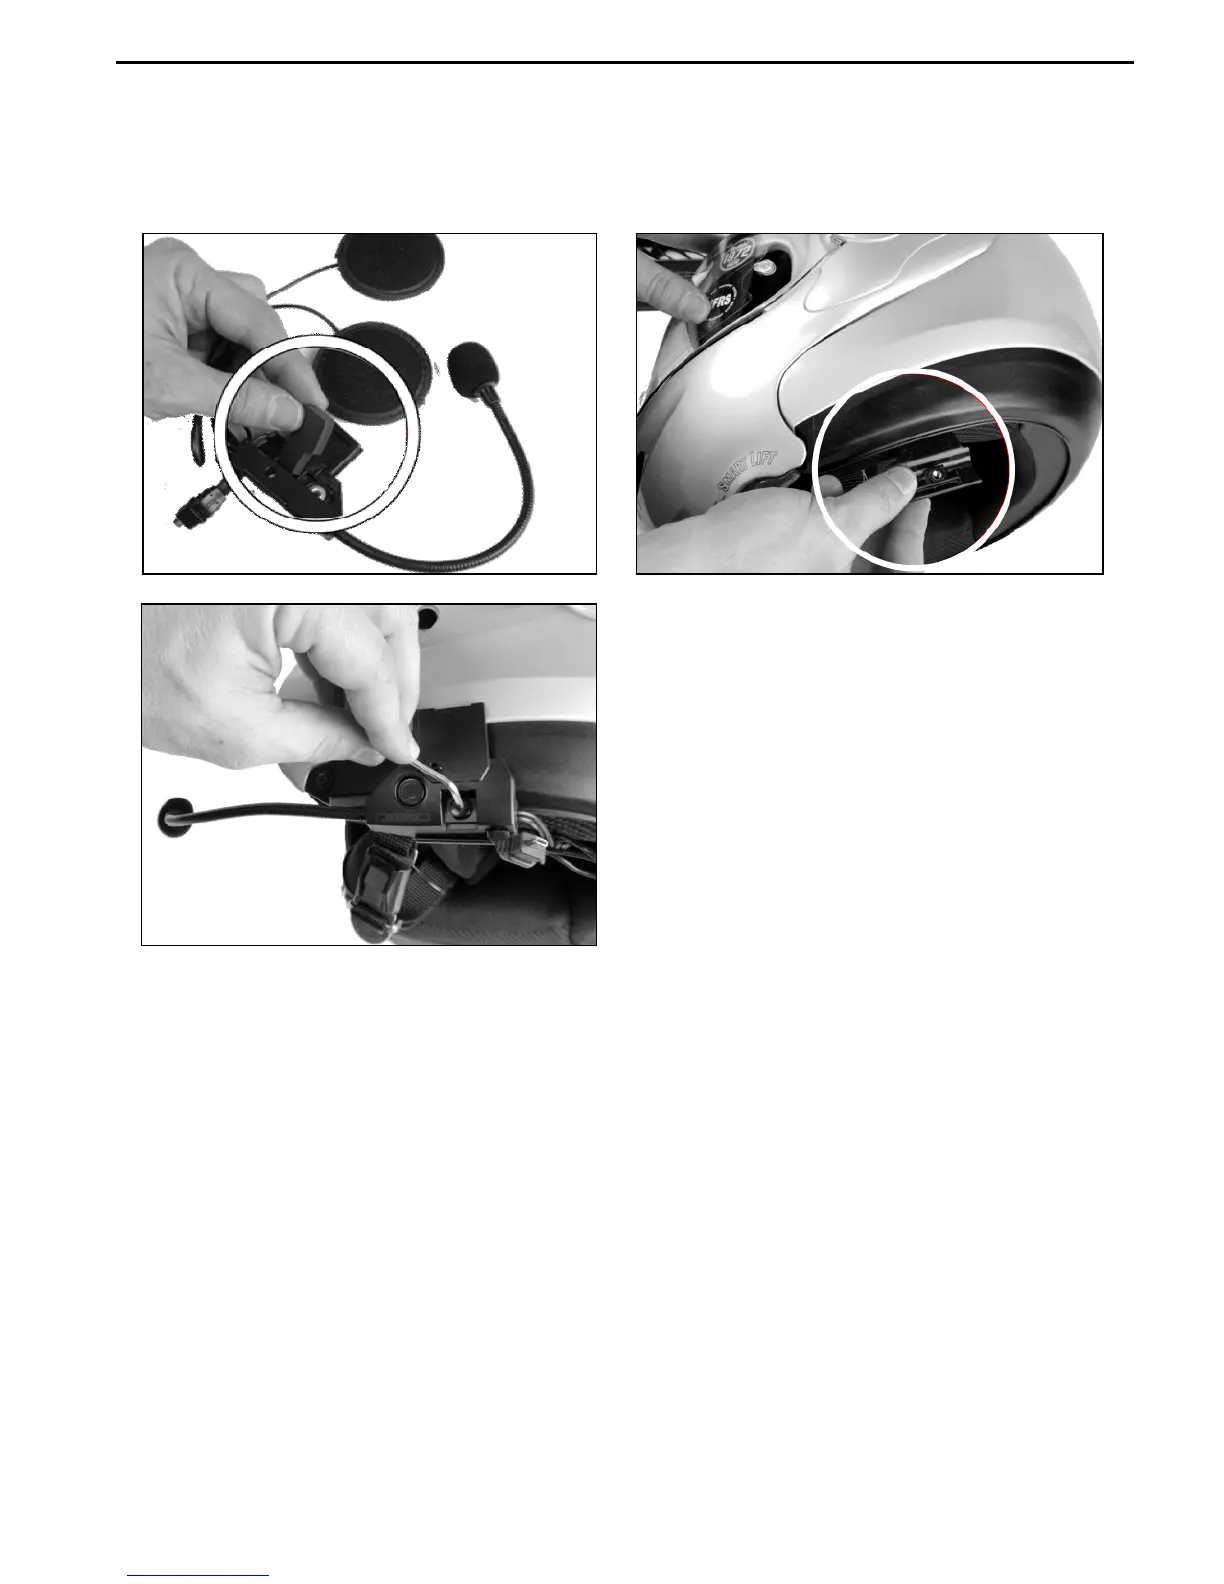
3.1. Fixing with screw pliers
Fig. 1
Fig. 2
Fig. 3
Thoroughly clean the outer surface of the
helmet, left side.
Apply the adhesive rubber to the back of the
wired support (fig 1).
Insert the pliers between the helmet padding
and the outer shell (fig 2).
Insert and tighten the screw, securing the
system to the helmet (fig. 3). Make sure the
rubber is properly positioned on the shell.
Make sure the microphone is positioned
exactly near the mouth.
N.B.: Do not tighten the screw excessively in order to avoid damage to the system components.
Caution: In case the polystyrene support is damaged during the operation, contact your local dealer for
its replacement.
3.2. Fixing with adhesive support
In case it is not possible to use the pliers to secure the system to the helmet, you can use the adhesive
support instead.
Caution: Once the adhesive is applied, it cannot be reused in a different position and will have to be
replaced once removed. Use this fixing method only in situations where it is not possible to secure the
system with the pliers.