EasyManua.ls Logo

Nailor D3001 - User Manual

Default Icon
48 pages
Print Icon
To Next Page IconTo Next Page
Loading...
3/15 IOM-SDTU
Installation and Operation Manual
Single Duct Terminal Units
Nailor Industries Inc. reserves the right to change any information concerning product or specification without notice or obligation.
Page 1 of 4
Receiving Inspection
After unpacking the assembly check it for
shipping damage. If any shipping damage is
found, report it immediately to the delivering
carrier. During unpacking and installation do
not handle by the inlet velocity sensor or the
control package.
Determine Position of the
Control Enclosure
The control enclosure can be installed on
either side of the ductwork by flipping the VAV
unit over 180 degrees. Unit with mercury
contactors, pneumatic controls, and digital
controls (DDC) need to be inspected before
installing.
Important: Unit with mercury contactors is
position sensitive. As a result, before installing
unit with mercury contactors, inspect the
position of the mercury contactors in the
control enclosure. Mercury contactors must be
heading up 90 degrees vertically. If they are
heading down, unscrew the mercury contactors,
rotate 180 degrees, and reinstall them.
If unit is equipped with pneumatic controls, it
should be mounted right side up and level
within ±10 degrees of horizontal, and parallel to
the airflow. The first letter in the model number
indicates control type (P is for pneumatic). If
the unit is mounted upside down, the controller
will have to be repositioned, re-piped, and
recalibrated. Analog control units (A-analog
model number pre-fix) may be installed in any
orientation. Some Digital (DDC) controls
(D-digital model number pre-fix) are position
sensitive dependent on the airflow sensor
transducer. Check with the controls
manufacturer for verification.
Supporting the Assembly
We recommend that each terminal unit be
independently supported, especially when
accessory modules, such as coils, attenuators,
silencers or multiple outlets are present.
Hanger straps may be used and screwed
directly into the sides or bottom of the unit
casing (see Fig. 1). Alternately, a carriage
made of unistrut may be used, somtimes this is
known as a trapeze setup. Support the VAV
and any accessories separately (Fig. 2). When
requested, unit is supplied with field mounted
hanger brackets for use with hanger rod up to
3/8" (9.5) dia. Hanger brackets should be
screwed into the top of the unit casing (see Fig.
3 & 4). Use the support method prescribed for
the rectangular duct in the job specifications.
CONTROL
ENCLOSURE
INLET
OPTIONAL HANGER BRACKET
(FIELD LOCATED
& INSTALLED)
RECTANGULAR
DISSIPATIVE SILENCER
SLIP & DRIVE
CONNECTION
COIL
SECTION
COMPRESSION STRAP ON FLEXDUCT
TO ENSURE AIRTIGHT JOINT
OPTIONAL
ACCESS DOOR
CONTROL
ENCLOSURE
RECTANGULAR
DISSIPATIVE SILENCER
SLIP & DRIVE
CONNECTION
COMPRESSION STRAP ON FLEXDUCT
TO ENSURE AIRTIGHT JOINT
CONTROL
ENCLOSURE
INLET
SLIP & DRIVE
CONNECTION
COMPRESSION STRAP ON
FLEXDUCT TO ENSURE
AIRTIGHT JOINT
OPTIONAL
ACCESS DOOR
COIL
SECTION
RECTANGULAR
DISSIPATIVE
SILENCER
SLIP & DRIVE
CONNECTION
ACCESS
DOOR
VAV
SECTION
DISCHARGE
DUCT
INLET
DUCT
CONTROL
ENCLOSURE
SLIP & DRIVE
CONNECTION
OPTIONAL HANGER BRACKET
(FIELD LOCATED & INSTALLED)
METAL STRAP HANGERS
SECURED TO BUILDING STRUCTURE
INLET
5/16" OR 3/8" (8 OR 10) DIAMETER HANGER RODS
SECURED TO BUILDING STRUCTURE
MINIMUM 2 DUCT DIAMETERS
OF STRAIGHT DUCT
ON AIR TERMINAL INLET
MINIMUM 2 DUCT DIAMETERS
OF STRAIGHT DUCT
ON AIR TERMINAL INLET
MINIMUM 2 DUCT DIAMETERS
OF STRAIGHT DUCT
ON AIR TERMINAL INLET
DISCHARGE
DUCT
DISCHARGE
DUCT
DISCHARGE
DUCT
Figure 1: Support Using Hanger Straps (Shown: Model D30RW - Single Duct VAV
Terminal Unit with Hot Water Heat).
Figure 2: Support Using Unistrut and Rods (Shown: Model 3001Q - Single Duct
Terminal Unit with Dissipative Silencer).
Figure 3: Support Using Optional Supplied Hanger Brackets (Shown: Model
D30RWQ - Single Duct VAV Quiet Terminal Unit with Standard Dissipative
Silencer and Hot Water Heat).
Figure 4: Support Using Optional Supplied Hanger Brackets (Shown: Model
D30HQX - Single Duct VAV Exhaust Terminal Unit with Dissipative Silencer).
Question and Answer IconNeed help?

Do you have a question about the Nailor D3001 and is the answer not in the manual?

Summary

Receiving Inspection

Inspection Procedures

Check unit for shipping damage immediately after unpacking.

Dual Duct Unit Inspection

Procedures for inspecting dual duct units for shipping damage.

Determine Position of the Control Enclosure

Control Enclosure Orientation

Guidance on orienting the control enclosure for proper operation.

Supporting the Assembly

Dual Duct Unit Support

Recommendations for supporting dual duct units.

Duct Connections

Inlet and Outlet Ducting

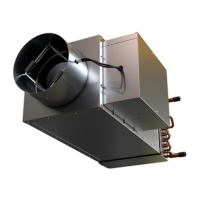
Details on connecting inlet and outlet ducts to the terminal unit.

Dual Duct Connection Guidelines

Guidelines for connecting ducts to dual duct terminal units.

Field Wiring

Wiring Compliance

Guidelines for electrical, control, and piping connections.

Control Start-up and Operation

Control System Operation

Procedures for starting and operating the unit's controls.

Dual Duct Control Procedures

Procedures for starting and operating controls.

Labels

Sample Nameplate Label

Details on information found on the unit's nameplate label.

Diamond Flow Sensor

Sensor Components

Information on the diamond flow sensor and its components.

Recommended Maintenance

Maintenance Guidelines

Maintenance recommendations for the terminal units.

Installation

Control Start-up, Operation

Retrofit Unit Control Procedures

Guidelines for starting and operating the unit.

Bypass Unit Control Procedures

Guidance for starting and operating the unit.

Balancing Procedure

Balancing Steps

Step-by-step guide for balancing the terminal unit.

Mechanical Minimum Stop Field Setting Procedure

Actuator Settings

Instructions for setting minimum stops for pneumatic and electric actuators.

Primary Air Damper and Fan Adjustment

Fan Adjustment Procedures

Steps for adjusting the primary air damper and fan.

General

Safety Precautions

Critical safety warnings and precautions for installation personnel.

Appendix A - MCA and MOP Calculations

MCA and MOP Calculation Guidelines

Formulas and guidelines for calculating Minimum Circuit Ampacity and Maximum Overcurrent Protection.

INSTALLATION

OPERATION

Heater Operational Requirements

Operational requirements for electric heaters, including airflow and static pressure.

Heater Element Rack Replacement

Element Rack Replacement Procedure

Step-by-step instructions for replacing the heater element rack.

Model Series: Diamond Flow Sensor K-Factors

Diamond Flow Sensor K-Factors

Tables of K-factors for different inlet sizes and series.

SETTING AIRFLOW

TROUBLESHOOTING IN MANUAL ADJUST MODE

Manual Mode Troubleshooting Steps

Steps for troubleshooting issues in manual adjustment mode.

EZvav Controllers:

Controller Installation Steps

Step-by-step guide for installing the EZvav controller and making connections.

Configuration

EZvav Configuration Parameters

Overview of parameters for configuring EZvav controllers and sensors.

CTE-5100 Series Thermostats:

Thermostat Installation

Instructions for mounting thermostats via electrical box or hollow wall.

CSP-5002 DAMPER CONTROLLER;ACTUATOR

ANALOG CONTROL CALIBRATION CHARTS

Voltage vs. Airflow Calibration

Charts and formulas for calibrating analog thermostats based on voltage and airflow.

CALIBRATION PROCEDURE FOR AIR VOLUME ADJUSTMENTS

CTE-5101 SINGLE SETPOINT THERMOSTAT

CTE - 5103 DUAL SETPOINT THERMOSTAT

CTE - 5104 DUAL SETPOINT THERMOSTAT

CTE - 5105 DAY; NIGHT THERMOSTAT

REE - 5002 Relay Module Fan with 2 Stage Reheat

REE-5002 Module Description

Description and application of the REE-5002 relay module.

TROUBLESHOOTING PROCEDURE

Troubleshooting Steps

Detailed steps for troubleshooting wiring, connections, and damper movement issues.

Nailor D3001 Specifications

General IconGeneral
ModelD3001
CategoryFan
TypeCeiling Fan
FilterNo
Speed Settings3

Related product manuals