Do you have a question about the Nakamichi CA-5AII and is the answer not in the manual?
Comprehensive safety and operating guidelines for user protection and proper use.
Instructions on cleaning the unit's exterior surfaces without damage.
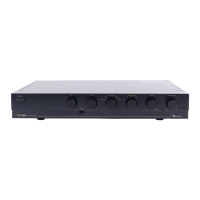
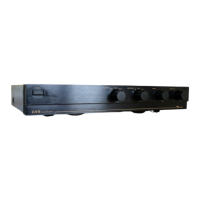
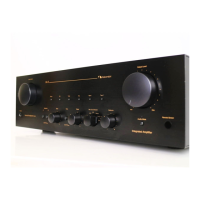
Adjusts bass and treble frequencies to shape the tonal balance of the audio output.
Activates or bypasses the tone control circuits for pure signal path.
Selects the audio source from connected components like CD player or tuner.
Adjusts the relative volume levels between the left and right speaker outputs.
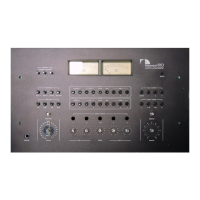
Selects the correct setting for phono cartridges based on type (MM/MC).
Optimizes phono cartridge termination capacitance or gain for best sound.
Selects source or tape playback for monitoring during recording or playback.
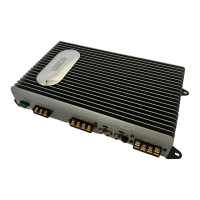
Connection point for an optional system power control strip.
Allows changing the unit's mains voltage for use in different countries.
Specific instructions for connecting a turntable, including grounding.
Detailed explanation of the cartridge selector switch for optimal phono input.
Explains cartridge load/gain selector settings for MM and MC cartridges.
Steps for playing vinyl records using the phono input and controls.
How to play audio from CD players, tuners, and other line-level sources.
Guide for connecting and operating tape decks for recording and playback.
Instructions for transferring audio between two connected tape decks.
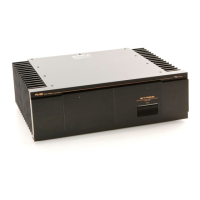
How to connect power amplifiers to the pre-out jacks for audio output.
Steps for connecting the unit to AC power and the sequence for powering on.
Common issues like no power or no sound with their probable causes and remedies.
Detailed technical data including input sensitivity, output levels, and frequency response.
| Phono MC (36 dB Gain) sensitivity | 45 μV/100 ohms |
|---|---|
| Phono MC (30 dB Gain) sensitivity | 85 μV/100 ohms |
| Phono MM sensitivity | 2.5 mV/50 kohms |
| Phono MC (36 dB Gain) SNR | Better than 81 dB |
|---|---|
| Phono MC (30 dB Gain) SNR | Better than 80 dB |
| Phono MM SNR | Better than 88 dB |
| Phono MC (36 dB Gain) max input level | 4.5 mV |
|---|---|
| Phono MC (30 dB Gain) max input level | 8.5 mV |
| Phono MM max input level | 270 mV |
| Pre Out level | 2 V/1 kohms |
|---|---|
| Rec Out level | 50 mV/1 kohms |
| Maximum Output Level | 7 V |
| Bass control | 20 Hz ± 10 dB |
|---|---|
| Treble control | 20 kHz ± 10 dB |
| Total Harmonic Distortion | Less than 0.005% |
| Power Source | 120, 120/220-240, 220 or 240 V AC |
|---|---|
| Frequency | 50/60 Hz |
| Power Consumption | 23 W max |
| Dimensions (W x H x D) | 435 x 103 x 287 mm |
|---|---|
| Dimensions (inches) | 17-1/8 x 2-1/2 x 11-5/16 inches |
| Weight | 5.1 kg, 11 lbs. 4 oz. |