Page 54
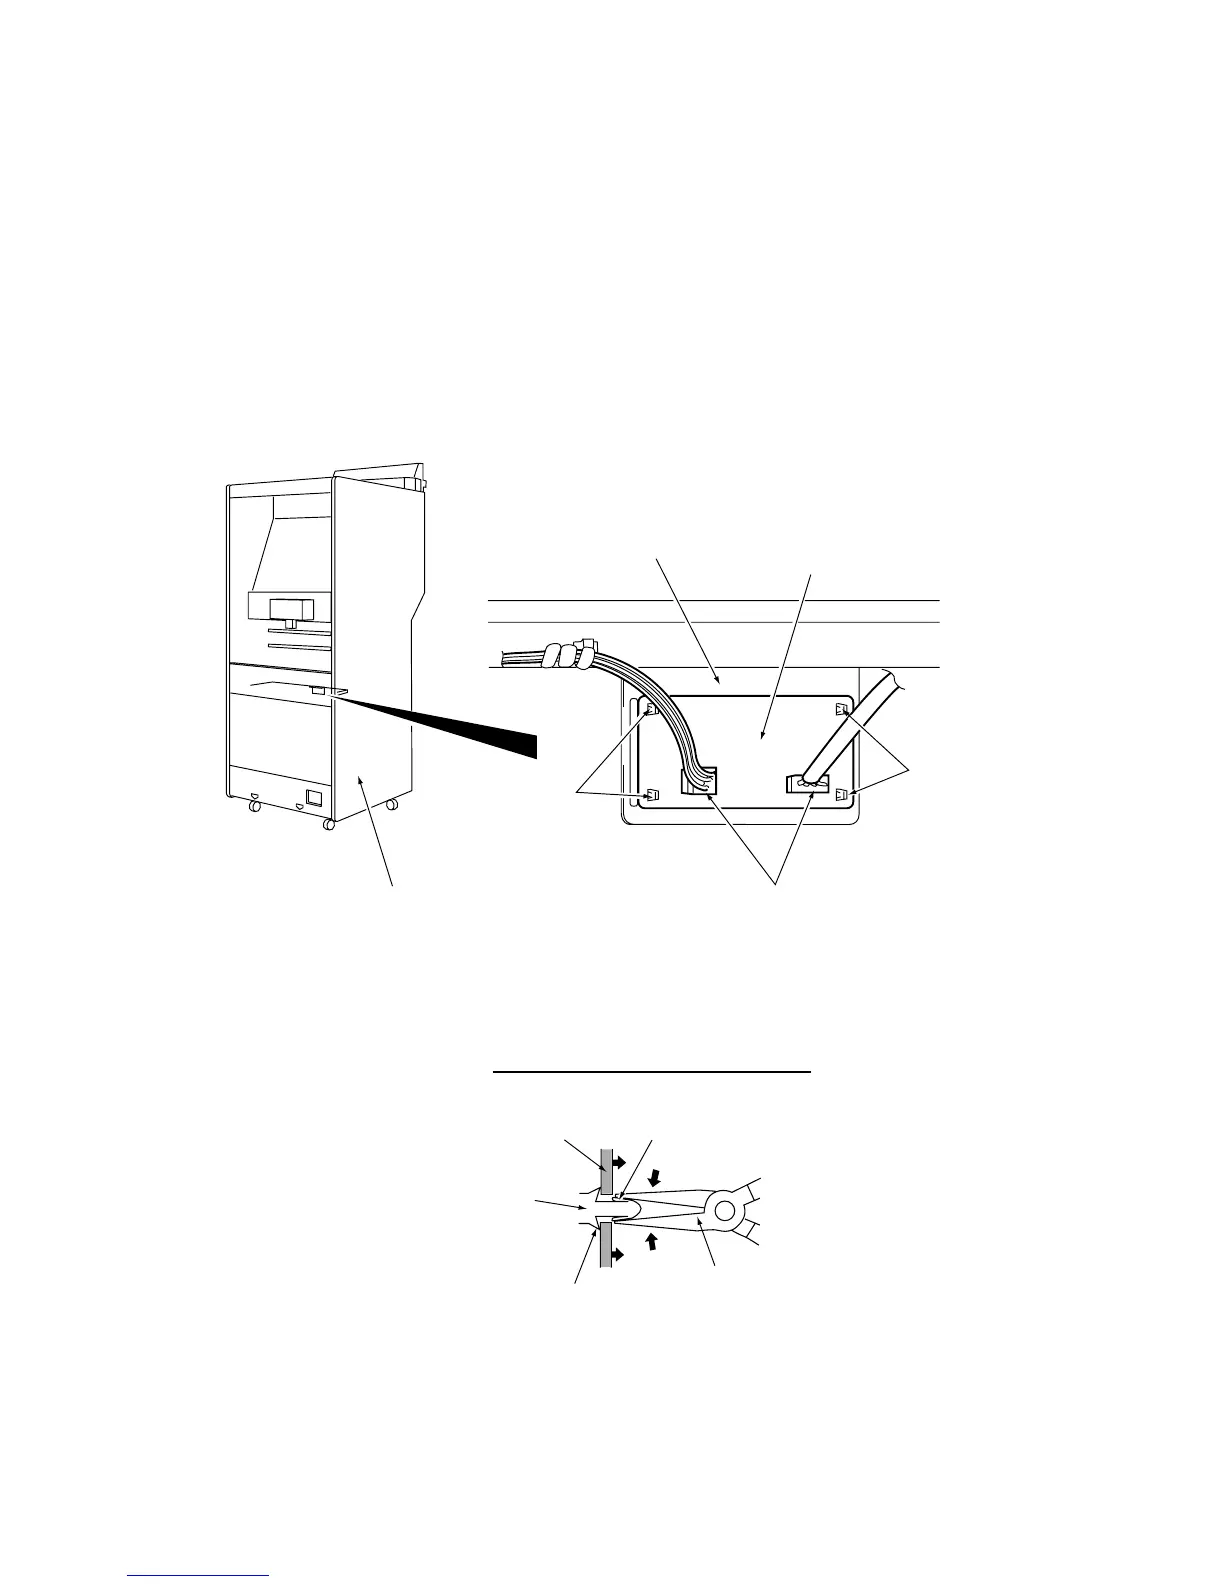
7-3 Replacing the Cup Target Sensor PC Board
1. Remove the upper rear maintenance door from the Target Cabinet.
2. Remove the connectors.
3. Using needle nosed pliers, squeeze the locking tabs of the locking supports, one
at a time, to release the PC Board. Remove the Sensor PC Board.
4. Replace the board by gently pushing the board on to the locking supports.
5. Refit the connectors and upper rear maintenance door.
Target Cabinet
Cup Target
Sensor Bracket
Cup Target
Sensor PC Board
Locking
Supports
Connectors
Locking
Supports
Tab
Needle Nosed
Pliers
Stopper
Locking Support
PC Board
Releasing the Locking Supports
 Loading...