2 StarLink SLE-MAX2-FIRE Commercial Series Sole/Dual-Path Alarm Communicator -- Installation Instructions
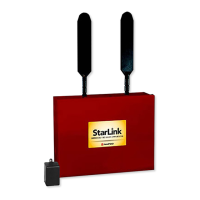
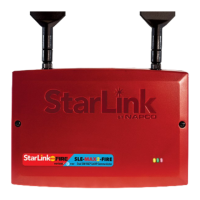
The SLE-MAX2-FIRE is provided with two antennas; only one
antenna is active at a time, and should the communicator have
a loss of adequate signal strength, the unit will connect to the
tower via the other antenna. If neither antenna can connect to
the tower within 200 seconds, a trouble output will be activated.
If using an external antenna such as from the NAPCO StarLink
SLE-ANTEXTXXX Series of Extended Antenna Kits, connect it
to the left antenna connector.
StarLink Fire Self-Supervision
NFPA 72 requires that any fire communicator trouble be locally
annunciated by the fire panel within 200 seconds of the trouble.
The troubles include loss of signal, NOC supervision check-in
failure, etc. The StarLink MAX2 Fire communicator model in-
cludes a "Self-Supervising Fire Communicator" feature that
allows the communicator to annunciate a communication trou-
ble without the need for wiring to an FACP zone input or any
FACP reprogramming. This is accomplished by dropping the
emulated phone line voltage to the FACP secondary phone
line, causing the FACP to annunciate communication trouble.
To enable Self-Supervision, simply remove Jumper JP2. Note
that when using Self-Supervision, some FACPs may require
the Jumper J7 shunt to be removed for the Primary Phone line
to restore correctly. To also report a communicator trouble to
the central station, enable the feature "Tip/Ring Wiring Fault
Report" in the Advanced tab in the StarLink NOC.
ADDITIONAL COMPONENTS
In addition to the SLE-MAX2-FIRE listed above, the following
sub-assemblies are available:
SLE-WIFI-MODULE - Allows your NAPCO StarLink device to
connect to the Internet by means of a wireless (Wi-Fi) link,
eliminating a wired Ethernet cable connection. Note: 7AH
battery required when using the SLE-WIFI-MODULE. For
more information, see WI2191. Not Certified for Commer-
cial or Residential Burglary.
SLE-FIRE-VR - Control Panel Voltage Drop Kit (see WI2580).
SLE-DLCBL - Download Cable, 6 feet.
SLE-ANTEXT30 – Antenna kit* with 30 feet of LMR 300 cable.
SLE-ANTEXT50 - Antenna kit* with 50 feet of LMR 300 cable.
SLE-ANTEXT75 - Antenna kit* with 75 feet of LMR 400 cable.
SLE-ANTEXT100 - Antenna kit* with 100 feet of LMR 400 ca-
ble.
SLE-ANTEXT04 - Antenna kit * with 4 feet of LMR 300 cable.
Ideal for installations that may require a few extras dBs of
gain but running the external cable may not be practical.
SPECIFICATIONS
Electrical Ratings for +12V / 24V (powered by the control
panel)
†
• Input Voltage: 10-24VDC regulated (power-limited output
from Certified control panel Aux/Remote Fire Power).
IMPORTANT: Powering the communicator with DC voltage
above 27.5VDC could cause damage; if the control panel out-
put voltage is operating between 27.5 - 30.7VDC, the SLE-
FIRE-VR Control Panel Voltage Drop Kit is available to main-
tain the communicator input voltage below 27.5VDC. Abso-
lute maximum input voltage with SLE-FIRE-VR
installed is 30.7VDC and FWR (Full Wave Rectification
voltage) is NOT supported.
• Input Current:
10VDC standby: 115mA
12VDC standby: 101mA
15VDC standby: 92mA
24VDC standby: 85mA
Wi-Fi Module: (Optional) Add 45mA to the above.
(With peak RF transmission current of 325mA).
Electrical Ratings for the IN 1 Fire Input:
• Input Voltage: 9-25VDC.
• Maximum Input Current: Up to 2mA from FACP NAC cir-
cuit
Electrical Ratings for IN 2, IN 3, IN 4, and IN 5:
(Inputs IN 2, IN 3, IN 4, and IN 5 are Class B)
• Maximum Loop Voltage: 25VDC input.
• Maximum Loop Current: 1.7mA
• End of Line Resistor (EOLR) Value: 10K
Electrical Ratings for PGM3 Output:
• Open Collector Output: Maximum Voltage 25VDC.
• Maximum PGM Sink Current: 50mA (up to 15VDC),
25mA (15.1VDC - 25VDC)
Physical (W x H x D)
• Plastic Housing: 8 x 5-
29
/
64
x 1½" (20.3 x 13.9 x 3.8cm)
• Mounting: Plastic housing includes three keyhole slots for
triple gang boxes (see scale template on page 13);
• Antenna Length: 8.25" (21cm)
Environmental
• Operating Temperature: 0°C - 49°C (32°F - 120°F)
• Humidity: Maximum 93% Non-Condensing
• Indoor / dry location use only
TERMINAL DESCRIPTIONS
Configure all inputs and outputs using the Management Cen-
ter screen (located at www.NapcoNOC.com). Located at the
bottom of the StarLink communicator PC board, the terminals
are described as follows:
TB1: PWR (+10 - 25VDC)
(Refer to section "STEP 4: APPLY POWER")
TB2: PWR GND (–)
(Refer to section "STEP 4: APPLY POWER")
TB3: PGM3 (–): Open collector output that goes active low
when the dealer-defined option occurs; see the NAP-
CO NOC (www.NapcoNOC.com) to configure options
for PGM activation.
TB4: IN 1 (+): Smart Channel input. Active high input for
wiring to the control panel bell output. When this input
detects a steady input, it sends a burglary alarm; a
pulsing temporal 3 high, it sends a Fire alarm; a puls-
ing temporal 4 (CO Alarm), a CO alarm is sent. When
used, these conductors must be run in conduit (max 3
feet for Residential Fire; max 20 feet for Commercial
Fire).
TB5: IN 2 (+): Fire Trouble input**. Wire to FACP trouble
relay N/O with parallel 10K EOLR at FACP.
†
For Commercial Fire installations, a UL Certified Fire Alarm regulated power supply or FACP regulated auxiliary output is required.
*All antenna kits include high quality/low loss LMR 300 or 400 Coax Type N male to SMA male terminated cable, all mounting hardware and StarLink SLE-
ANTEXT-ISO Commercial Fire Ground Fault Isolation Plate to ensure that the external antenna will not cause ground fault system troubles. (Any suitable
external cellular antenna is permitted by UL). Always follow the manufacturer's installation instructions. Note: Antennas are not Certified by UL.
**Factory programmed options; may be changed at the NOC website (www.NapcoNOC.com).
 Loading...