© National Instruments | B-3
RMC-8356 User Manual
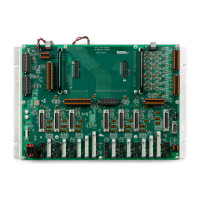
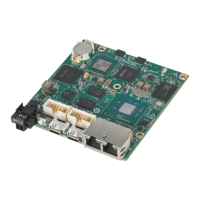
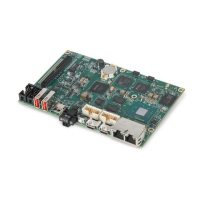
Note Figure B-1 shows three motherboard layouts. The motherboard has the
features shown above except for the LAN3 and LAN4 ports and their associated
jumpers.
Note Jumpers not identified are for test purposes only.
Caution There is a danger of explosion if the onboard battery is installed upside
down (which reverses its polarities). This battery must be replaced only with the same
or an equivalent type recommended by the manufacturer (CR2032).
Caution To prevent damage to the power supply or motherboard, use a power
supply with a 24-pin and one 8-pin power connectors. Be sure to connect these
connectors to the 24-pin (JPW1) and one 8-pin (JPW2) power connectors on the
motherboard. Failure to do so voids the manufacturer warranty on your power supply
and motherboard.
Note When the LED4 LED is on, the onboard power connection is on. Be sure to
unplug the power cables before removing or installing components.
Table B-1. Jumper Descriptions
Jumper Description Default Setting
JBT1 CMOS clear Open (Normal)
JI
2
C1/JI
2
C2 SMB to PCI Express slots Enable/Disable Pins 1-2 (Enabled)
JPB1 BMC Enable/Disable Pins 1-2 (Enabled)
JPG1 VGA Enable/Disable (Disabled by default) Pins 1-2 (Enabled)
JPL1/JPL2 LAN1/2 Enable/Disable Pins 1-2 (Enabled)
JPME2 Manufacturing Mode Pins 1-2 (Normal)
JVRM1 VRM SMB Clock (to BMC or PCH) Pins 1-2 (BMC, Normal)
JVRM2 VRM SMB Data (to BMC or PCH) Pins 1-2 (BMC, Normal)
JWD1 Watchdog Pins 1-2 (Reset)
 Loading...