16
ASSEMBLY
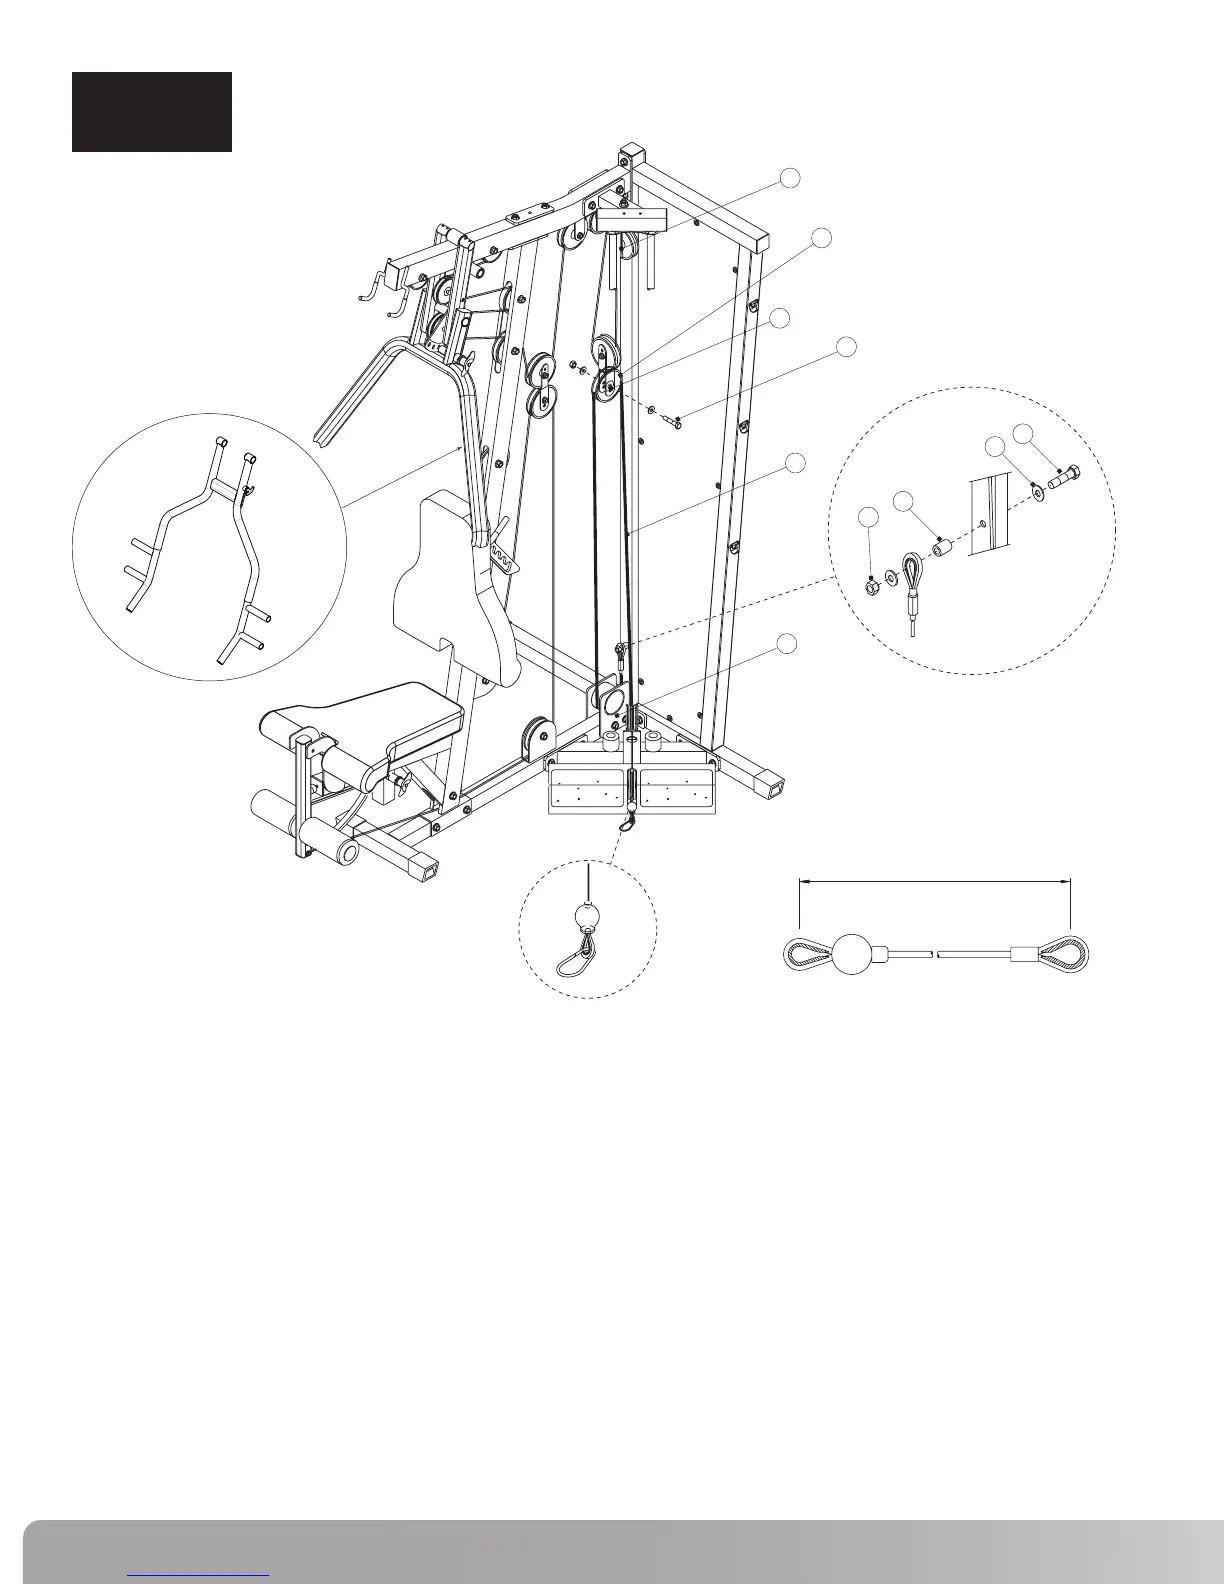
STEP 8
Step 8 Components: Procedure:
# Component Qty
A.
Loop Cable #1 (41) around a 4 ½” Pulley (13) and place in Double Floating
Pulley Bracket (40) shown. Attach Pulley to bracket in the inner hole using
the hardware shown. Tighten hardware securely.
B. Wrap Cable #1 (41) under Cable Housing (7) and attach termination to
Rear Frame using hardware shown in Detail B. DO NOT OVER TIGHTEN.
If cable termination does not reach the connection hole on Rear Frame,
adjust Pulleys (13) in the Double Floating Pulley Bracket (40) to Increase
cable length.
C.
Once all cables have been installed, align Floating Pulley Bracket (11) so
that Cable #2 is vertical and does not rub against the Floating Pulley
Bracket. Tighten hardware firmly so that the Floating Pulley Bracket (11)
will not spin.
Note: This cable termination is used for exercise attachments such as a
leg press. If an attachment is used, do not install Cable Housing (7).
Please refer to attachment instructions for installation.
13
41
48
54
59
61
62
4 ½” Pulley
Cable #1 - Low Row (136.5”)
Hex Bolt 3/8” x 4”L
Hex Bolt 3/8” x 2”L
3/8” Flat Washer
3/8” Lock Nut
Pulley Spacer
1
1
1
1
4
2
1
136.5” (3470mm)
13
54
40
11
41
7
48
59
62
61
4”L
2”L
A
B
NS200X Press Arm
 Loading...