9
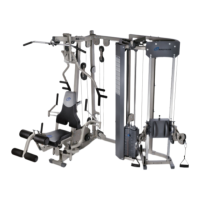
Nautilus NS200X
1
2
3
4
8
10
11
44
45
47
49
50
59
61
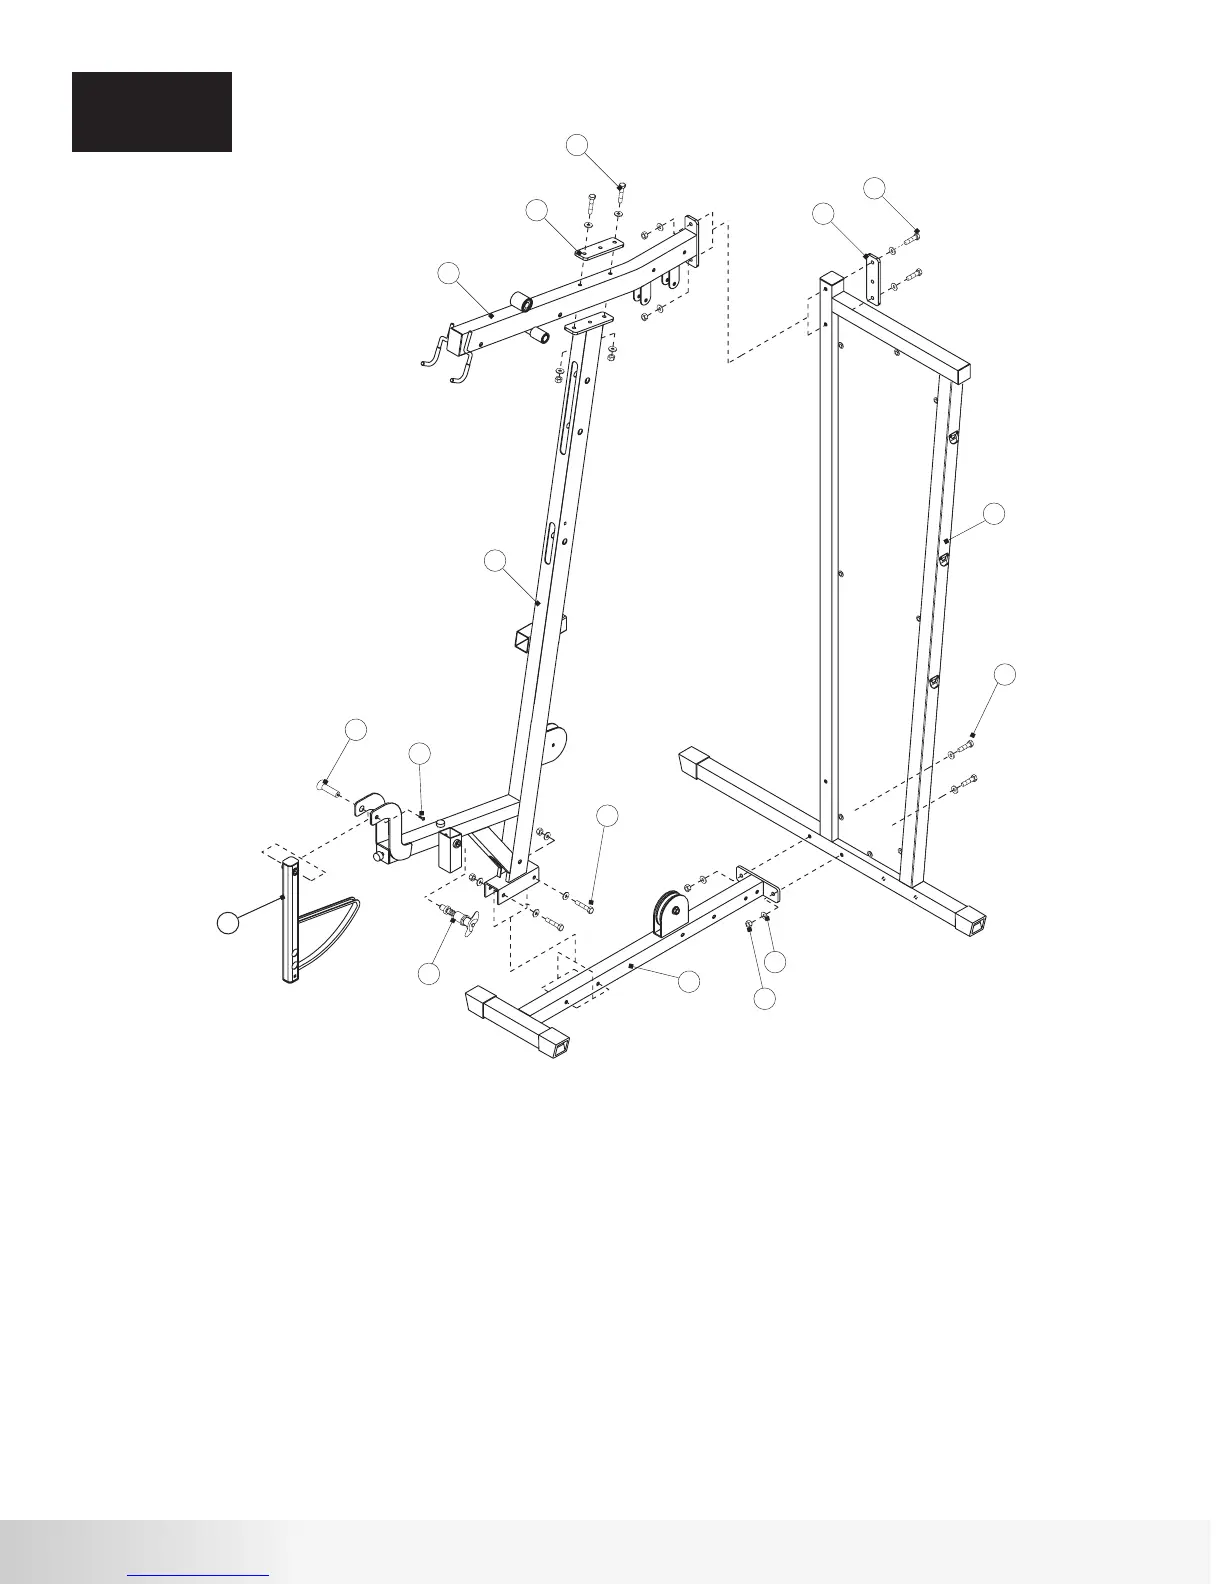
Procedure:
ASSEMBLY
STEP 1
# Component Qty
Step 1 Components:
Main Base Frame
Rear Frame
Front Upright Frame
Top Frame
2 inch Backing Plate
Leg Extension Assembly
Pop Pin - Seat Adjustment
Flat Head Screw - M8
Flat Head Screw - M4
Hex Bolt 3/8” x 4 1/4”L
Hex Bolt 3/8” x 3 1/4”L
Hex Bolt 3/8” x 3”L
3/8” Flat Washer
3/8” Lock Nut
1
1
1
1
2
1
1
1
1
2
2
4
16
8
A.
Attach Main Base Frame (1) to Rear Frame (2) using
hardware shown. Tighten hardware firmly.
B. Attach Front Upright Frame (3) to Main Base Frame (1)
using hardware shown. Do not tighten hardware.
C. Attach Top Frame (4) to Front Upright Assembly (3) using
hardware shown and 2” Backing Plate (8). Do not tighten
hardware.
D. Attach Top Frame (4) to Rear Frame (2) using hardware
shown and 2” Backing Plate (8). Tighten all hardware used
in steps B, C, and D firmly.
E. Attach Leg Extension Assembly (10) to Front Upright Frame
(3) using hardware shown. Tighten hardware securely making
sure that the Leg Extension Assembly can rotate freely.
F. Attach Pop Pin (11) to Front Upright Assembly (3) as
shown. Tighten securely using adjustable wrench.
1
11
50
61
59
50
2
10
44
45
3
4
8
47
8
49
4 1/4”L
3”L
3”L
3 1/4”L
 Loading...