www.NavePoint.com 8 customerservice@navepoint.com
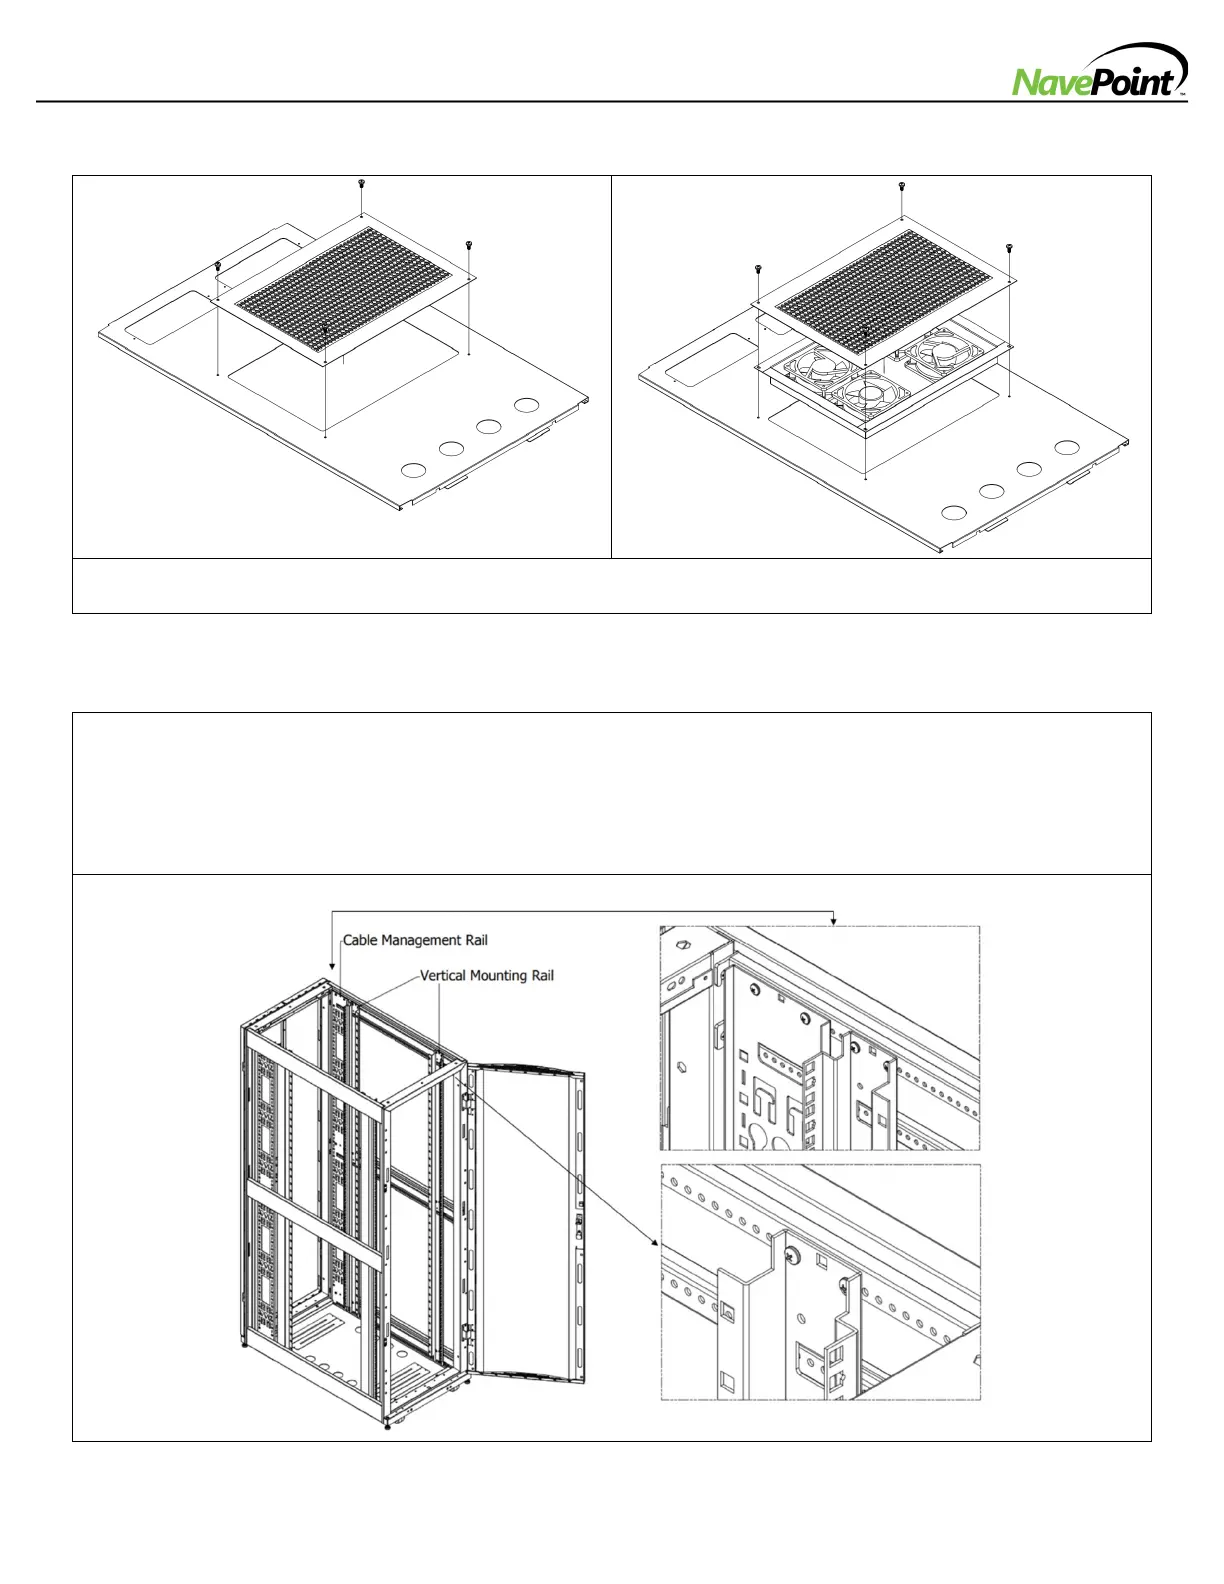
-Optional Cooling Fan for Fan Top Panel (Sold Separately)
1: Unscrew the perforated panel.
2: Attach Cooling Fan Panel into the opening on the Top Panel and fasten with screws provided.
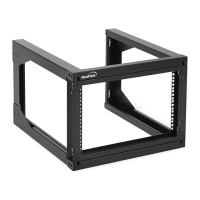
-Adjusting Vertical Mounting Rails and Cable Management Rails
1: Each Vertical Mounting Rail is connected to the enclosure with 6 screws (1 pair at the top beam, 1 pair at the
middle beam and 1 pair at the bottom beam.
2: Adjust the rails by sliding them to the desired depth and secure them with the 6 screws described above.
3: Slide the mounting rails to the desired depth and reattach them.
The depth of the 2 Cable Management Rails can be adjusted using the same method. The rail attachment points are
numbered to help you align each pair of rails at the same depth.