2. Connecting the projector and computer by wire-
less LAN
Please purchase a separately sold wireless LAN unit to connect the projector and computer
by wireless LAN.
The network settings of the computer, smartphone and tablet terminal must be
set so that the IP addresses are acquired automatically.
There should be no problem with normal network settings, but be careful when
using special settings.
When the settings are changed so that the IP addresses are acquired automati-
cally, the currently set IP addresses are cleared. Be sure to make a note of the cur-
rently set IP addresses, subnet masks, gateways, DNS servers, etc., beforehand.
2-1. Displaying the projector’s wireless LAN standby screen
When connecting the projector with a computer, smartphone or tablet terminal by wireless
LAN, but sure to display the projector’s wireless LAN standby screen.
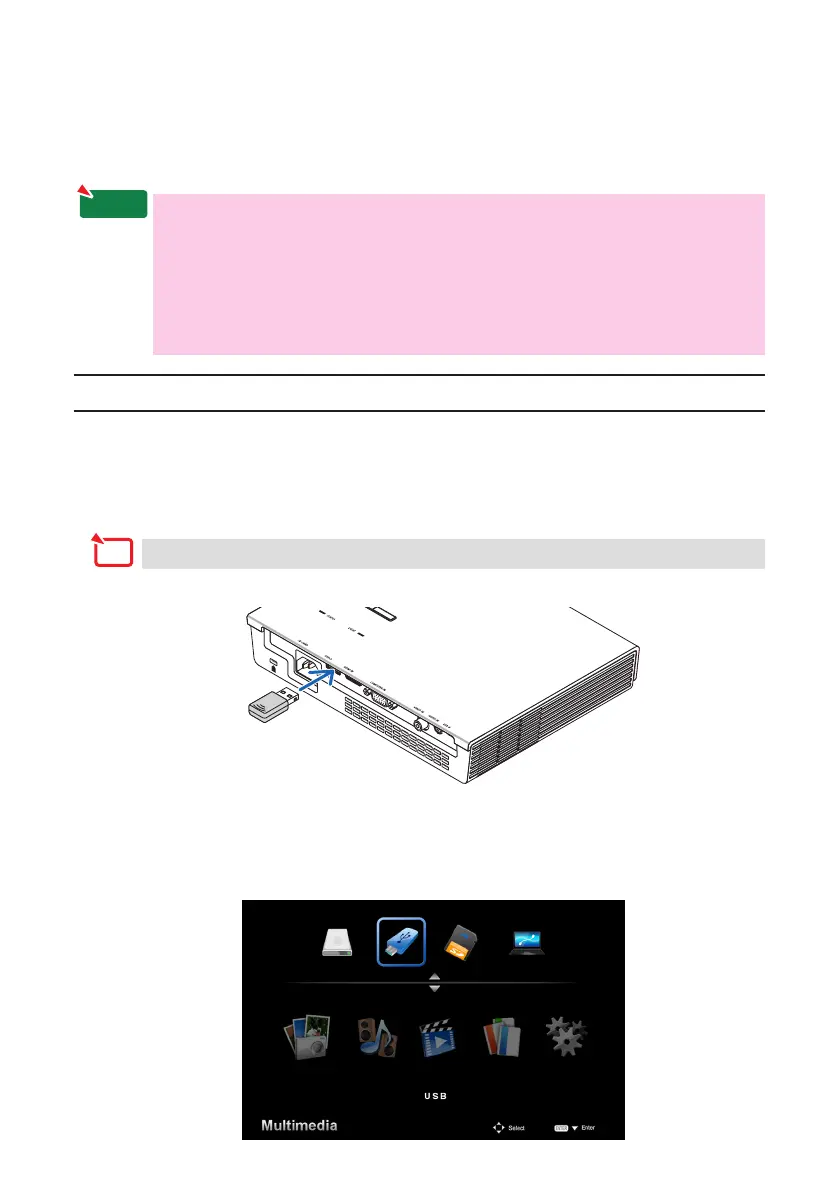
1. With the projector’s power turned off, connect the wireless LAN unit to the projector’s
USB-A port.
The projector’s USB-A port does not support USB hubs.
2. Turn on the projector’s power and display its image on the screen.
3. Press the (USB-A) button on the remote control.
The Multimedia screen is displayed.