Do you have a question about the NEC LT157 and is the answer not in the manual?
Details on what is covered and excluded by the warranty, including serial number requirements.
Steps required to get warranty service, including proof of purchase and contact procedures.
Information on implied warranties and damages not covered by the limited warranty.
Contact details for obtaining more information or warranty service.
General safety precautions, cautions, and important operational notes for the projector.
Information regarding radio frequency interference and FCC rules.
Compliance statements for Canadian interference regulations and acoustic noise.
Recommendations for safe and proper projector installation.
Guidelines for safe handling of power cables and cleaning the projector.
Safety measures related to the projector lamp and preventing fire or shock.
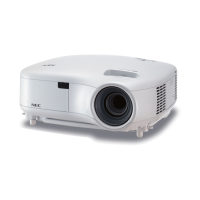
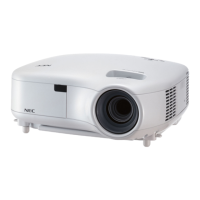
Overview of the LT158/LT157 projector and its basic features.
Highlights key features like NSH lamp, remote control, and PC Card Viewer.
Initial guidance on setting up and using the projector for the first time.
Identification of controls and features on the front and side of the projector.
Identification of ports and features on the rear and side of the projector.
Identification of features located on the bottom of the projector.
Identification of controls located on the top of the projector.
Information on remote control operating range and function switch.
Instructions for battery installation and handling precautions for the remote.
Detailed explanation of each button on the remote control.
How to switch between computer and projector operation modes.
Description of various input connectors like Audio, RGB, S-Video, and Video.
Details on ports for computer control and USB mouse connectivity.
Information on power connection and the Kensington security slot.
Guidance on setting up the projector and choosing a suitable location.
Chart showing recommended distances for various screen sizes.
Information and precautions for mounting the projector on a ceiling.
Instructions for setting up image reflection using a mirror.
Diagrams for connecting VCR, DVD player, and document cameras.
Diagrams for connecting PC and Macintosh computers.
Steps for connecting the LT157 projector to a PC.
Steps for connecting the LT158 projector via DVI.
Procedure for connecting the power cable and initial startup.
How to turn the projector on and off using the power button.
How to choose the input source for the projected image.
Using the zoom lever and focus ring to adjust the image.
Automatic optimization of image position, clock, and phase.
Choosing between computer, video, S-video, or PC Card Viewer inputs.
Using the Auto Adjust button to optimize RGB image quality.
How to use the projector's built-in pointer for presentations.
Functionality for zooming and panning the projected image.
Navigation and operation of the projector's on-screen menu system.
Steps to customize the projector's menu items.
Instructions for operating menus using a connected USB mouse.
Details on configuring different input sources for the projector.
Explanation of various picture adjustment settings.
How to correct trapezoidal image distortion.
Selecting between Normal and Eco lamp modes for extended life.
Options for choosing the display aspect ratio of the image.
Adjusting video noise reduction levels.
Manual adjustment of image position, clock, and phase.
Adjusting gamma for different lighting conditions.
Selecting the appropriate color matrix type for signals.
Adjusting white balance for RGB color levels.
Setting how long the on-screen menu remains visible.
Configuring on-screen messages like 'No Input' or 'Clean Filter'.
Customizing behavior of direct buttons, volume, and keystone bars.
Setting image orientation and cinema aspect ratio.
Configuring display background and USB mouse settings.
Settings for PC Card Viewer features and image capture.
Choosing signal types for input sources like RGB and Video.
Settings for automatic power-on and power management.
Options for power-off confirmation and saving keystone settings.
Procedures for resetting lamp hour meter and filter usage.
Settings for PC control communication speed and panel key lock.
Setting the default input source when the projector is turned on.
Accessing and managing files stored on a CompactFlash card.
Capturing displayed images and saving them to CompactFlash.
Using the chalkboard tool for freehand drawings.
Overview of the PC Card Viewer's capabilities and user-friendliness.
Details on image quality and the associated utility software.
Instructions for inserting and removing CompactFlash cards.
Steps to take before installing the PC Card Viewer software.
Step-by-step guide for installing the PC Card Viewer software.
How to launch and use the PC Card Viewer software on a computer.
How to display presentation slides from a CompactFlash card.
Procedure for deleting captured images from the projector.
Conditions and methods for viewing digital images.
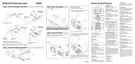
Step-by-step instructions for replacing the projector lamp.
Meaning of projector power and status light messages.
Guide to resolving common issues encountered with the projector.
Technical details of the LCD panel, lens, and lamp.
Information on video bandwidth, resolution, and power requirements.
Dimensions, weight, and environmental operating conditions.
Operating temperatures, humidity, and compliance standards.
Pinout details for the analog RGB D-Sub 15-pin connector.
Pinout details for the DVI digital connector.
Diagram illustrating the cable connection for PC control.