| Matrix size | 0.76 \ |
|---|
| Native aspect ratio | - |
|---|
| Projection distance | 0.74 - 20.9 m |
|---|
| Projection technology | LCD |
|---|
| Contrast ratio (typical) | 10000:1 |
|---|
| Screen size compatibility | 40 - 500 \ |
|---|
| Projector native resolution | 1080p (1920x1080) |
|---|
| Keystone correction, vertical | -30 - 30 ° |
|---|
| Vertical synchronization (max) | 120 kHz |
|---|
| Vertical synchronization (min) | 24 kHz |
|---|
| Keystone correction, horizontal | -40 - 40 ° |
|---|
| Horizontal synchronization (max) | 153 kHz |
|---|
| Horizontal synchronization (min) | 15 kHz |
|---|
| 3D | No |
|---|
| Full HD | Yes |
|---|
| Supported video modes | 480i, 480p, 576i, 576p, 720p, 1080i, 1080p, 2160p |
|---|
| Analog signal format system | NTSC, NTSC 4.43, PAL, PAL 60, PAL M, PAL N, SECAM |
|---|
| Supported graphics resolutions | 640 x 480 (VGA), 800 x 600 (SVGA), 1024 x 768 (XGA), 1280 x 1024 (SXGA), 1400 x 1050 (SXGA+), 1600 x 1200 (UXGA), 1920 x 1080 (HD 1080), 1920 x 1200 (WUXGA), 2560 x 1600 (WQXGA), 4096 x 2160 |
|---|
| Lamp power | 420 W |
|---|
| Lamps quantity | 1 lamp(s) |
|---|
| Light source type | Lamp |
|---|
| Service life of light source | 3000 h |
|---|
| Service life of light source (economic mode) | 5000 h |
|---|
| Focus | Auto |
|---|
| Focal length range | - mm |
|---|
| Vertical lens shift range | -0.1 - 0.6 ° |
|---|
| Horizontal lens shift range | -0.3 - 0.3 ° |
|---|
| Number of optional lenses supported | 8 |
|---|
| HDMI connector type | Full-size |
|---|
| Serial interface type | RS-232 |
|---|
| USB 2.0 ports quantity | USB 2.0 ports have a data transmission speed of 480 Mbps, and are backwards compatible with USB 1.1 ports. You can connect all kinds of peripheral devices to them. |
|---|
| S-Video inputs quantity | 0 |
|---|
| Noise level | 39 dB |
|---|
| Certification | UL60950-1, FCC 15 B (ANSI C63.4.2014), C22.2 No.60950-1-07, ICES-003 6 (ANSI C63.4:2014) |
|---|
| Noise level (economic mode) | 33 dB |
|---|
| Power source | AC |
|---|
| AC input voltage | 100 - 240 V |
|---|
| AC input frequency | 50 - 60 Hz |
|---|
| Power consumption (standby) | 0.7 W |
|---|
| Power consumption (typical) | 566 W |
|---|
| Power consumption (PowerSave) | - W |
|---|
| Power consumption (economy mode) | 390 W |
|---|
| Storage temperature (T-T) | -10 - 50 °C |
|---|
| Operating temperature (T-T) | 5 - 40 °C |
|---|
| Operating relative humidity (H-H) | 20 - 80 % |
|---|
| Placement | Desktop |
|---|
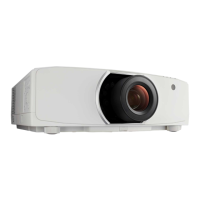
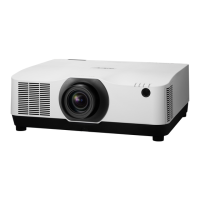
| Product type | Large venue projector |
|---|
| Product color | White |
|---|
| RMS rated power | 10 W |
|---|
| Harmonized System (HS) code | 85286200 |
|---|