English Français
[First] Remove the cable cover.
1. Loosen the cable cover screws.
2. Remove the cable cover.
① Push up the cable cover slightly to release the bottom part.
② Pull the cable cover while pushing and holding the arrow part.
❶ Connect your computer to the projector using the supplied
computer cable (VGA).
❷ Connect the supplied power cord.
Attach the cable cover and tighten the cable cover screws.
❸ Turn on the projector.
Press the
(POWER) button on the projector cabinet or the POWER ON button on the
remote control.
❹ Select a source.
TIP:
Press the AUTO ADJ. button to optimize an RGB image automatically.
❺ Adjust an image size and the position.
[TILT]
Rotate the tilt foot to adjust the left and right tilt.
[FOCUS]
Rotate the focus ring on the right side of the projector.
[DIGITAL ZOOM]
1. Press the ZOOM button on the remote control to display the DIGITAL ZOOM bar.
2. Press the ▲ or ▼ button.
❻ Correct the Keystone-type distortion.
1. Press the ▼ button on the projector cabinet or the KEYSTONE button on the remote
control to display the KEYSTONE menu.
2. Press the ▼ button to select [VERTICAL] and then use the ▲ or ▼ so that the left and
right sides of the projected image are parallel.
* When correcting the vertical keystone distortion.
❼ Turn off the projector.
1. Press the
(POWER) button on the projector cabinet or the STANDBY button on the
remote control.
2. Press either the
(POWER) or the STANDBY button again.
3. Disconnect all the cables.
[En premier] Retirez le cache-câbles.
1. Desserrez les vis du cache-câble.
2. Retirez le cache-câble.
① Poussez le cache-câble légèrement pour libérer la partie inférieure.
② Tirez le cache-câble tout en maintenant enfoncée la partie avec la flèche.
❶ Branchez votre ordinateur au projecteur à l’aide du câble
d’ordinateur fourni (VGA).
❷ Branchez le cordon d’alimentation fourni.
Fixez le cache-câble et serrez les vis du cache-câble.
❸ Allumez le projecteur.
Appuyez sur la touche
(POWER) sur le boîtier du projecteur ou sur la touche POWER ON de la
télécommande.
❹ Sélectionnez une source.
ASTUCE :
Appuyez sur la touche AUTO ADJ. pour optimiser automatiquement une image RVB.
❺ Ajuster la taille et la position d’une image.
[INCLINAISON]
Tournez le pied à inclinaison réglable pour ajuster l’inclinaison à gauche et à droite.
[MISE AU POINT]
Tournez l’anneau de l’objectif sur le côté droit du projecteur.
[ZOOM NUMÉRIQUE]
1. Appuyez sur la touche ZOOM de la télécommande pour afficher la barre ZOOM NUMÉRIQUE.
2. Appuyez sur la touche ▲ ou ▼.
❻ Corrigez la distorsion de type Keystone.
1. Appuyez sur le bouton ▼ sur le boîtier du projecteur ou sur la touche KEYSTONE de la
télécommande pour afficher le menu KEYSTONE .
2. Appuyez sur la touche ▼ pour sélectionner [VERTICAL] et utilisez les touches ▲ ou ▼ afin que
les côtés gauche et droit de l’image projetée soient parallèles.
* Lors de la correction de la distorsion verticale Keystone.
❼ Mettez le projecteur hors tension.
1. Appuyez sur le bouton
(POWER) sur le boîtier du projecteur ou sur le bouton STANDBY de
la télécommande.
2. Appuyez à nouveau sur le bouton
(POWER) ou sur le bouton STANDBY.
3. Débranchez tous les câbles.
Deutsch Italiano
[Erstens] Entfernen Sie die Kabelabdeckung.
1. Lösen Sie die Schrauben der Kabelabdeckung.
2. Entfernen Sie die Kabelabdeckung.
① Drücken Sie die Kabelabdeckung leicht nach oben, um den unteren Teil zu lösen.
② Ziehen Sie die Kabelabdeckung, während Sie den Teil mit dem Pfeil schieben und
halten.
❶ Schließen Sie Ihren Computer an den Projektor mit dem
mitgelieferten Computerkabel (VGA) an.
❷ Schließen Sie das mitgelieferte Stromkabel an.
Bringen Sie die Kabelabdeckung an und ziehen Sie die
Schrauben der Kabelabdeckung fest.
❸ Schalten Sie den Projektor ein.
Drücken Sie die
(POWER) -Taste am Projektorgehäuse oder die POWER ON -Taste auf der
Fernbedienung.
❹ Wählen Sie eine Quelle aus.
TIPP:
Drücken Sie die Taste AUTO ADJ., um ein RGB-Bild automatisch zu optimieren.
❺ Stellen Sie eine Bildgröße und eine Position ein.
[NEIGUNG]
Drehen Sie den Kippfuß, um die linke und rechte Neigung einzustellen.
[FOKUS]
Drehen Sie den Fokusring auf der rechten Seite des Projektors.
[DIGITAL-ZOOM]
1.
Drücken Sie die ZOOM Taste auf der Fernbedienung, um die DIGITAL-ZOOM Leiste anzuzeigen.
2. Drücken Sie die Taste ▲ oder ▼.
❻ Korrigieren Sie die Trapez-förmige Verzerrung.
1. Drücken Sie die ▼ Taste am Projektorgehäuse oder die KEYSTONE -Taste auf der
Fernbedienung, um das TRAPEZ -Menü aufzurufen.
2. Drücken Sie die ▼ Taste, um [VERTIKAL] auszuwählen und verwenden Sie dann ▲ oder
▼, so dass die linke und rechte Seite des projizierten Bildes parallel sind.
* Bei der Korrektur der vertikalen Trapez-Verzerrung.
❼ Schalten Sie den Projektor aus.
1. Drücken Sie die
(POWER) -Taste am Projektorgehäuse oder die STANDBY -Taste auf
der Fernbedienung.
2. Drücken Sie entweder die
(POWER)-Taste oder die STANDBY -Taste erneut.
3. Trennen Sie alle Kabel.
[Prima] Rimuovere il copricavi.
1. Allentare le viti del copricavi.
2. Rimuovere il copricavi.
① Spingere leggermente verso l’alto il copricavi per liberare la parte inferiore.
② Tirare il copricavi spingendo e tenendo la parte con la freccia.
❶ Collegare il computer al proiettore mediante il cavo computer (VGA)
in dotazione.
❷ Collegare il cavo di alimentazione in dotazione.
Fissare il copricavi e serrare le viti del copricavi.
❸ Accendere il proiettore.
Premere il pulsante
(POWER) sull’involucro del proiettore o il pulsante POWER ON sul
telecomando.
❹ Selezionare una sorgente.
SUGGERIMENTO:
Premere il pulsante AUTO ADJ. per ottimizzare automaticamente un’immagine RGB.
❺ Regolare la dimensione e la posizione di un’immagine.
[INCLINAZIONE]
Ruotare il piedino di inclinazione per regolare l’inclinazione a destra e a sinistra.
[MESSA A FUOCO]
Ruotare l’anello di messa a fuoco sul lato destro del proiettore.
[ZOOM DIGITALE]
1. Premere il pulsante ZOOM sul telecomando per visualizzare la barra ZOOM DIGITALE.
2. Premere il pulsante ▲ o ▼.
❻ Correggere la distorsione di tipo a trapezio.
1. Premere il pulsante ▼ sull’involucro del proiettore o il pulsante KEYSTONE sul telecomando per
visualizzare il menu TRAPEZIO .
2. Premere il pulsante ▼ per selezionare [VERTICALE], quindi usare il pulsante ▲ o ▼ in modo
che i lati destro e sinistro dell’immagine proiettata siano paralleli.
* Quando si corregge la distorsione a trapezio verticale.
❼ Spegnere il proiettore.
1. Premere il pulsante
(POWER) sull’involucro del proiettore o il pulsante STANDBY sul
telecomando.
2. Premere nuovamente il pulsante
(POWER) o il pulsante STANDBY.
3. Scollegare tutti i cavi.
© NEC Display Solutions, Ltd. 2015–2016 Ver. 3 4/16 Printed in China
Select a source.
Connect your computer.
Connect the supplied
power cord.
Turn off the projector.
Turn on the projector.
× 2 times
or
or
Fn F1 F
12
Correct the Keystone distortion.
Adjust an image size
and the position.
[DIGITAL ZOOM]
Focus ring
[FOCUS]
(View from the bottom)
Remove the
cable cover.
TIP:
AUTO ADJ.
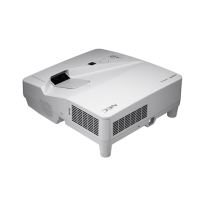
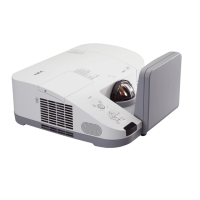
UM352W
Tilt foot
Up
Down
[TILT]
Attach the cable cover.
or
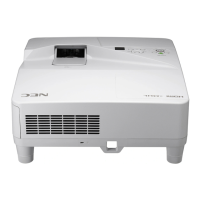
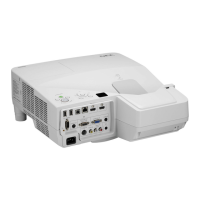
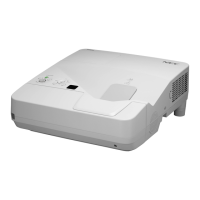
UM351W / UM301W / UM361X / UM301X / UM352W
Quick Setup Guide
NOTE: The color of the POWER indicator
RED or ORANGE
BLUE
[Standby] [Power On]
ImageImage Image
or