13
Remote Control Guide
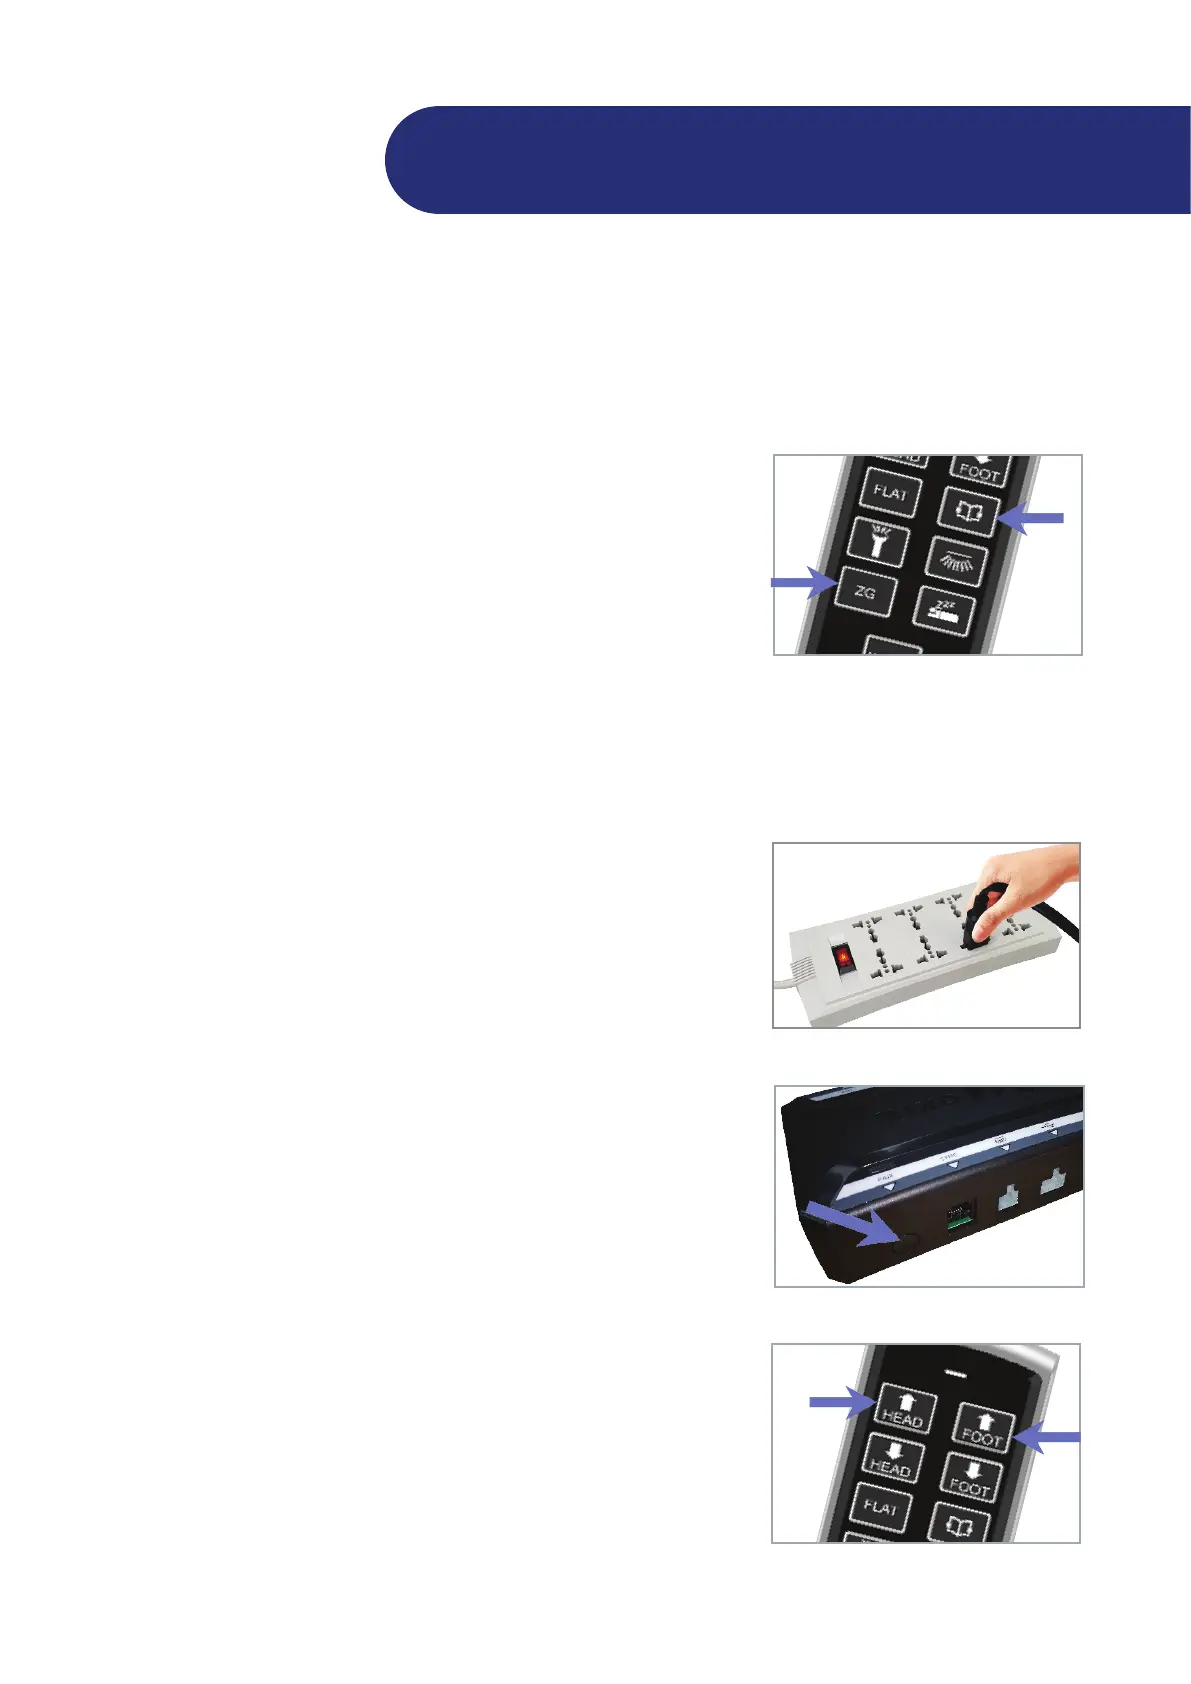
Customizing the memory and preset buons
You can store new head and foot posions by customizing the memory and preset buons. For safe reasons, the Flat and
An-Snore buons cannot be customized.
Move the head and/or foot secons to your desired posion.
Press and hold the FLAT buon and the preset buon that you
want to customize for 5 seconds .
The new bed posion is now stored in your selected preset buon
overriding the factory default.
1
2
Pairing the remote control to your adjustable bed
Your adjustable bed is already paired to your remote at the factory. Manual pairing is only needed for replacement remote
controls.
Make sure your bed is connected to a working electrical outlet. A
surge protector is recommended.
To pair your remote control to your adjustable bed, do one of the
following:
• Unplug the power cord from the outlet and then plug it
back in. The LED light on the control box turns blue and the
control box is in remote pairing mode for 20 seconds.
• On the control box, press the PAIR buon twice. The LED
light on the control box turns blue and the control box is in
remote pairing mode for 20 seconds.
On your remote control, press and hold the HEAD UP and FOOT
UP buons at the same me for four (4) seconds.
If the pairing is successful, the LED light on the control box turns
to green immediately. If pairing fails, the LED light on the control
box stays blue and turns green only aer the 20-second meout.
Repeat steps 2 to 3 unl pairing is successful.
1
2
3
Pairing method 1:
Unplug the power cord, then plug it back in.
Pairing method 2:
Press the PAIR buon twice.