5
3. Clean the outside of the product with a soft clean, damp cloth.
-
Do not immerse the product in water for cleaning.
4. Before rst use, perform at least one heating cycle while the
product is empty.
4
When the product heats up for the rst time, it may emit slight
smoke or odour. This is normal and does not aect the safety of
the product.
Using the product
1. Place the product on a stable, at and heat resistant surface.
2. Keep the air outlet A
5
at least 13 cm away from the wall.
3. Plug the power cable A
6
into a power outlet.
4. Pull out both baskets A
2
using the handles A
3
.
5. Place the perforated baking trays A
4
in the baskets A
2
.
-
Do not ll the inside of the basket with oil or other liquids. The
product works with hot air.
6. Place the baskets A
2
back into the product, using the handles
A
3
.
7. Press the power button B
8
to switch on the product.
8. Press the selection button B
4
to select a basket.
4
The product starts in the manual mode with the default settings
of 200˚C and 15 minutes.
9. Set the time and temperature with buttons B
qwe
, or select a
preset B
r
using the preset selection buttons B
9
.
4
See ‘Presets’ for the temperature and cooking time of each preset.
• Press the smart nish button B
7
to delay the basket with the
shortest timer so both baskets nish cooking at the same time.
• Press the match cook button B
5
to copy the settings of the
selected basket to the other basket.
4
The selected preset icon blinks.
4
The time and temperature can be changed after a preset has
been selected.
4
Add time as needed to preheat the unit.
10. Pull out one of the baskets A
2
using the handle A
3
.
11. Place food into the basket A
2
.
12. Place the basket A
2
back into the product, using the handle
A
3
.
13. Press the start/stop button B
1
to start. Depending on whether
or not you have set the time and temperature for both baskets,
only one or both switches on.
-
The basket or the outer surface may get hot when the product
is operating.
4
The product stops working when the basket A
2
is removed.
4
Press the light button B
6
to switch on the lights inside the
product. The light switches o after 30 seconds.
4
When the timer ends, the product emits a beeping sound and
the display shows "0000".
4
The fan automatically stops after 30 seconds.
14. Pull out the basket A
2
using the handle A
3
.
-
Be careful, hot steam may escape.
4
Insert the basket A
2
back into the product and reset the timer
and temperature if the food is not ready yet.
15. Place the basket A
2
on a heat-resistant surface.
-
Do not touch the perforated baking tray A
4
with bare hands.
16. Remove the prepared food using a kitchen tong.
4
Do not use a metal tool to remove the food to avoid damaging
the coating.
17. Press the power button B
8
to switch o the product.
Disposal
The product is designated for separate collection at
an appropriate collection point. Do not dispose of the
product with household waste.
For more information, contact the retailer or the local
authority responsible for the waste management.
c
Kurzanleitung
Digitale
Doppel-XL-Heißluft-Fritteuse
KAAF320BK
Weitere Informationen nden Sie in der erweiterten
Anleitung online: ned.is/kaaf320bk
Bestimmungsgemäße Verwendung
Die Nedis KAAF320BK ist eine Heißluft-Fritteuse mit zwei Fächern
mit jeweils 4,2 Litern Kapazität.
Dieses Produkt ist nur zur Verwendung in Innenräumen gedacht.
Lassen Sie keine Personen mit verringerten körperlichen,
sensorischen oder geistigen Fähigkeiten oder mangelnder Erfahrung
oder Wissen zur Verwendung das Produkt nutzen.
Kinder müssen beaufsichtigt werden, um sicherzustellen, dass sie
nicht mit dem Produkt spielen.
Kinder ab dem achten Lebensjahr und Personen mit
eingeschränkten körperlichen, sensorischen oder geistigen
Fähigkeiten oder ohne ausreichende Erfahrung und Kenntnis dürfen
dieses Produkt nur dann verwenden, wenn sie beaufsichtigt werden
oder in die sichere Benutzung des Produkts eingewiesen wurden
und die bestehenden Gefahren verstehen. Kinder dürfen nicht mit
dem Produkt spielen. Reinigung und Wartung durch den Benutzer
dürfen nicht von unbeaufsichtigten Kindern durchgeführt werden.
Das Produkt ist zur Verwendung in Haushaltsumgebungen
für typische Haushaltsfunktionen gedacht, die auch von nicht
fachkundigen Benutzern ausgeführt werden können, wie z.B.:
in Geschäften, Büros und ähnlichen Arbeitsumgebungen,
Bauernhäusern, von Kunden in Hotels, Motels und anderen
Unterkünften und/oder in Pensionen.
Jegliche Modikation des Produkts kann Folgen für die Sicherheit,
Garantie und ordnungsgemäße Funktionalität haben.
Dieses Produkt ist nur für den privaten Gebrauch (normalen
Hausgebrauch) bestimmt. Nedis ist nicht verantwortlich für
Verschleiß, Defekte und/oder Schäden, die durch die gewerbliche
Nutzung des Produkts entstehen.
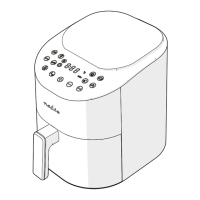
Hauptbestandteile (Abbildung A)
1 Bedienfeld
2 Korb (2×)
3 Gri (2×)
4 Gelochtes Backblech (2×)
5 Luftauslass (2×)
6 Stromkabel
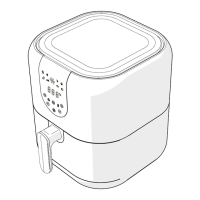
Bedienfeld (Abbildung B)
1 Ein/Aus-Taste
2 Zeit-/Temperaturanzeige
3 Schüttelanzeige
4 Korbauswahltaste
5 Match Cook-Taste
6 Light Taste
7 Smart Finish-Taste
8 Ein/Aus-Taste
9 Voreinstellungs-
Auswahltaste
q Zeit/Temperatur erhöhen-
Taste
w Zeit/Temperatur-
Auswahltaste
e Zeit/Temperatur verringern-
Taste
r Voreinstellungs-Anzeigen
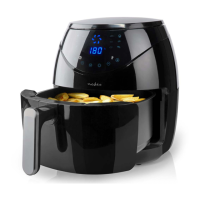
Presets (Abbildung C)
1 Pommes Frites
2 Hühnchen
3 Garnelen
4 Backen
5 Bacon
6 Pizza
7 Steak
8 Fisch
9 Lebensmitteldehydrierung
q Aufwärmen
4
Das Kochergebnis jedes Gerichts hängt von vielen Variablen ab.
Die Zubereitungsdauer, Temperatur, das Gewicht und die Menge
des Essens beeinussen das Ergebnis.
4
Bei Voreinstellungen C
1238
ertönt nach der Hälfte der
Garzeit für 10Sekunden ein Alarm. Die Schüttelanzeige B
3
leuchtet auf. Schütteln oder wenden Sie die Speisen für bessere
Garergebnisse.
 Loading...