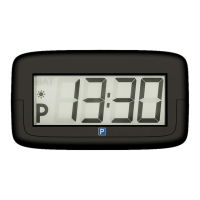
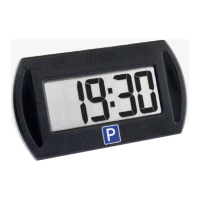
Congratulaons on your new PARK MINI. With PARK MINI in
your car, you don’t need to remember to set the parking disc, thus
avoiding expensive parking ckets.
The electronics in PARK MINI register the movement of the car
and PARK MINI automacally sets the clock at the correct parking
me, and releases the parking mode only once the car starts moving
again.
Before making use of PARK MINI, it is recommended to carefully
read the complete user manual.
To ensure correct installaon of your
PARK MINI, please follow
the instrucons below:
Prior to installaon
A: Acvate the baery
Gently remove the plasc strip and push the baery back into place
if it comes loose. Should the baery by accident fall out, reinsert it
with the + facing upwards (same side as the one with text). If the
baery are placed correctly, “hours” ash in the display.
B: Set the digital clock
(The digital clock automacally sets both summer and winter
me, but can be de acvated manually if necessary, see C:)
1. Acvate setup mode by pushing buon
❶ with a pointy
object (e.g. pencil) unl the ”hours”- digits start ashing.
2. When “hours” ashes in the display, push buon ❷ repe-
atedly unl the hours are set correctly.
3. Push buon ❶ once and ”minutes” ash in the display.
Set the minutes by pushing buon ❷.
4. Set year, month and date as above (in that order).
2. Wipe the inside of the windscreen with a damp cloth and a
lile detergent. Dry the windscreen and use the enclosed clea-
ning ssue to clean the chosen spot very carefully. Dry it with
a so clean cloth. (Only the enclosed cleaning ssue should be
used - no other cleansing agent).
3. Make sure the windscreen is no less that +15 degrees Celsius,
as the pads do not work opmally at less than 15 degrees.
Use either the fan in the car or, with cauon, a hair dryer to
heatup the windscreen.
4. Remove the protecve foil from the 2 pads and press the
device rmly to the windscreen for about 30 seconds Press at
shortly aer the baery is removed, so please avoid leaving your car
parked anywhere with the baery removed.
Changing the baery
1. Buy a new coin baery no. CR 2450 – 3 Volt.
2. Gently pull out the baery holder all the way.
3. Remove old baery.
4. Insert new baery. Remember to wipe the baery.
5. Gently push the baery holder all the way in.
Approvals and cercates
PARK MINI has been approved by the Danish Transport Authority
with reference to the execuve order no. 327, 2003 concerning
parking discs; the authorisaon number of the government agency
FS21 is shown on the front of the device.
CE labelling
With the CE label, Needit ApS and Needit Denmark ApS declares
that the product fullls the general safety requirements in the
relevant CE labeling direcves.
With the CE label, the manufacturer of the product guarantees that
All rights to
PARK MINI belong to:
Needit ApS • Hundigevej 79 • 2670 Greve
Phone: +45 70 221 535
E-mail: kundeservice@needit.dk
Website: www.needit.dk
Please note that the content of this user manual
is subject to change.
the product is produced according to the standard European safety,
health and environmental standards.
The declaraon of conformity conrms that the product in queson
is in accordance with (CE) EN 55022 (Radio disturbance characte-
riscs) and (CE) EN 55024 (Standards for Commercial Electronic
Products).
WEEE
PARK MINI is not to be disposed of with general household
waste, but has to be disposed of separately. The baery may be re-
turned to any retailer selling baeries, and the PARK MINI itself may
be disposed of at your local recycling staon or by the retailer.
Specicaons
Size (cenmeters): 8.3 x 4.5 x 2.5
Baery Coin cell no.: Coin Baery no. CR 2450 - 3 Volt
Baery life expectancy: Approximately 2 years
Clock accuracy (average): ± 2 minutes/2 years
Reacon me (parking mode): Approximately 20 sec.
Terminaon of parking mode: Approximately 20 sec.
PARK MINI is patent pending.
Service and warranty
At our website www.needit.dk you will nd an FAQ secon with
informaon on your new PARK MINI. Advice is also available from
kundeservice@needit.dk.
Needit ApS and Needit Denmark ApS provide a warranty according
to the Danish Sale of Goods Act. If faults and imperfecons occur
during the warranty period, please return the device directly to your
retailer, and it will be repaired or replaced with a new PARK MINI.
Please enclose a copy of your receipt, as it is also your warranty.
Do not try to open PARK MINI by force, as the electronics will
be destroyed and the warranty be void.
IMPORTANT
It is the responsibility of the driver to set the clock correctly. Any
parking cket or installaon mistake is not the responsibility of
Needit ApS or Needit Denmark ApS.
Maintenance
Avoid exposing PARK MINI to extreme temperatures (below -20
°C or above +75 °C), as it may destroy the electronics and/or aect
the reacon me.
If PARK MINI is exposed to heavy moisture or water, please use a
clean cloth to dry it.
Use only a cloth to clean the device. Do not use any cleansing
agents on the device.
Once you have set the above details, no digits in the display should
be ashing (please note that the colon (:) between hours and
minutes will ash at all mes).
Please push buon
❶ repeatedly to stop any ashing in the display.
If you have made a mistake in the setup, reset PARK MINI by
pushing buon ❶ unl the ”hours”- digits start ashing.
We recommend checking the seng of the clock regularly, especially
on the change between summer me/winter me and back again.
C: Acvate/deacvate summer me/winter me
The digital clock automacally sets both summer and winter me by
the middle of the backside. Check from outside if all the pads
are indeed aached to the windscreen.
5. You have now mounted your PARK MINI and are ready to go.
NB!
PARK MINI has to be mounted on the windscreen for it to
work correctly.
How does PARK MINI work?
When parking your car, PARK MINI will automacally set the
clock forward to the nearest quarter aer your arrival me. (E.g.
arrival at 10:07, PARK MINI sets the me at 10:15).
Seng the parking me manually
PARK MINI can also be manually set, as required by law.
BEK nr. 327 of 29/04/2003 (§3 stk. 3): “If, during the vehicle’s par-
king, a period of no me limit occurs, the clock must be set no later
than the end of the non-limited me period, at the correct me,
from when a new me limited period begins.”
If you need to set the PARK MINI manually, just push buon ❷
and the clock will start running at 15 minutes intervals. Run the
clock to the correct me and release. Please note that this funcon
is only available when PARK MINI is in parking mode.
Baery
When the diode ❶ starts ashing for 10 seconds when PARK
MINI
enters or exits parking mode, it indicates that the baery
should be changed within a week.
Replacement baeries are available at retailers selling coin baeries.
REMEMBER TO RESET THE CLOCK.
When the baery is changed, the clock will reset automacally.
All me informaon can always be reset by following the setup
instrucons.
Please note that the LCD display of PARK MINI will switch o
default. But if used in a territory without, you can deacvate, using
the following steps.
1. Acvate setup mode by push ing both buon
❶ and buon
❷ unl the ”hours” and ”minutes”- digits show ”oN:Su”.
2. Gently release pressure on buon ❶.
3. Hold the buon ❷ unl the display reads ”oF:Su”.
4. Display will automacally return to funcon mode.
Your PARK MINI is now ready to be mounted on the inside of
your windscreen.
Please note that only one parking disc is allowed in your car at any
me, and it is the owner’s responsibility to install
PARK MINI
correctly.
Needit ApS and Needit Denmark ApS do not reimburse any parking
ckets.
Mounng PARK MINI
1. Find the best place on the inside of the windscreen’s lower
right corner (legal requirement) where both pads touch the
glass. Make sure you have access to all the buons and are
able to change the baery.
Hvis du trenger å slle PARK MINI manuelt, trykker du bare på
knappen ❷ og klokken teller fremover med 15 minuers inter-
valler. La klokken gå l den rikge den, og slipp. Vær oppmerksom
på at denne funksjonen bare er lgjengelig når PARK MINI er i
parkeringsmodus.
Baeri
Når dioden ❶ begynner å blinke i 10 sekunder hver gang PARK
MINI
går inn i eller ut av parkeringsmodus, betyr det at baeriet bør
skies innen en uke.
Reservebaerier er lgjengelige i bukker som selger knappebaerier.
HUSK Å STILLE KLOKKEN TILBAKE.
Når baeriet skies, vil klokken lbakeslles automask. Du kan
alld slle inn den ved å følge innsllingene som er beskrevet over.
Vær oppmerksom på at LCD-displayet l
PARK MINI vil slå seg av
kort d eer at baeriet er ta ut, så du bør unngå å forlate bilen
noen steder når baeriet er ta ut.
Utskiing av baeri
1. Kjøp et ny knappbaeri nr. CR 2450 - 3 volt
2. Trekk forsikg baeriholderen helt ut.
3. Ta ut det gamle baeriet.
4. Se i det nye baeriet Husk å tørke av baeriet.
5. Skyv baeriholderen forsikg helt inn.
Service og garan
På nestedet vårt, www.needit.dk, nner du svar på mange
spørsmål vedrørende PARK MINI. Du kan også slle spørsmål l
kundeservice@needit.dk.
Needit ApS og Needit Denmark ApS yter en garan i henhold l den
danske kjøpsloven. Hvis det skulle oppstå feil eller mangler i løpet av
garanperioden, returner PARK MINI l det stedet parkeringsskiven
ble kjøpt.
Legg ved en kopi av kvieringen din, fordi den gjelder også som din
garan.
Ikke forsøk å åpne PARK MINI dee vil skade elektronikken, og
garanen vil boralle.
VIKTIG
Det er sjåførens ansvar å slle klokken rikg. Eventuelle parkerings-
bøter eller installasjonsfeil er ikke Needit ApS eller Needit Denmark
ApS si ansvar.
Vedlikehold
Unngå å utsee PARK MINI for ekstreme temperaturer (under
-20 °C eller over +75 °C), fordi dee kan skade elektronikken og/eller
påvirke reaksjonsden.
Hvis PARK MINI blir utsa for mye fukghet eller vann, tørk den
av med en ren klut.
Bare bruk en klut l rengjøre skiven. Ikke bruk noe rengjøringsmiddel
på den.
Godkjenninger og serkater
PARK MINI er godkjent av de danske transportmyndighetene i
henhold l bekjentgjøring nr. 327, 2003 om parkeringsskiver, og har
godkjenningsnummeret l etaten, FS11 på forsiden.
CE-merking
Med CE-merket erklærer Needit ApS og Needit Denmark Aps at
produktet oppfyller de generelle sikkerhetskravene i de relevante
direkvene om CE-merking.
Med CE-merket garanterer produsenten at produktet er produsert i
henhold l de europeiske standardene for helse, miljø og sikkerhet.
Needit ApS erklærer med dee at denne parkeringsskiven er i over-
ensstemmelse med (CE) EN 55022 (bestemmelser om radiointerfe-
rens) og (CE) EN 55024 (Standarder for kommersielle, elektroniske
produkter).
WEEE
PARK MINI må ikke kastes i vanlig husholdningsavfall, men må
kastes for seg selv. Baeriet kan leveres l alle detaljhandlere som
selger baerier, og selve PARK MINI kan avhendes i alle gjenvin-
ningsstasjoner eller der parkeringsskiven ble kjøpt
Spesikasjoner
Størrelse (cenmeter) 8,3 x 4,5 x 2,5
Knappbaeri størrelse nr.: Knappbaeri nr. CR 2450 - 3 volt
Baeriets forventede varighet: Ca. 2 år
Klokkens nøyakghet (gjennomsni): ± 2 minuer/2 år
Reaksjonsd (parkeringsmodus): Ca. 20 sek.
Å avslue parkeringsmodus: Ca. 20 sek.
PARK MINI avventer patent.
Alle regheter l
PARK MINI lhører:
Needit ApS • Hundigevej 79 • 2670 Greve
Telefon: +45 70 221 535
E-post: kundeservice@needit.dk
Nested: www.needit.dk
Vær oppmerksom på at innholdet i denne bruksanvisningen kan
endres.
English User manual
PARK MINI
electronic parking disc
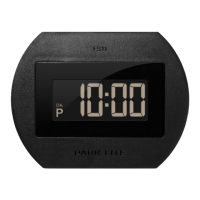
Button ❶
and diode
Button
❷
Battery
13 11 1719
14 12 1820
15 13 19
16 14 20
17 15 21
12 10 1618
2
3
4
5
6
7
8
9
 Loading...