26
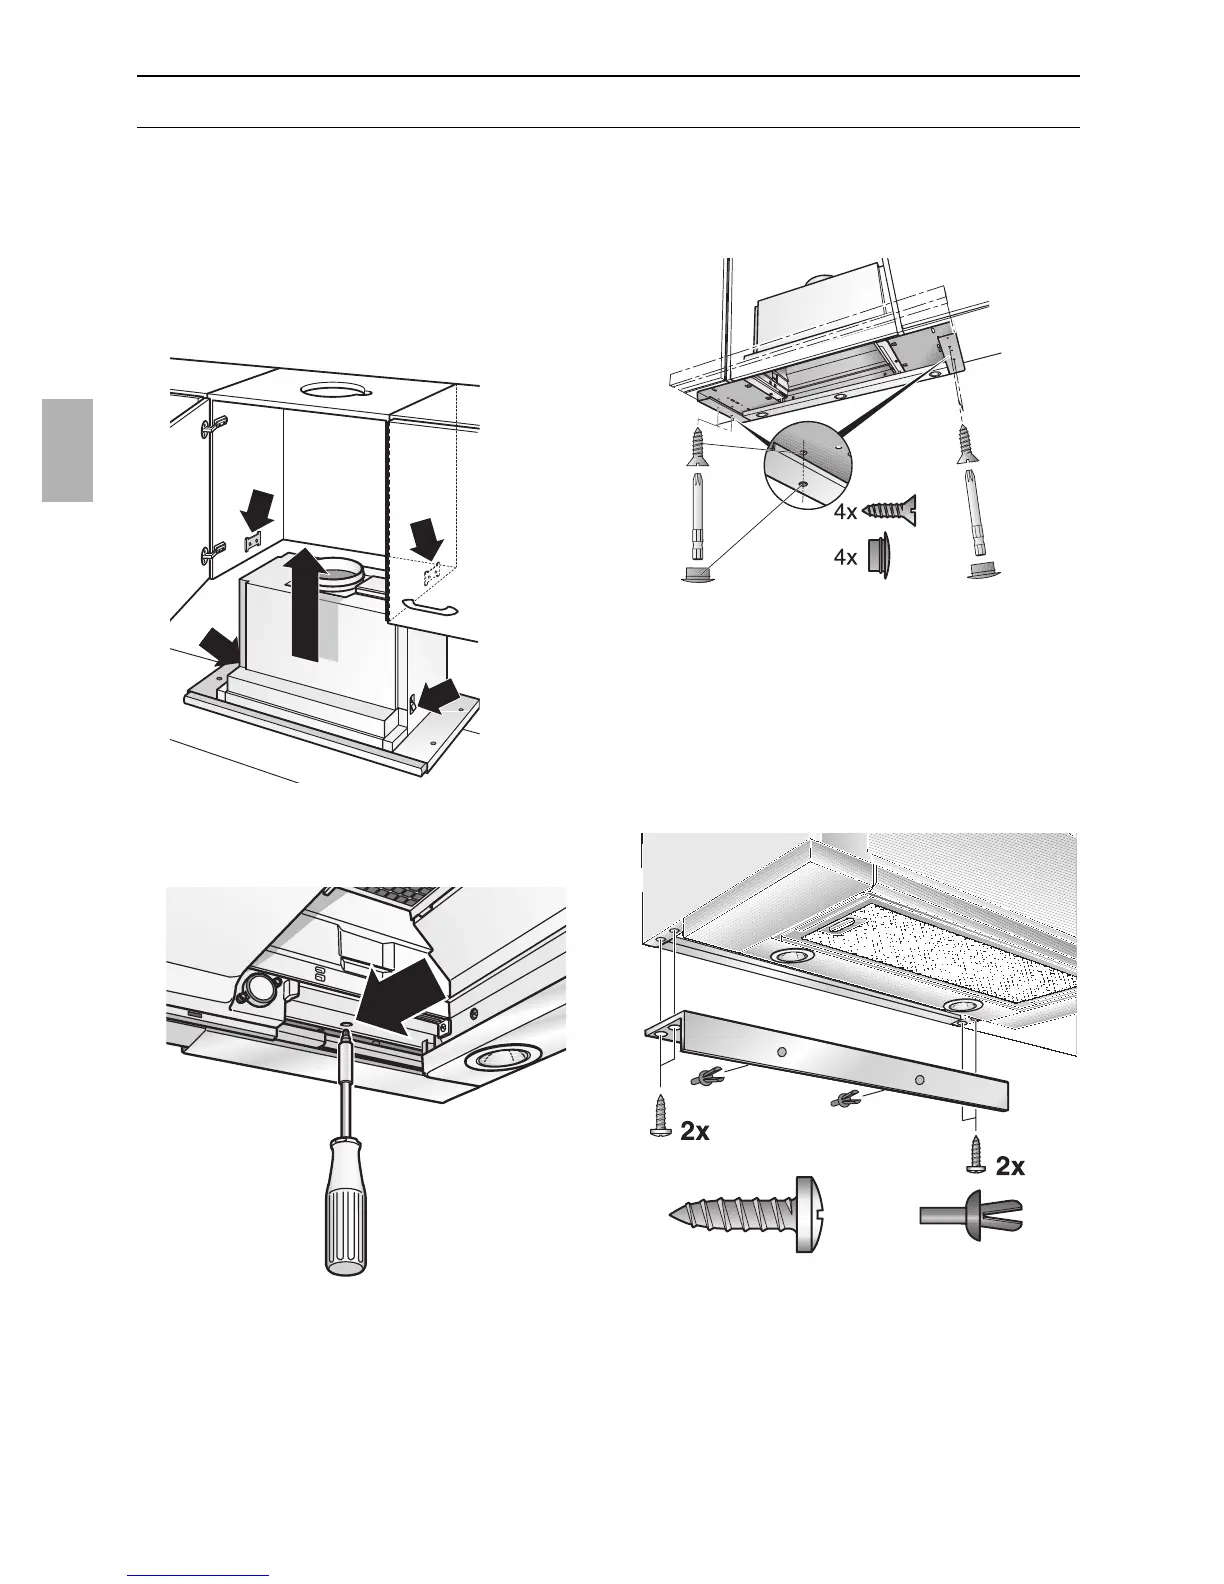
3. Screw in the adjusting screws by hand
until the extractor hood is situated on
the base of the cupboard.
7. Feed the mains connection cable out of
the cupboard.
8. Connect the pipes in the wall cupboard.
– If required, attach the air hose to the
cupboard ceiling –.
9. Re-insert grease filter
(see Operating instructions).
Fitting into wall cupboard
Check door alignment and readjust if
necessary.
1. Remove grease filter
(see Operating instructions).
2. Lift the extractor hood into the cupboard
from below until both fixing lugs have
locked firmly into position.
❑
Align the extractor hood in the
cupboard.
❑
Carefully tighten both fastening screws.
4. Also attach the extractor hood to the left
and right wall cupboards with 2 screws
each side. First make pilot holes with a
bradawl.
5. Seal the holes with 2 stoppers each on
the left and right.
6. If required, shorten the wall cover to the
required dimension (e.g. saw off).
Attach the wall cover with the enclosed
clips.
Screw the wall cover to the wall
cupboard.
 Loading...