5 / 13
3 Operation
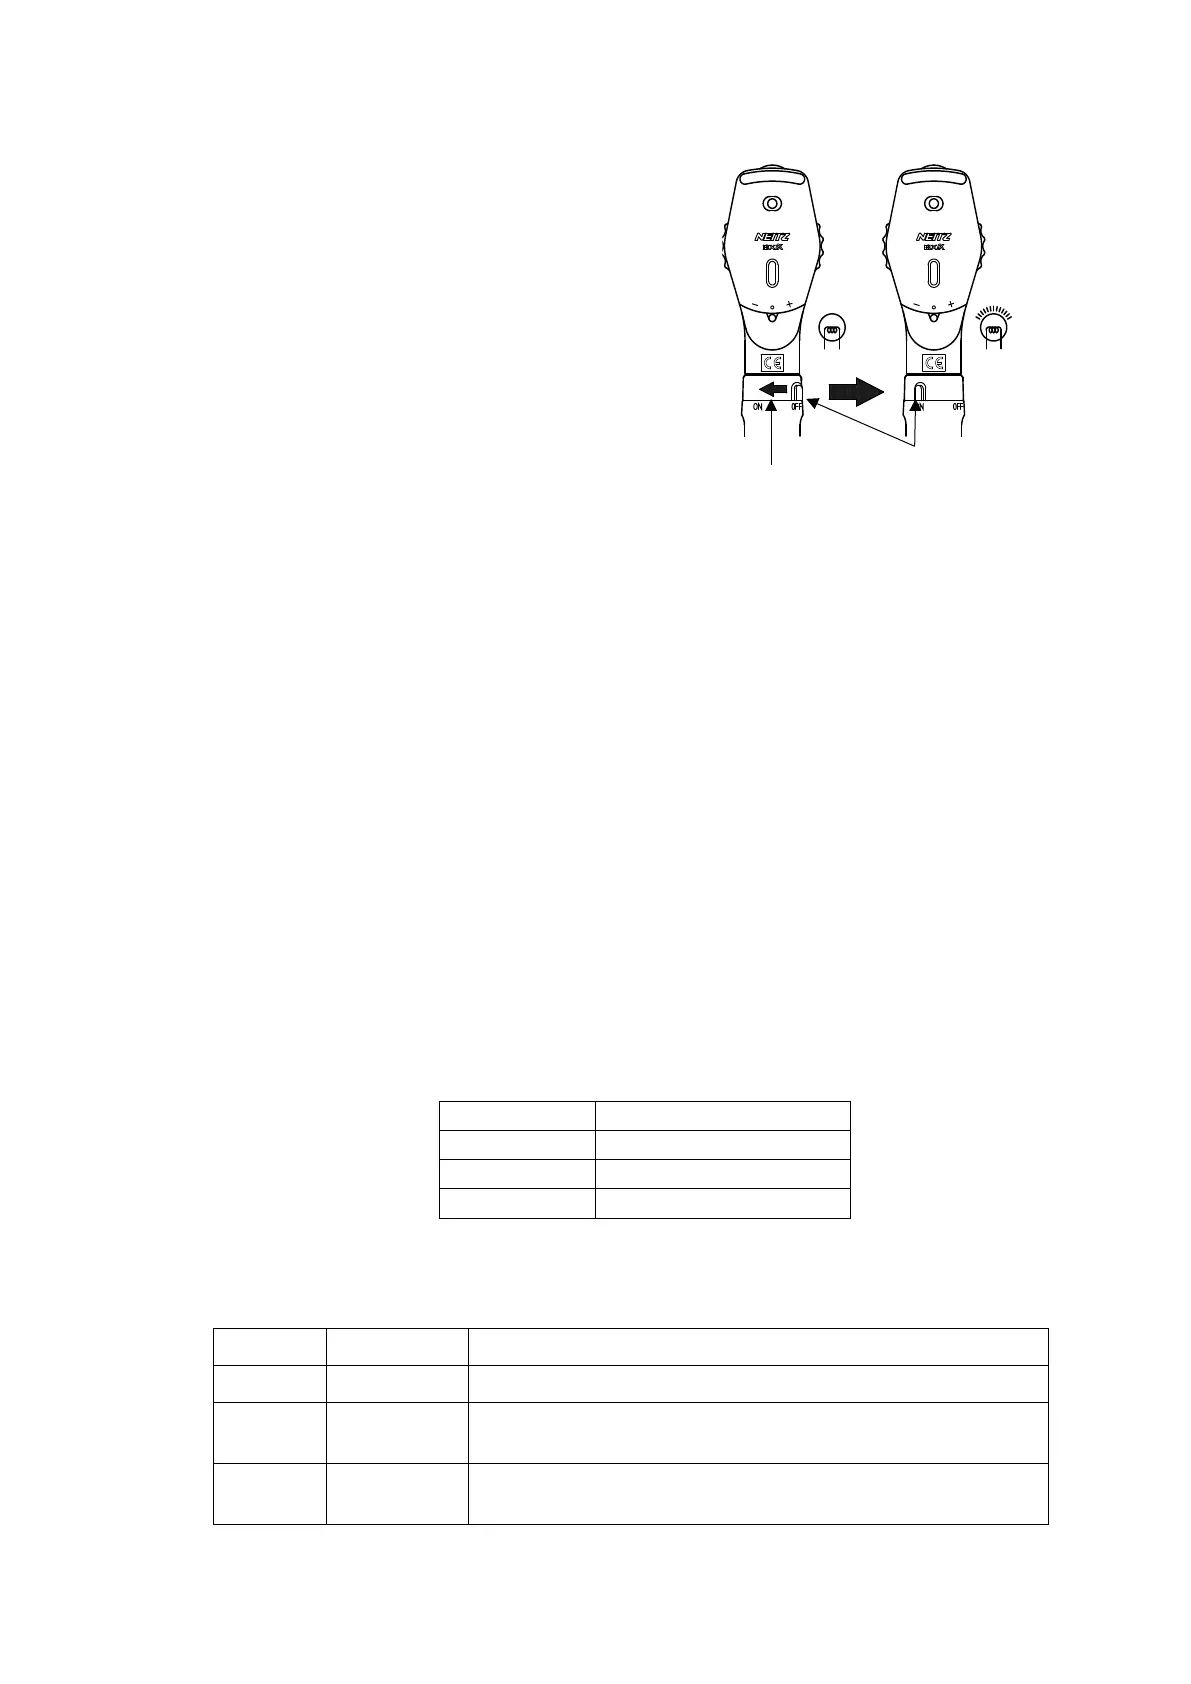
3.1 Turning Illumination ON/OFF
While pressing the Switch Button on the Handle,
rotate the Switch Ring to the left (towards ON) to
turn the illumination on (see Fig. 3.1).
The device is equipped with a built-in illumination
adjustment function. The further left the ring is
rotated, the brighter the illumination.
To turn the illumination off, rotate the Switch Ring
to the right until the Switch Button returns to the
OFF position.
3.2 Correction Lens and Filters
3.2.1 Rekoss Lens
The Rekoss Lens is used to adjust the diopter between the examiner and patient to bring
the fundus image into focus. Use the “+” lens to correct hyperopia and “-" lens to correct
myopia.
[Example]
For an examiner with myopia and a patient with hyperopia:
In the above example, it would be necessary to set the Rekoss Disc to -4 D.
However, in practice, the Rekoss Disc is rotated while observing the fundus to find the
appropriate diopter.
In cases of extreme myopia or hyperopia, where the image cannot be focused by using
only the Rekoss Disc, it is also possible to insert an auxiliary lens for accommodation. The
following ranges may be covered depending on the position of the Auxiliary Lens Selector:
・
3.2.2 4000 K and Polarizing Filters
It is possible to insert the following filters in the illumination system using the Filter Lever:
Position Filter Function
O Open No filter is inserted in the center position
F 4000 K
A 4000 K filter is inserted into the illumination system. Use
for observation with light resembling natural light (daylight).
P Polarizing
A polarizing filter is inserted into the illumination system.
Use in combination with the Observation Polarizing Filter.