Do you have a question about the Nektar Panorama P1 and is the answer not in the manual?
Guide to installing the Panorama driver and updating firmware on Windows.
Steps for Nektar integration in Bitwig on Windows and common troubleshooting.
Instructions for Panorama firmware update and Bitwig integration on MacOS.
Steps for Panorama firmware update and Bitwig integration on Linux.
Details the primary functions of Panorama's transport control buttons.
Overview of the Mixer mode's main screen, fader assignments, and track controls.
Explains default assignments for encoders and LED buttons in Mixer mode.
How to use Panorama to navigate and load presets via the Bitwig browser.
How to navigate devices and understand mapping sources (Default, Nektar, Remote Controls).
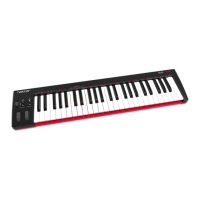
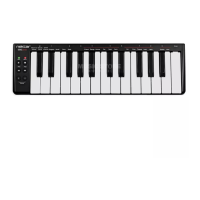
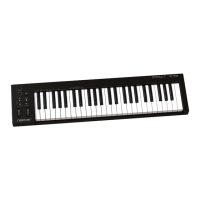
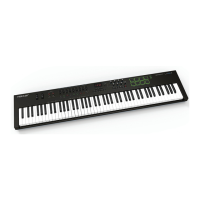
The Nektar Panorama P-series is a MIDI controller designed for deep integration with Bitwig Studio, offering a comprehensive hardware control surface for various aspects of music production. It is compatible with Bitwig Studio and Bitwig Studio 8-Track on Windows, macOS, and Linux operating systems.
The Panorama P-series serves as a dedicated control surface for Bitwig Studio, allowing users to navigate, control, and interact with the software's mixer, instruments, transport, and internal MIDI functions directly from the hardware. It aims to provide a tactile and intuitive experience, akin to working with a hardware workstation, reducing the reliance on a computer mouse and keyboard.
For Windows users, installation involves running a specific Panorama P-series driver installer. Firmware updates are crucial for all operating systems (Windows, macOS, Linux) to ensure compatibility with OS X 10.11 or higher. The firmware update process typically involves connecting the Panorama via USB, switching it on while holding specific buttons ([Toggle/View] + [Mixer]), and then using a dedicated "nkupdate" application to load and program the firmware file. After a firmware update, it's recommended to reset Panorama to its default settings by holding [patch-] + [Patch+] while powering on, which erases internal presets and map settings. For P1, an additional step involves pressing [Cycle] + [Record] followed by [Patch-] + [Patch+] within a 2-second countdown. Users are advised to back up their settings before a reset if they wish to retain them.
Once the firmware is updated and the unit is switched on, Bitwig Studio should automatically detect the Panorama. If not, users can manually add the controller in Bitwig's Settings/Controllers menu by selecting "Nektar" as the manufacturer and "Panorama P6" (or P1/P4 depending on the model). Port configuration is also necessary, typically setting Input1/Output1 to "Panorama P6 Instrument" and Input2/Output2 to "Panorama P6 Internal."
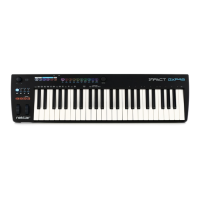
The Panorama features dedicated navigation buttons: [Bank <], [Bank >], [Zoom <], [Zoom >], [Shift], [Track-], [Track+], [Patch-], [Patch+], and [View].
Transport buttons include [F-Keys], [<<], [>>], [Undo], [Click], [Mode], [Cycle], [Rewind], [Forward], [Stop], [Play], and [Record]. These buttons control essential transport functions like setting locators, undoing actions, toggling metronome, overdub, loop/cycle, moving play start position, stopping, playing, and recording. Many of these buttons also have secondary functions when held with [Shift], such as setting loop points, redoing, toggling automation write, stopping launcher clips, selecting launcher scenes, and activating clip overdub.
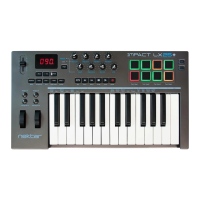
The Panorama offers four main modes: Mixer, Instrument, Transport, and Internal. Each mode configures Panorama to control different aspects of Bitwig Studio. Pressing a mode button jumps to that mode, remembering the last accessed page. Pressing it twice returns to the mode's home page.
The display Info-Bar (Red/Gray/Red area) provides status information:
Five display buttons are used for menu navigation and function activation. Red labels indicate active menus or pages, while a red line above a button indicates an "On" status for a parameter.
In Mixer mode, the Panorama's 9 faders control mixer channel volumes, and the 8 encoders above them are assigned to Pan by default. A [Toggle/View] button allows cycling through assignments for the 8 encoders (e.g., Send 1, Send 2, etc., and back to Pan). The 8 LED buttons below the faders are assigned to Select by default, enabling quick track selection. A [Toggle/Mute] button changes their assignment to Mute, Solo, or Record Arm. The display shows the current assignments for encoders and LED buttons.
Navigating tracks and channels can be done using [Track -/+] buttons, [Shift]+[<Bank] or [Bank>] to bank over 8 channels, or by pressing the [LED buttons] when assigned to "Select." The first display button labeled [+] opens Bitwig's pop-up browser for device selection. The [Sends] button in Mixer mode allows control over up to 8 sends for the selected channel. The [User] page allows mapping up to 8 global controls across a Bitwig Studio project by right-clicking a parameter in Bitwig and assigning it to a Panorama encoder.
For P4/P6 models, the motorized fader follows the currently selected track's volume in Bitwig Studio. Mute and Solo buttons with LED indicators also update with track changes. The [Fader] button toggles the Write Arranger Automation function, indicated by a 'Write' LED. The [Devices] menu in Mixer mode allows control of devices using the 2x4 encoders, independent of Instrument mode device selection.
In Instrument mode, all 16 encoders, 9 faders, and 8 LED buttons are dedicated to controlling the selected device. [Shift]+[Instrument] creates a new Instrument Track and opens Bitwig's browser. Display buttons labeled [Browser], [<], [>], [OK], and [Data Control] facilitate navigation and selection within the browser. [Patch-] and [Patch+] buttons audition patches.
Device mapping can come from "Default map," "Nektar map" (advanced device/plugin mapping), or "Bitwig Remote Controls." Nektar-mapped devices, like Bitwig's Polysynth, offer organized control pages accessible via a "menu" display button and [Data Control]. Controller pages can show assignments for 2x4 encoders, faders + 1x8 encoders, or faders + LED buttons. [Toggle/View] and [Toggle/Mute] buttons toggle between different views of these sections. Faders are typically assigned to ADSR envelopes (e.g., Fader 1: Amp Attack, Fader 5: Filter Attack).
The [Remote] display button activates Bitwig's Remote Controls Pages, allowing customization of mappings for any device using the 8 encoders. Users can create, name, and assign parameters to control slots.
Panorama controls the Bitwig Drum Machine container device. The device home page displays the preset name, and 2x4 encoders map to Device Home Page parameters.
To change presets for individual slots, the device within the slot needs to be set as the "Primary Device" in Bitwig Studio.
Similar to the Drum Machine container, Panorama controls up to 12 device layers within the Instrument Layer container.
To change presets for individual layers, the device within the layer needs to be set as the "Primary Device."
Transport mode helps navigate and build song compositions. The display shows the current Play Position, Left and Right locators, and assignments for the 2x4 rows of encoders (Tempo, Pre-Roll, Shuffle, Rate, Accent, Phase,
Pressing [Launcher] in Transport mode assigns pads to trigger and record clips and opens the "Launcher" menu. The display shows the status of the first 12 clips on the selected track (Gray: empty, Red: recording, Green: playback, Yellow: recorded but not selected).
Clips can be recorded and played back using transport buttons' secondary functions. [Shift]+[View] brings up the Bitwig Studio Mix window.
In Transport Mode, press [Step Seq] to access the Step Sequencer. This page allows entering notes into a selected Note clip.
To create notes: create a Note clip, press an LED button below a fader (e.g., Fader 1) to create a C1 note with 100 velocity. Pressing it again removes the note. To set Note values: Press a key on Panorama's keyboard, observe the encoder graphics change, then press an LED button. The data encoder changes note values for all steps. Individual encoders change note values for specific steps. To set Velocity values: Move a fader (e.g., Fader 2) to a value (e.g., 64), then press the corresponding LED button. Sequence length and Step size: Play a Note clip, and LED buttons light up to indicate steps. The sequencer defaults to 1/16 notes (16 steps in a 1-bar clip), but only 8 steps are visible at a time. Buttons below the display (1-8, 9-16, etc.) or holding [Toggle/Mute] access other steps. The maximum sequence length is 32 steps. The display button labeled ‘Step Size' sets note length (1/4, 1/8, 1/16, 1/32). To select clips for sequencing, click on a Note Clip in Bitwig's Clip Launcher or Arranger, or tap pads when Panorama's Clip page is active in Mixer Mode.
| Number of Keys | 49 |
|---|---|
| Key Type | Semi-weighted |
| Aftertouch | Yes |
| Faders | 9 |
| Knobs/Encoders | 8 |
| Transport Controls | Yes |
| Display | LCD |
| Connectivity/MIDI I/O | USB, MIDI In/Out |
| DAW Integration | Yes |
| Power | USB powered |
| Pedal Inputs | 2 |
| Type | MIDI Keyboard Controller |
| Software Compatibility | Cubase, Logic Pro |