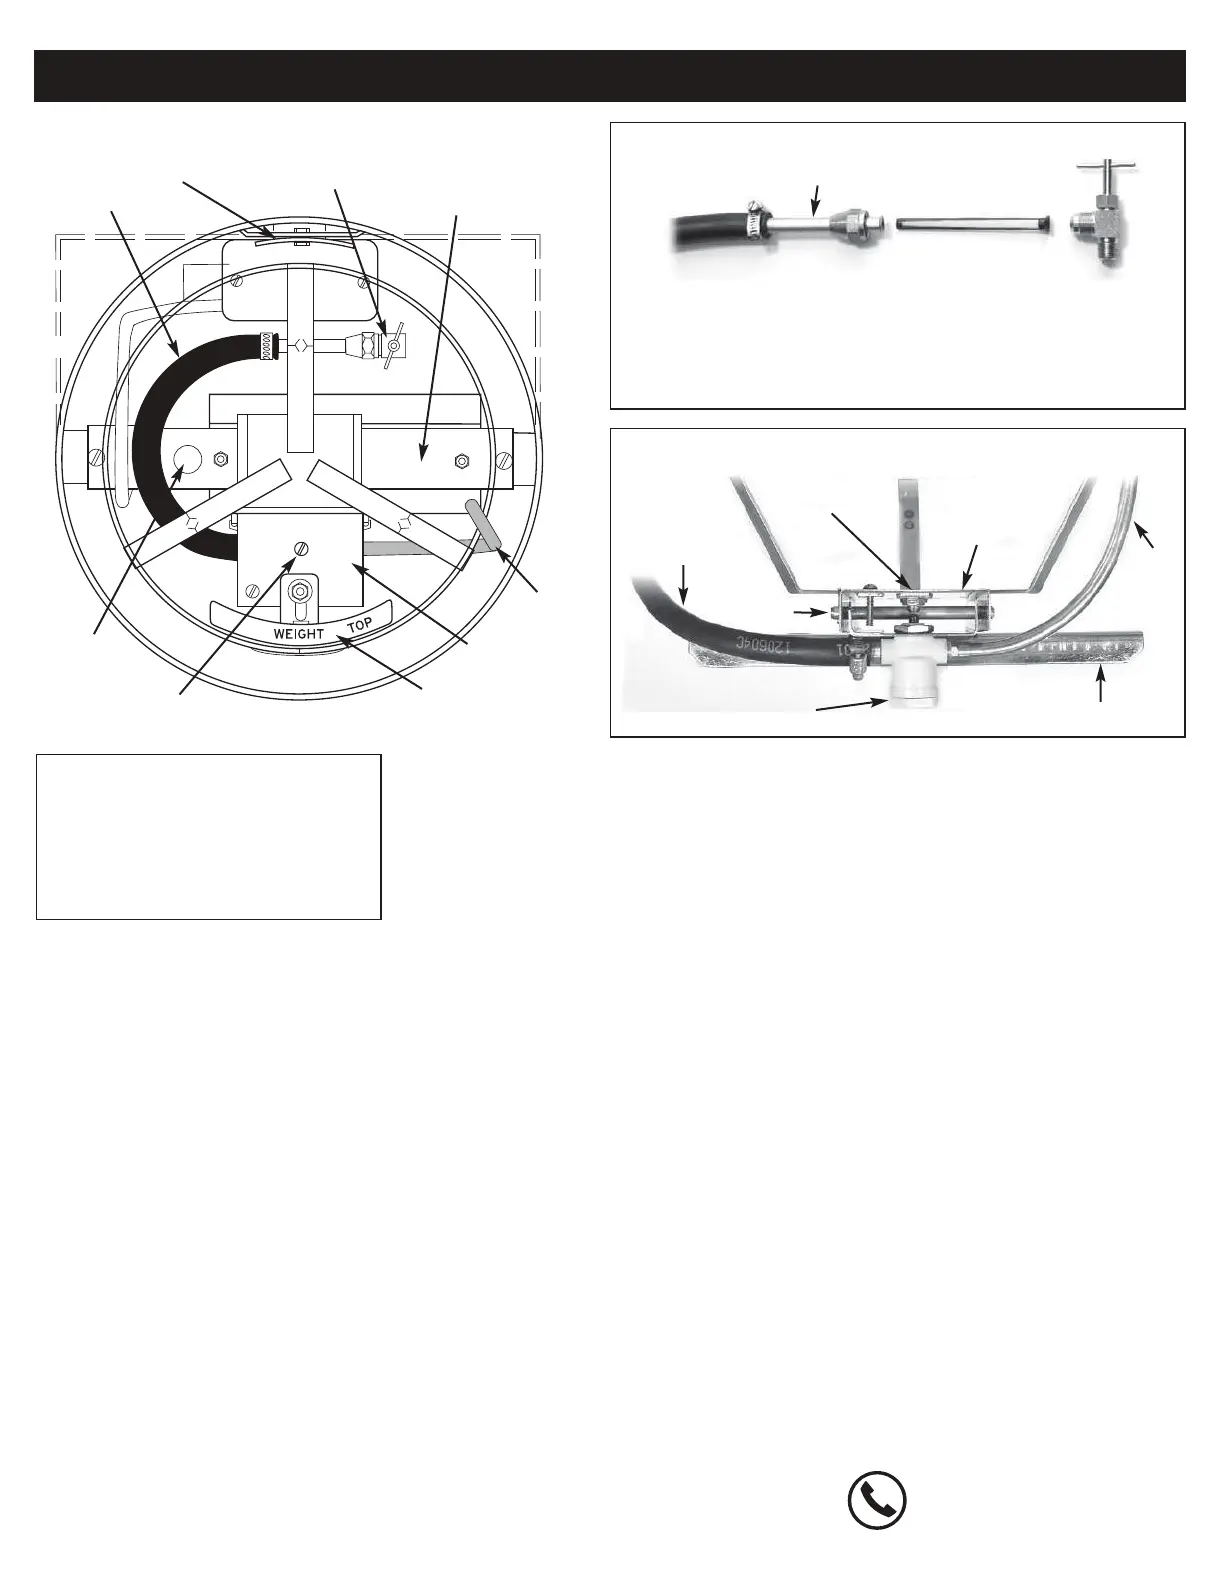
Filter
Brass Shut-off Valve
Copper Tube
Instructions For Replacing Plumbing Parts Including Control Valve & Filter
Tools Needed:
• Safety glasses
• (1) needle-nose pliers - medium to small size.
• (1) open end or adjustable wrench - 11/16”
• (1) open end wrench - 3/4”
• (1) open or boxed end wrench - 7/8”
• (1) open or boxed end wrench - 7/16”
• (1) straight bit screw driver - 1/4”
Removing Filter and Control Valve
1.Unlatch and remove top cover castin
g.
2. Lock the balance beam off the valve using
the beam lock lever. This prevents the valve
from opening and water pouring from water
spout tube.
3.Remove drinking bowl.
4.Shut-off water supply at the brass shut-off
valve. (If brass shut-off valve is hard to
access, it may be easier to come back to
steps 5 and 6 after completing steps 7-9.)
5. Using a 3/4” open end wr
ench, unfasten the
flare nut connected to the shut-off valve. A
second wrench (11/16” open or adjustable)
may be needed to hold the brass shut-off valve
in place while unfastening the brass flare nut.
6. Using needle nose pliers remove nylon water
filter located just inside the water supply
tube. Set the filter aside for cleaning.
7. Using 7/16” wrench remove the lead counter
weight and set aside.
8. Using needle nose pliers remove the cotter
pin on the tapered end of the brass pivot
shaft and slide the pivot shaft out.
9. The pivot beam and cage may then be
removed as a unit. With the pivot beam and
cage removed, it is a good oppor tunity to
cleanunder the cross beam and heater if
debris is present. Mice have been known to
build nests i
n this area. A wet/dry shop
vacuum works well.
10. Disconnect water spout tube from plastic locator.
11. Using a 7/8” open or box end wrench,
remove brass hex nut secures the control
valve to the bracket. Plumbing should lift out.
12. Using hands, unscrew water supply hose
and water spout tube from each end of the
control valve.
13
. When installing new control valve, make
certain water flows through the valve in the
proper direction; otherwise, it will not shut-
off. The words “IN” and ‘OUT” are
imprinted on the valve directly below the
port holes. Connect the water supply hose
to the “IN” port. Connect the copper water
14. *Reassemble parts (see note).
15. With beam lock lever still locking pivot
beam off valve, open brass shut-off valve.
16. Adjust control valve at valve adjustment
screw.
a.Using screw driver, turn valve adjustment
screw (3/8” stainless steel screw in brass
bushing) until very small stream flows from
the water spout tube and breaks –up into
drops about 3” below tube outlet. Then turn
control valve adjustm
ent screw 1/4 turn
counter-clockwise which will cause water to
stop flowing.
Note: If, after initial adjustment, water does
not completely shut-off and drips, lock the
beam lock lever and turn the control valve
adjustment screw another 1/4 turn counter-
clockwise. Continue the process at 1/4 turn
intervals until water shuts-off completely
afterrefilling.
17
.Insert stainless steel bowl back into
waterer, release beam lock lever to allow
refilling and latch top cover to housing.
*Note: It is much easier to install the lead
counter weight and control valve adjustment
screw onto the pivot beam and cage AFTER
installing pivot beam and cage to the cross
beam with the brass pivot shaft.
WARNING! TURN OFF POWER WHEN
SERVICING WATERER.
Always turn off power whenusing a tool
to service ormaintain waterer to
eliminate risk of electrocution. Waterers
should be on dedicated circuits.
WATER FILTER LOCATION
• Water supply hose and shut-off valve should be located as shown in diagram
on left for easier filter access and maximum freeze protection.
• Install a large cold water filter in a non-freeze location if your water contains a
lot of debris and/or if you have a large number of waterers.
• DO NOT bend/crimp copper tube leading to br
ass shut-off valve.
 Loading...