Mercury Neo electric scooters Part Code: Z40948 (Rev A)
Owner’s Handbook Page 20 of 24
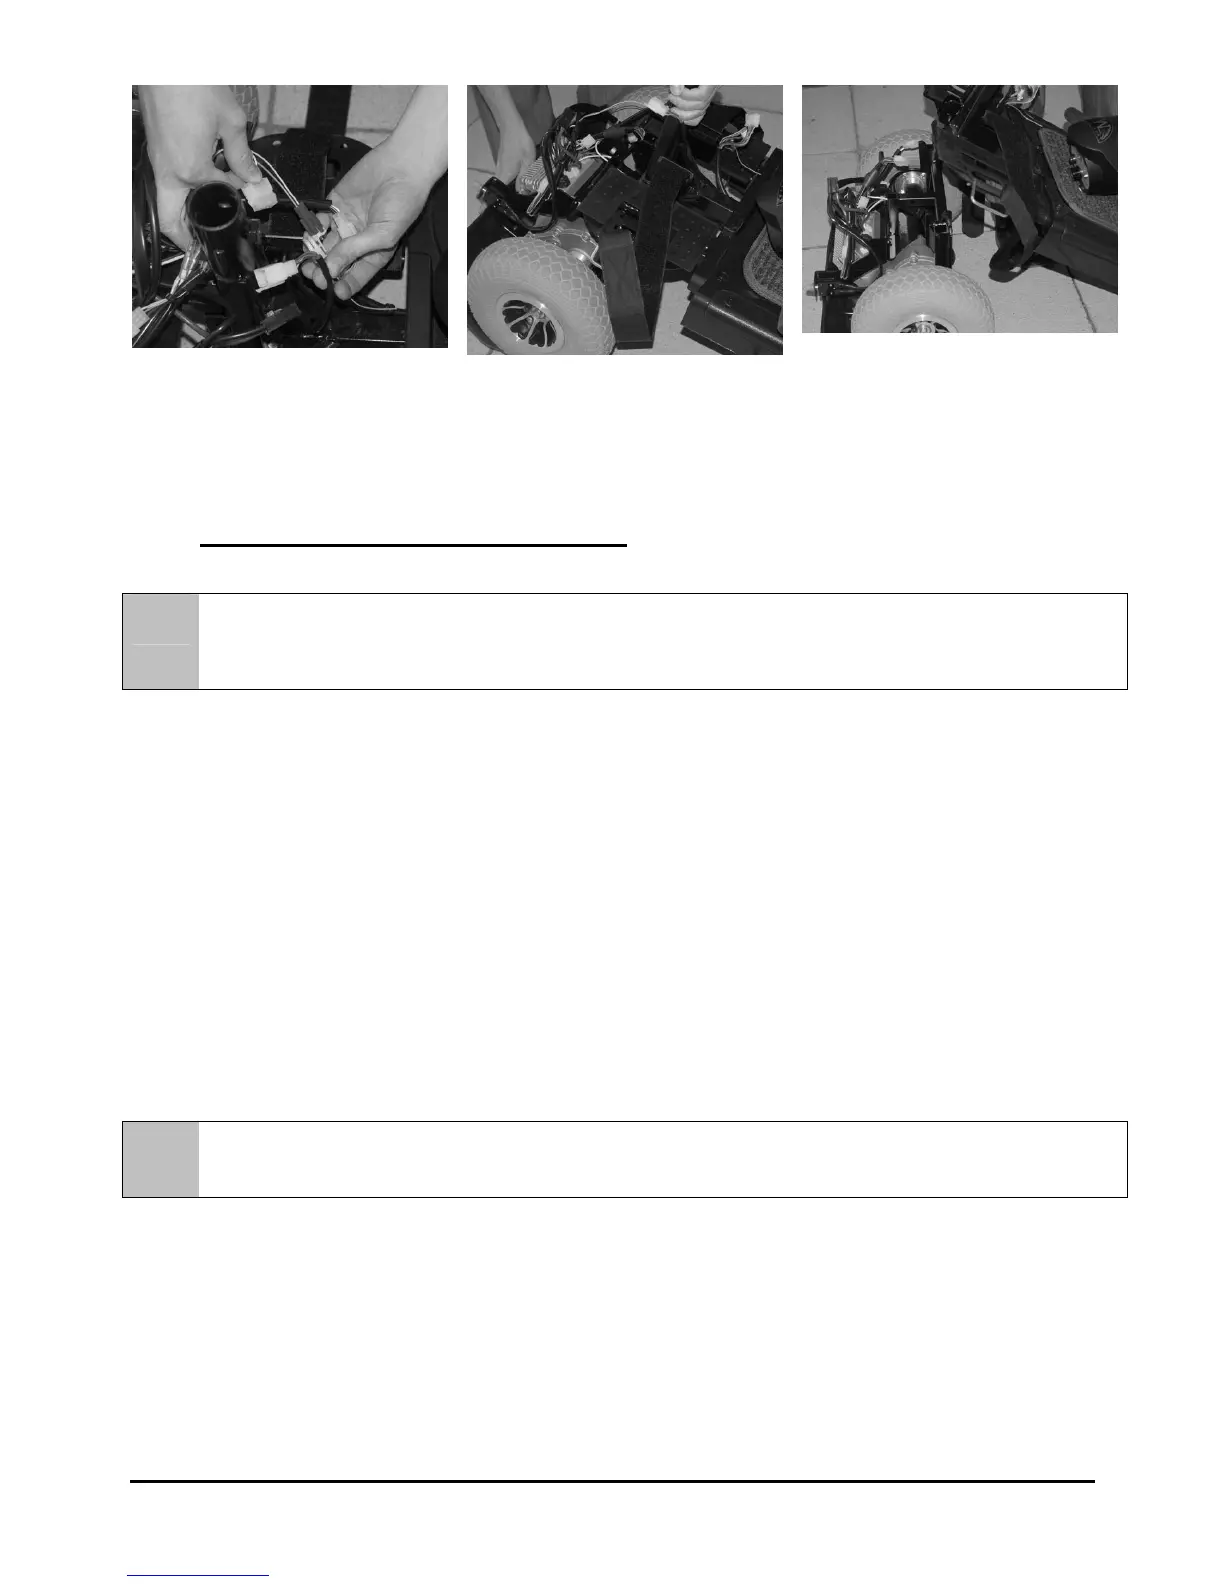
7. Unplug the front-to-rear
harnesses. On the Neo 8 only,
remove the ‘R’ clip and pin
attaching the rear cable brake.
8. Pivot the scooter’s rear section
upwards until the rear section is
standing vertically on its rear
bumper.
9. Lift the front section until the
lower pegs are no longer in the
curved locking brackets. Carefully
lift the front section away from the
rear section.
7.2 ASSEMBLING THE SCOOTER
Suggestion
The assembly process is essentially the disassembly process in reverse. First study the text and
photographs in the disassembly procedure before re-assembling the scooter.
1. Position the front and rear sections of the scooter.
2. Align the lower curved locking brackets of the front section with the corresponding pegs on the front of
the rear section.
3. Holding the seat post, slowly pivot the rear section forward until the curved locking brackets are fully
connected on to the top rear pegs.
4. Secure the lock pin in to the pin hole
5. Loosen the tiller adjustment knob, raise the tiller to the desired position, and then tighten the tiller
adjustment knob.
6. Reinstall the batteries and secure them with the Velcro strap.
7. Connect the front-to-rear harnesses and battery cables.
8. Reinstall the rear shroud.
9. Replace the seat and rotate it until it locks in to its correct position.
Warning
After assembling the scooter, make absolutely certain the tiller adjustment knob is fully tightened.

 Loading...