5. Lift the tone arm from the rest and slowly move it to the record side. The platter will start to rotate and position the tone
arm over the desired position of the record.
6. Pull down the cueing lever (36). The tone arm will slowly descend onto the record.
7. At the end of record, the tone arm will return to the rest position automatically.
8. To stop manually, lift the tone arm from the record and return it to the rest.
Play suspension
Setting the cueing lever (36) to the up position will lift up the tone arm and then stop playback temporarily.
Play ejection
Pressing the Eject button (15) anytime during playback will return the tone arm to the rest position immediately.
Remark :
- When using for the very first time, the tone arm will return to the rest automatically when first placing
the tone arm to the platter. This is not a malfunction.
- If you find the tone arm cannot return automatically after playback the record, please press the eject
button and return the tone arm back to the rest position.
- Should you attempt change to a magnetic cartridge system, you will prevent playback via the aux-in.
Adjustments
Anti-skating control
- The anti-skating control (35) is to control the stability of the stylus relative to different type of vinyl.
Platter speed alignment
- During playback of records, check the strobe calibration dots from the strobe lens. The upper calibration is for 33 rpm and
the middle one is for 45 rpm.
- If the strobe dots appear to flowing to the right, it means the platter is revolving slower than rated speed. Turn the pitch
control (39) to the “ + “ direction. If the strobe dots appear to flowing to the left, it means the platter is revolving faster than
rated speed, in which case, turn the pitch control (39) to the “ – “ direction.
- Adjust the pitch control (39) until the strobe dots appear stationary (ie, no left or right movement.)
Tone arm stopping position alignment
- The position of the tone arm complete playback and return to the rest station can be adjusted at the alignment screw (33)
as follows:-
Before starting the alignment, please remove rubber hole cover:-
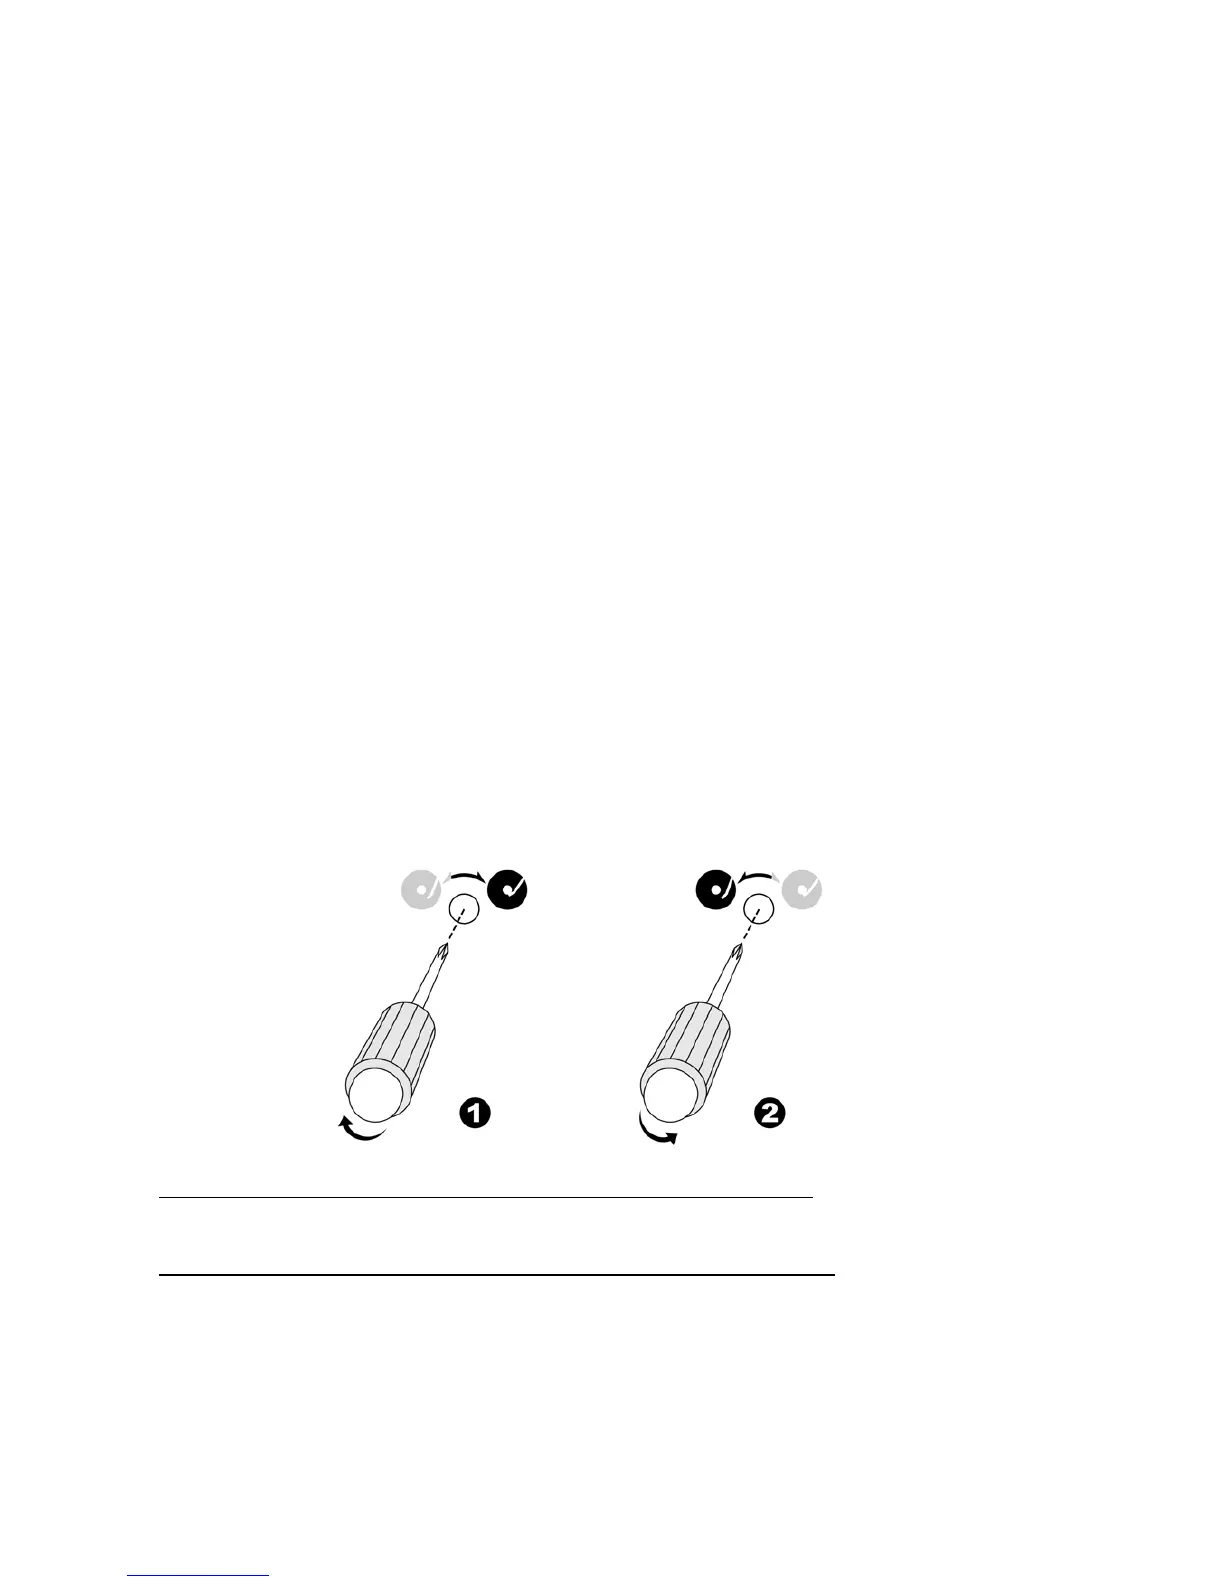
A) If the system cannot complete the playback of the record and returns too early
1) Using a cross head screw driver, turn the alignment screw (33) inside the hole clockwise. The stopping and eject position of
the tone arm will move more inward to the centre of the record before playback completion.
B) If the system cannot return to rest position automatically after playback of record
2) Using a cross head screw driver, turn the alignment screw (34) inside the hole anti-clockwise, the stopping and eject
position of the tone arm will move further away from the centre of the record before playback completion.
Remark:-
- The stopping position is very subjective amongst difference users. Please select the most suitable position based on your
own record collection. The ex-factory setting is based on the most common template.
- Please check the stopping position from time to time. Avoid any over-adjustment as this could damage the mechanism
and is not covered under your warranty.
E-6
 Loading...