USB/Power In
TV Out
SD
13
Pc connect
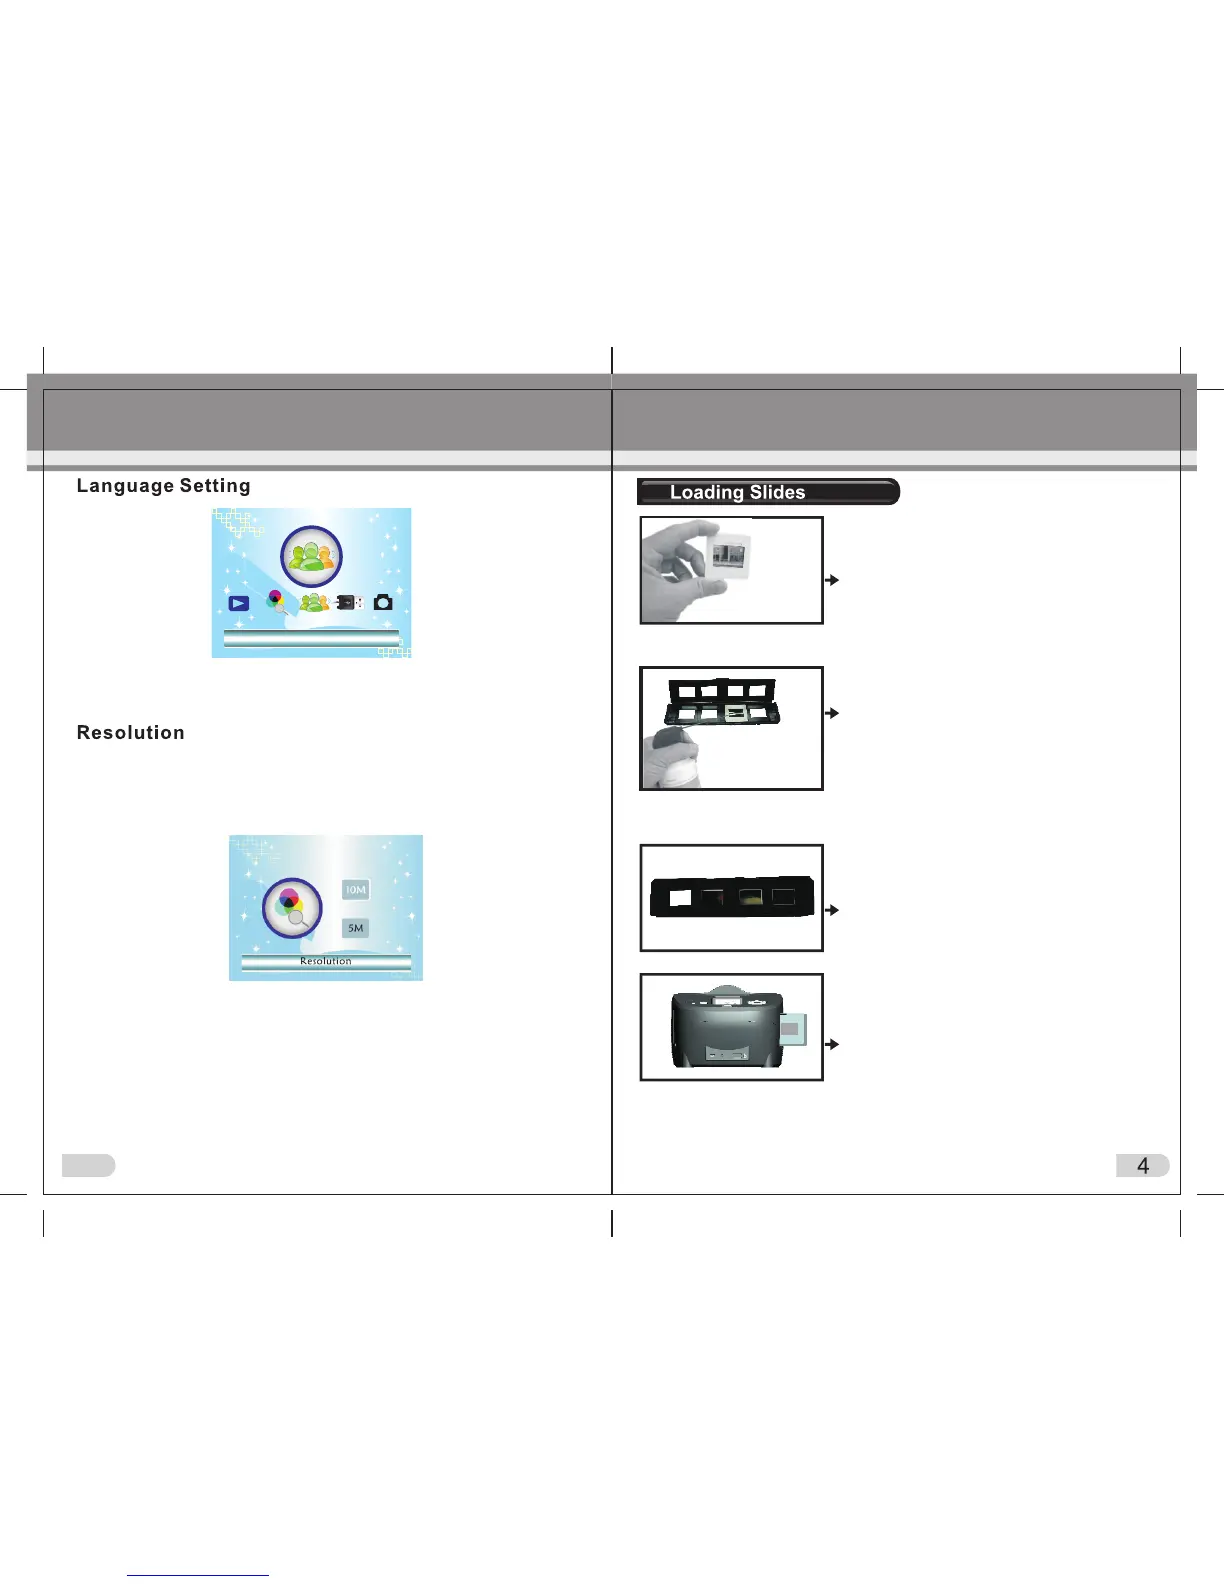
(1)Hold up the slide toward the light. Face
the trademark slide of the slide away
from you. Look through the slide and it
should appear normally (not a mirror image).
Now turn the slide so the image is upside
down while looking at the same side.
(2)Open the slide holder at the marked spot
on the top. With the slide holder laid open
place the slide into recessed area in the
holder — the slide should fit perfectly.
Note: Handle slides with care. Any dust,
Scratches or finger prints will show up on
your saved images. If possible, use cotton
gloves when handing slides. It is recommended
to use compressed air to remove any dust
on the slides. This is not included with the
film scanner but can be purchased from an
office supply or electronics retailer.
(3)Close the slide holder and press the edges
so that it locks in place.
Note: Choosing English, German, Italian, Spanish, Traditional Chinese,
Simplified Chinese, Japanese, French according to user ’s need
5M or 10M can be chosen after entering into Resolution Menu. 10 mega
pixel is interpolated but still gives good quality scans. 10 mega pixel files
are useful if you wish to print a large size photograph (A4 for example).
Otherwise 5MP is recommended.
Language
A: Connect the main unit to PC using USB lead supplied and turn on
scanner, then enter into main menu. Your PC should identify new
‘hardware’ (the scanner); use Windows to view images saved on the
SD card.
B: Otherwise select USB MSDC from main menu (once scanner and
PC are connected) .
Connect to PC
(4) Insert the slide holder into the left side of the
main body as pictured by arrow on scanner
body. Push the holder through the main body
one slide at a time pressing the ‘scan’ button
as you progress. The holder will emerge out
of the right hand side of the main body of
scanner as pictured in image (4) left.
IMPORTANT
On the main scanner body at the top, ensure you have selected the
correct mode: either PHOTO (to scan photographs) or
FILM (to scan slides / negative film).