6
PODIUM INSTALLATION
W
hen the plans call for podium installation we recommand the
following installation procedure:
NO
TICE: To minimize the risk of errors you should not begin
construction of the podium until you have the bath on hand.
NOTICE: The bath must be supported by both its feet and at
the rim. The feet must be in contact with the floor at all times.
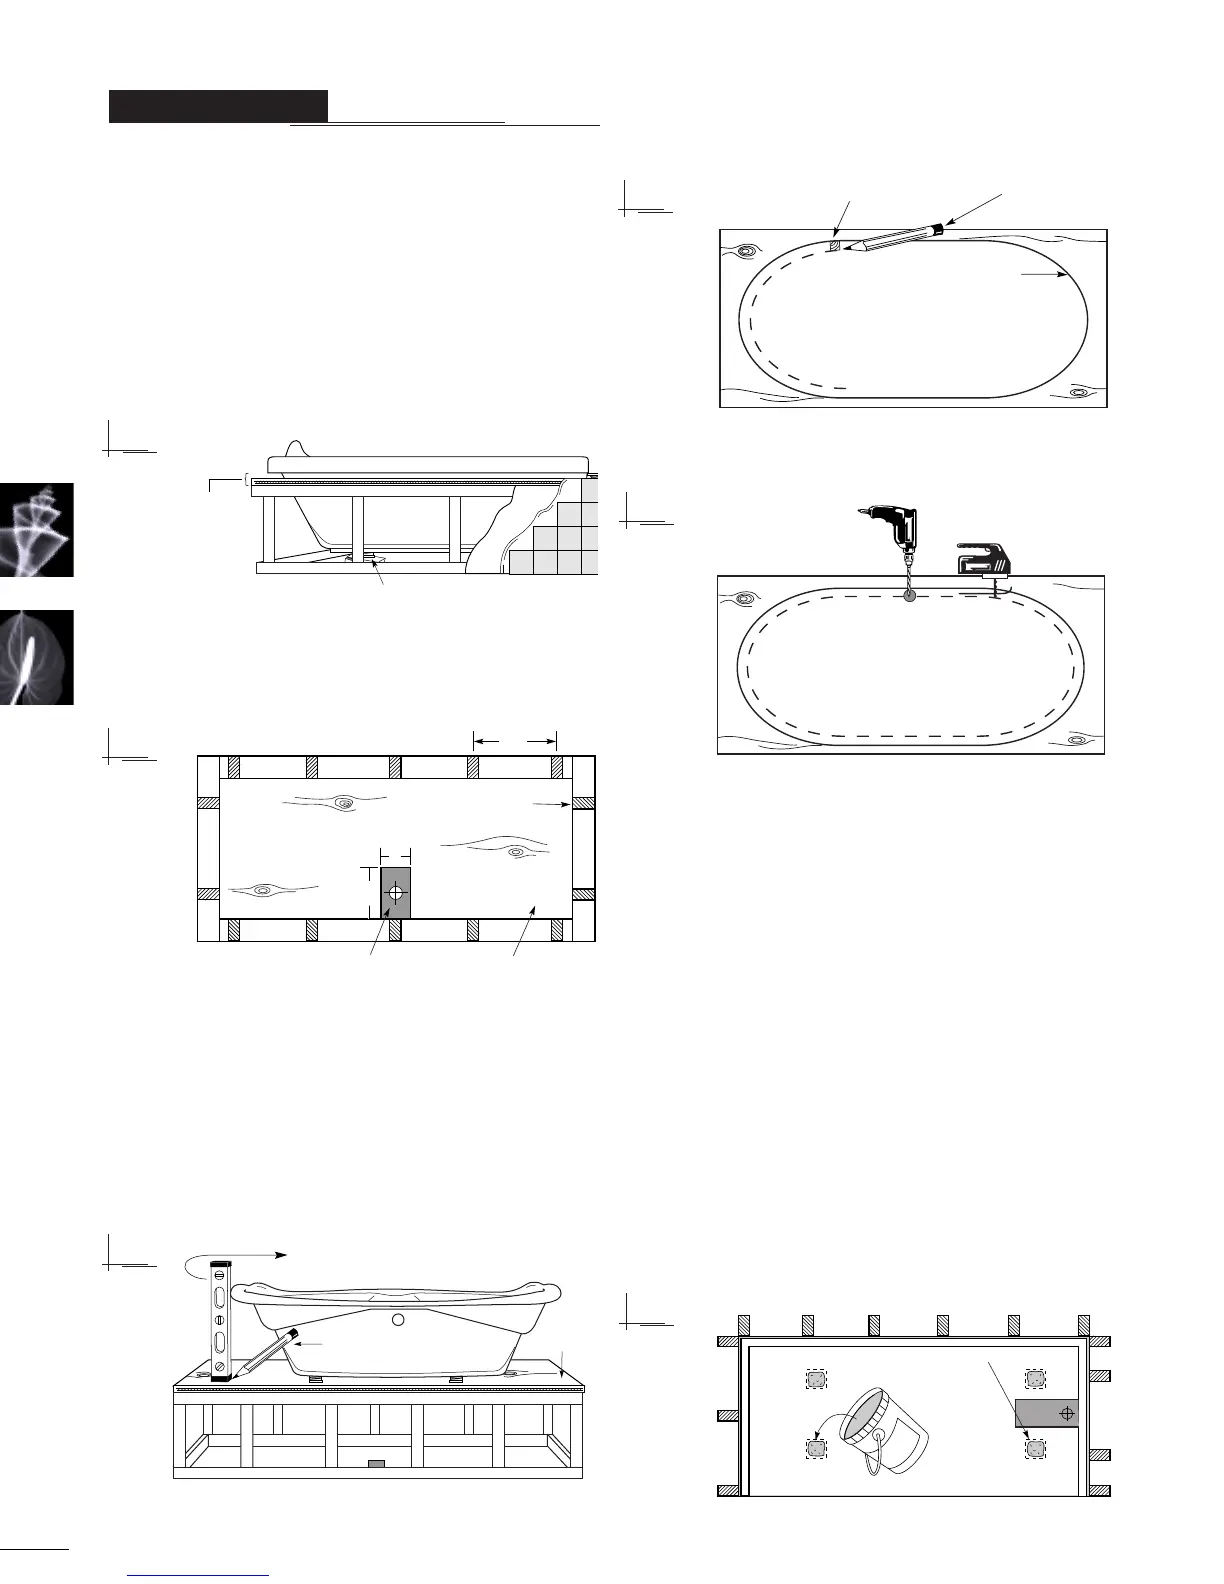
• Step 1: Calculate the height of your podium structure. Remember
that the finish material must fit between the lip of the bath and the
podium structure, so its thickness must be subtracted from the
total height when building your structure
(see fig. 12).
• Step 2: Frame the podium using 2”x 3”s spaced no more than
41cm (16”) on center. Remember to provide adequate support
under the rim of the tub and ensure that the framework is level. This
framing must conform to your local building codes
(see fig. 13).
• Step 3: Cut out an opening15cm x 30cm (6”x 12”) in the floor
to accommodate the bath drain and overflow piping.
•
Step 4: Sheath the top of the podium using 5/8” thick exterior
grade plywood. The plywood should be attached to the frame-
work using screws.
•
Step 5: Lift the bath onto the podium and align it in the desired
position. The outline can now be traced using a level and pen-
cil as shown
in fig. 14.
•
Step 6: Remove the bath from the podium, and sketch a cut
line 2.5cm (1”) inside the outline of the bath
(See fig. 15). You
can use a 1” scrap of wood to simplify this procedure.
•
Step 7: Drill a pilot hole on the cut line. Cut out the waste
following the cut line using a saber saw
(see fig. 16).
•
Step 8: Clear away and vacuum any remaining debris from
inside the podium
(debris could be sucked into the bath’s
systems causing damage not covered by the warranty)
.
•
Step 9: The bath overflow and drain should now be installed by
a competent certified plumber according to the overflow manu-
facturers instructions, and conforming to local building codes.
•
Step 10:
Lift the bath and set it into the podium. Make sure that it
does not catch on the plywood deck and that there is sufficient
space for the bath over
flow plumbing. Make any necessary modifi
-
cations before proceeding with the next step. If you plan to use a
mortar bed mark the position of the bath’s feet on the floor and
remove the bath from the podium.
• Step 11:
Mortar bed (optional, otherwise go to step 13)
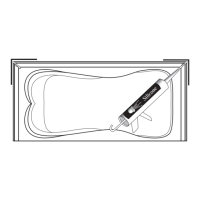
NOTICE: When using mortar to support a bath equipped
with a Mass-air system, the mortar should be under the feet
only
. Under no circumstances should the mor
tar come into
contact with the piping and fittings underneath the bath.
Freshly mixed mortar should now be placed on the floor where
the bath’s feet will land (marked out in step 10)
(see fig. 4).
30cm
12"
15cm
6"
Cut out for drain /
overflow
Provide support
under the rim
2" x 3" 's
41cm
16"max
Plywood deck
TRACING THE OUTLINE OF THE BATH
Trace outline with pencil
1" Scrap of wood
Bath outline
Sketching the
cut-line
M
o
r
t
a
r
Pencil outline of feet
Fig. 13
Fig. 14
Fig. 15
Fig. 16
Fig. 4
Remember to
leave sufficient
space for tiles,
mortar or other
finish material.
Feet must be in contact with the floor.
Fig. 12