(r)
(s)
(t)
(o)
(p)
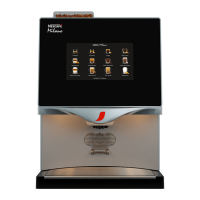
NESCAFÉ Alegria “Combi” Coffee Machine
Summary Operational Guide (Page 2 of 2)
MONTHLY Cleaning ProceduresWEEKLY Cleaning Procedure
1. Follow “DAILY Cleaning Procedure – Part 1”. However, this
time leave internal parts to soak for 20 minutes, using a food
grade sanitiser, for deep clean. Reassemble internal parts on
machine (do not rinse, or close door).
2. Leave coffee machine door open.
3. Remove orange key from lid of machine (o) and insert key
into roof of machine – above canisters (p). This will enable
you to operate the machine in “Door Open Mode”.
4. Press “Programme Key” (q) on back of machine door.
5. Select “Cleaning Mode” by pressing Button 4 (r) on touch
panel on front of machine.
6. Confirm Drip Tray Empty – Press 10 (t)
7. Is Water OK – Press 10 (s)
8. Select “HC”, by pressing Button 8 (s) on touch panel
9. When prompted, put a “Brewer Cleaning Tablet” in the
brewer chamber, as shown below and Press Button 10 (t)
1. Skip final coffee? Press any Button for yes (except 1 for
“No”).
2. Once completed, remove orange key from door and
replace in lid of machine.
3. Follow “DAILY Cleaning Procedure – Part 2”, rinsing
brewer under warm running water, will ensure all traces
off cleaning tablet have been removed.
4. Close and lock door.
5. Perform rinse.
(q)
Common Faults/Problems:
1. Remove the coffee bean hopper, by pushing the orange clip in
to close off neck/supply of beans:
2. Once neck is locked, to remove hopper, lift hopper up and
out.
3. Ideally, you will only have a small amount of beans – empty
these into an air tight container and store in a cool, dry, dark
storage to help them remain as fresh as possible.
4. Using a Food Grade Sanitiser, leave the hopper to soak for 20
minutes.
5. Rinse, then dry completely.
6. Place the hopper back in machine. Tip, put the rear of the
hopper in place, in slot, at rear in the first instance, then
lower down the front of the hopper. Once in place, pull
orange clip back out to “lock” hopper in place.
7. Refill with beans.
 Loading...