2 3
English
English
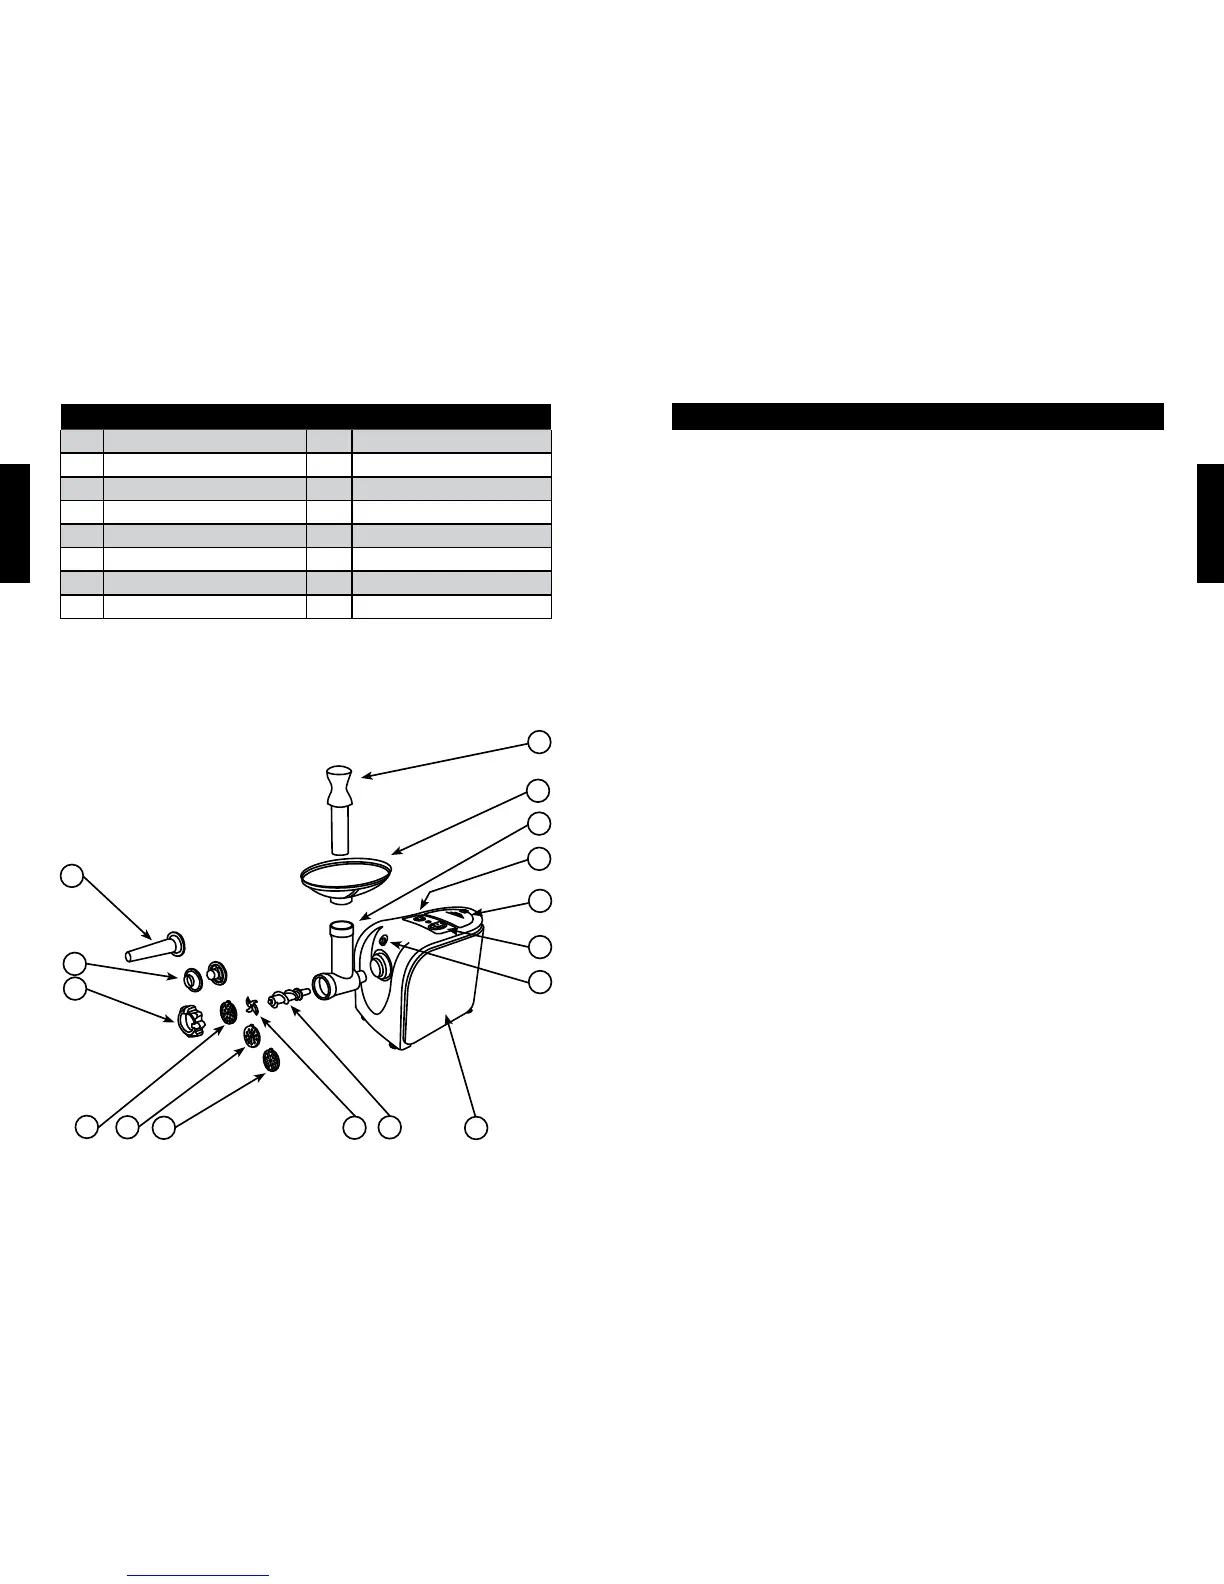
Parts list - Food Grinder
1 Pushrod 9 Feed Screw / Auger
2 Food Hopper 10 Cutting Blade
3 Grinding Head 11 COARSE Grinding Disc
4 HI / LOW speed button 12 MEDIUM Grinding Disc
5 Parts Storage 13 FINE Grinding Disc
6 ON / OFF / REVERSE button 14 Ring Nut
7 Head Release button 15 Kebbe maker
8 Grinder Base 16 Sausage cone
1
8
5
4
3
2
9
10
16
15
14
13
12
NESCO
®
Food Grinder - Introduction
• With your own NESCO
®
Food Grinder, you control the ingredients. You
control the amount of fats, salts and other additives, for a healthier diet. Chunky
sandwich spreads, savory appetizers, hearty soups, relishes and homemade
sausage. These and other dishes are so easy to make your way, for you and
friends.
• You can make sausages out of any foods. Most butcher shops offer casings,
which you purchase fresh, just before you are ready to grind.
• Your NESCO
®
Food Grinder is intended for processing relatively small
quantities. Meat needs to be cut into relatively small chunks and gristle should be
removed or it will likely clog the grinding head assembly. If grinder clogs, you
can easily clear the tube by pressing the REVERSE switch button.
If the grinder is locked, turn grinder off and press the reverse button. If this does
not unlock the grinder, turn the unit off, unplug the electrical cord from the outlet
and disassemble the grinder head and remove the obstruction. Reassemble and
continue grinding.
• There is an indicator light between the control buttons that will turn ON when
the unit has power and is ready to be used. This should happen when the cord is
plugged into the electrical outlet.
7
11
6