c. Connect the battery cable to the socket on the NVRAM card.
d. Swing the locking latch into the locked position and make sure that it locks in place.
Step 3: Move PCIe cards
As part of the controller replacement process, you must remove both PCIe riser modules, Riser 2 (the middle
riser) and Riser 3 (riser on the far right) from the impaired controller module, remove the PCIe cards from the
riser modules, and install them in the same riser modules in the replacement controller module. You will install
the riser modules into the replacement controller module once the DIMMs have been moved to the
replacement controller module.
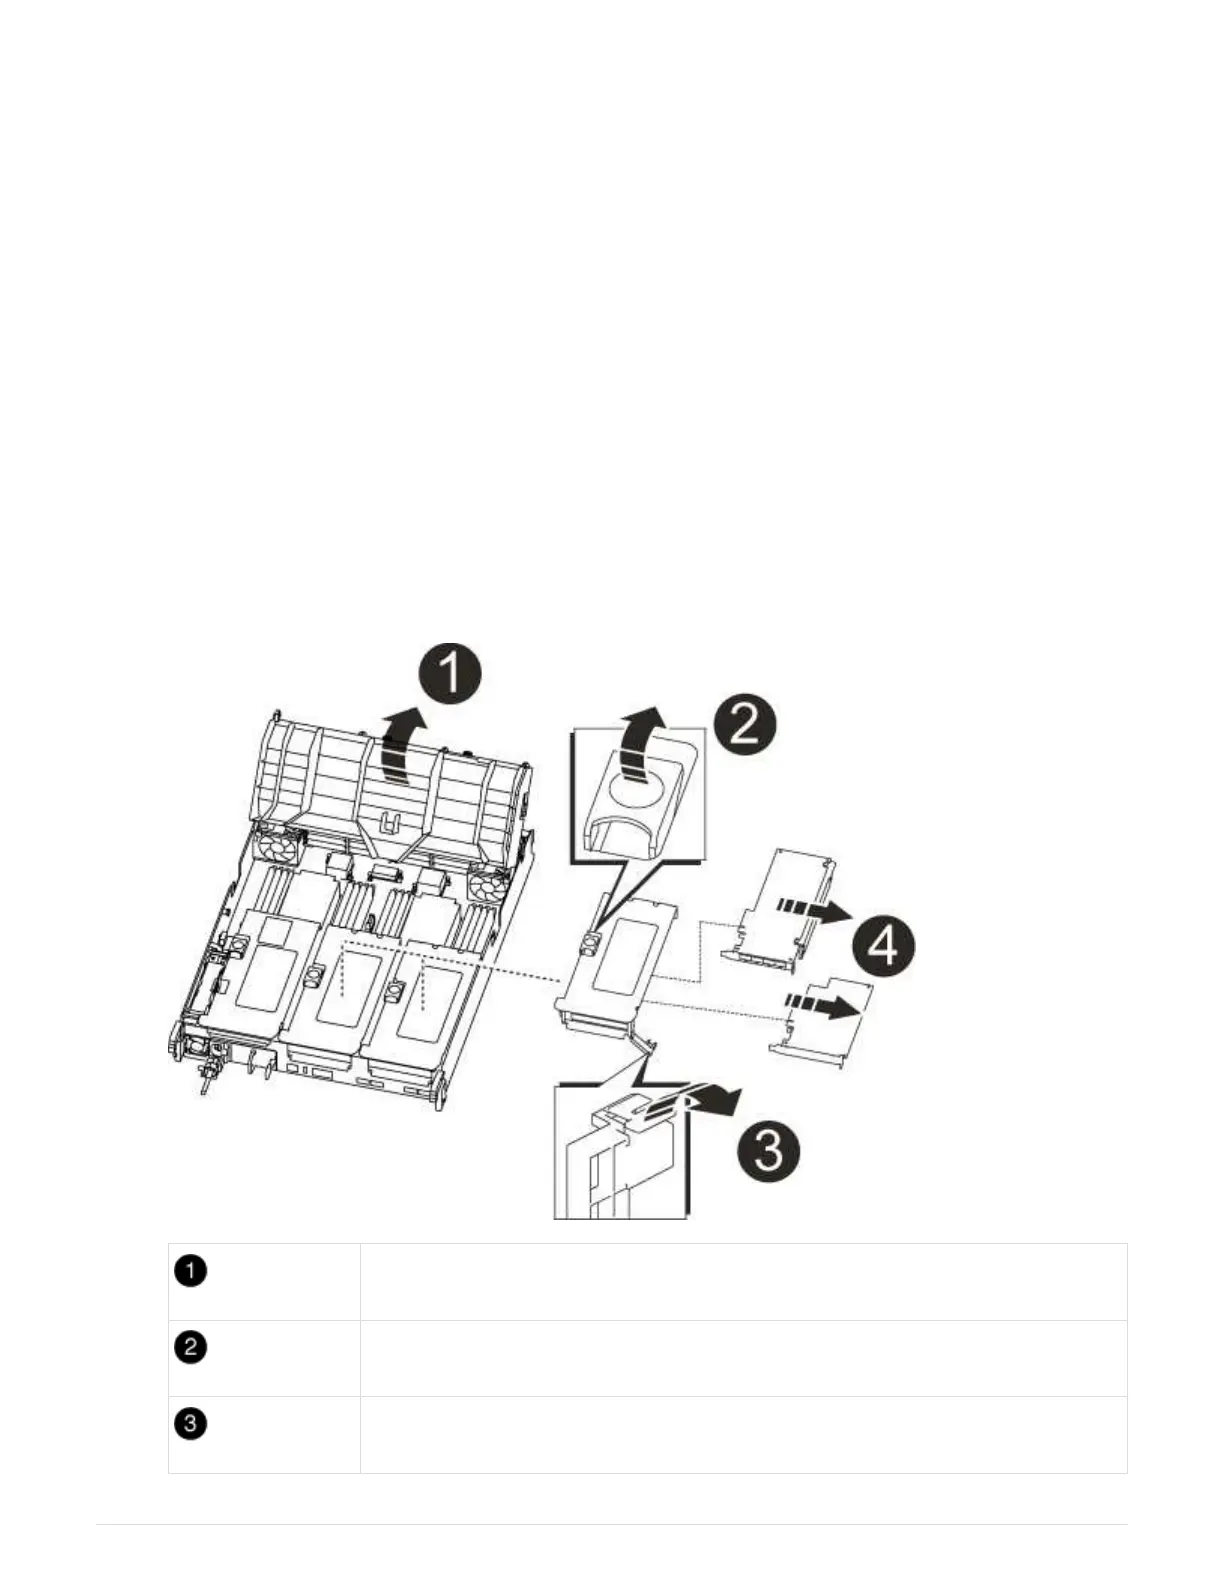
1. Remove the PCIe riser from the controller module:
a. Remove any SFP modules that might be in the PCIe cards.
b. Rotate the module locking latch on the left side of the riser up and toward the fan modules.
The PCIe riser raises up slightly from the controller module.
c. Lift the PCIe riser up, shift it toward the fans so that the sheet metal lip on the riser clears the edge of
the controller module, lift the riser out of the controller module, and then place it on a stable, flat
surface.
Air duct
Riser locking latch
Card locking bracket
873